
How to Remove Flash Shadows in Photoshop Like a Pro
1. Why Flash Shadow Removal Is Essential in Real Estate Photography
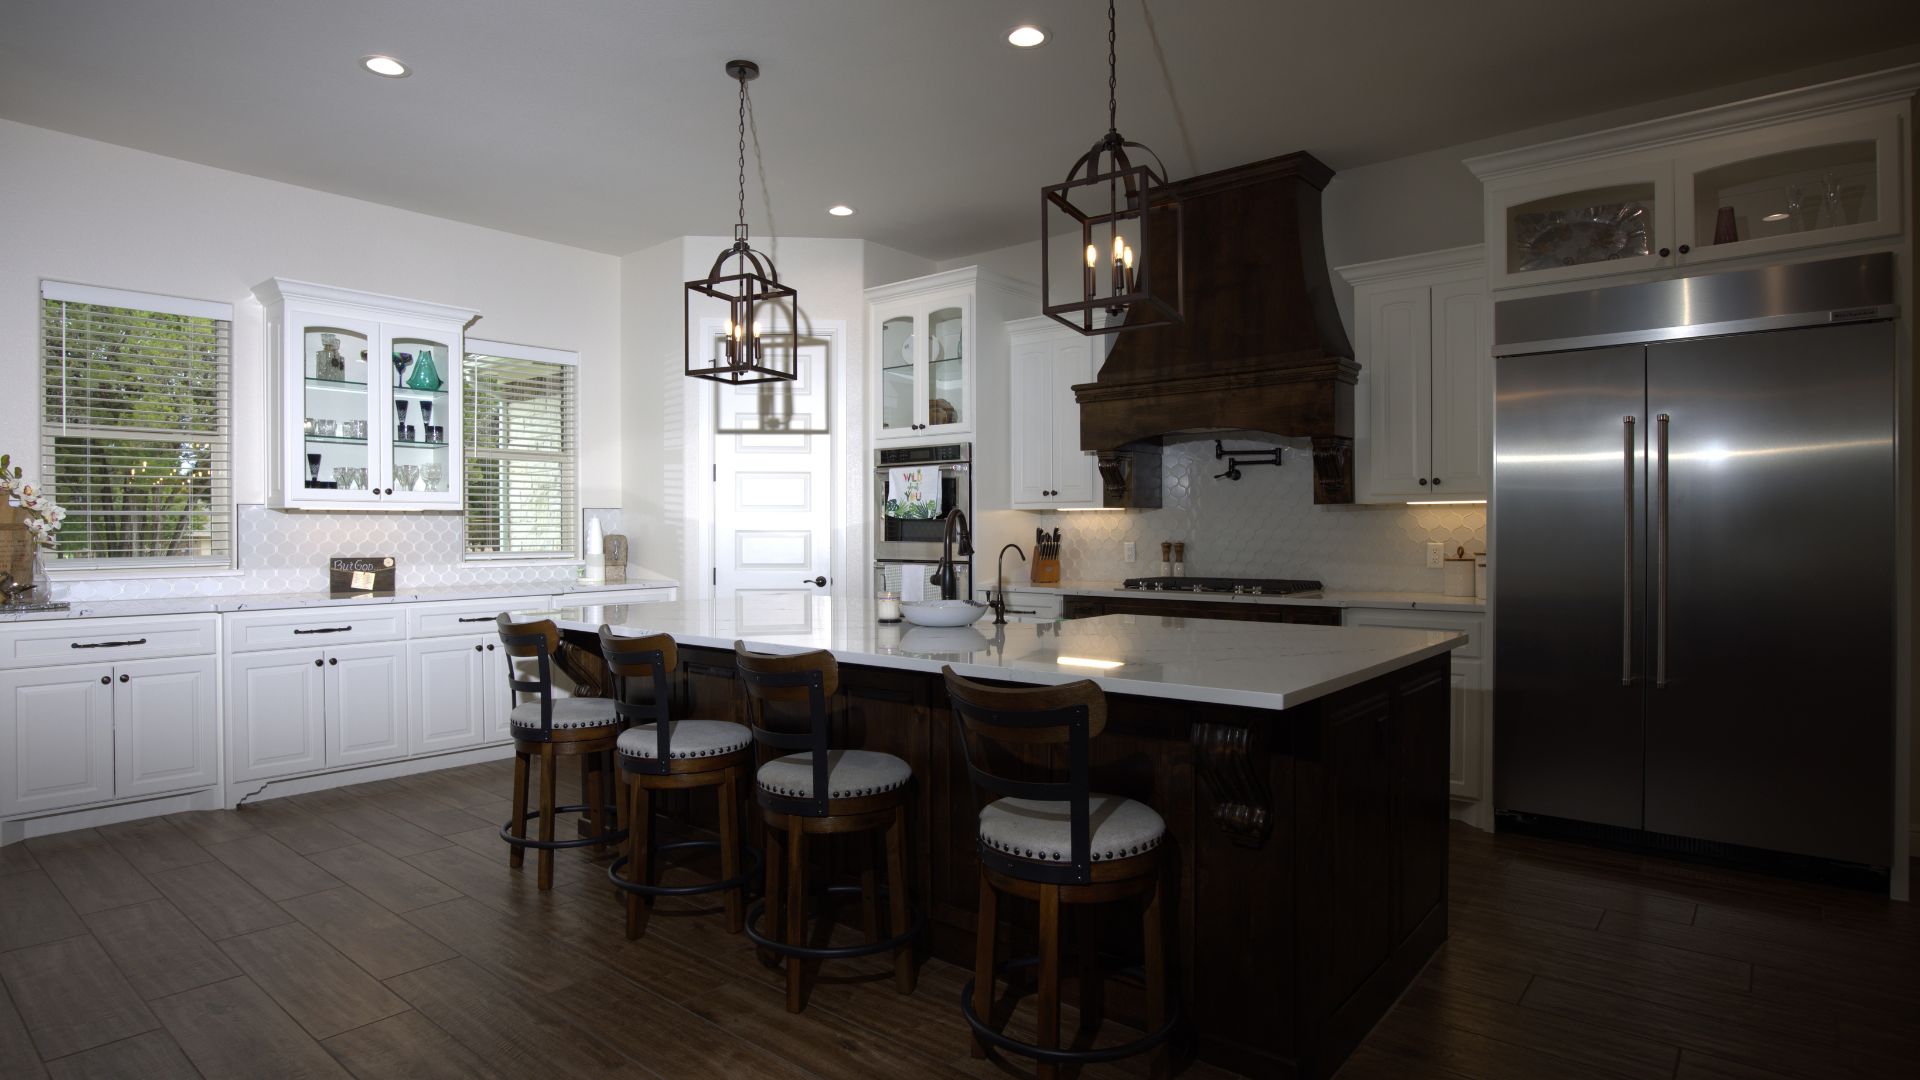
- Behind furniture such as sofas, chairs, and tables
- On walls, corners, ceilings, and floors
- Near doors, windows, staircases, and architectural details
- Direct on-camera flash usage
- Flash positioned too close to objects
- Small interior spaces and low ceilings
- Mixed lighting from flash and indoor lights
- Limited natural light during shooting
- Make rooms feel smaller, darker, and more closed-in
- Create a harsh contrast that disrupts visual balance
- Distract buyers from the layout, materials, and design details
- Hide textures and surfaces on walls, floors, and ceilings
- Give photos an amateur, unfinished appearance
2. Step-by-Step Guide to Removing Flash Shadows in Real Estate Photos
- Open the image in Adobe Photoshop
- In the Layers panel, right-click the Background layer and select Duplicate Layer
- Rename the new layer to keep your workflow organized
- Behind furniture
- Along walls and corners
- Near doors, windows, and staircases
- Click the Adjustment Layer icon at the bottom of the Layers panel
- Select Curves
- In the Curves panel:
- Gently lift the lower part of the curve to brighten shadow areas
- Avoid raising highlights to prevent overexposure
- Select the Curves adjustment layer
- Press Ctrl + I / Cmd + I to invert the mask to black
- Choose the Brush Tool (B)
- Soft brush
- Low opacity
- Create a new layer and set its blend mode to Soft Light
- Select the Dodge Tool
- Lightly brighten remaining dark spots
3. Common Mistakes to Avoid When Removing Flash Shadows
- Over-brightening shadow areas Lifting shadows too much can make walls look flat and washed out, removing depth and making the image feel unnatural.
- Removing all shadows Not all shadows are bad. Natural shadows help define space and dimension. Eliminating them results in a lifeless, unrealistic image.
- Using high brush opacity Strong brush strokes create visible patches and uneven transitions, especially on walls and ceilings.
- Losing wall and floor texture Aggressive cloning or healing can blur surfaces, making walls look plastic and unprofessional.
- Ignoring light direction Brightening shadows without considering the original light source breaks realism and visual consistency.
- Creating uneven lighting across the image Focusing on one area while neglecting others leads to inconsistent brightness throughout the room.
- Skipping a full-size review before export Issues that look fine when zoomed out may become obvious at full resolution.
4. Removing Flash Shadows with a Professional Real Estate Editing Service
- Flash shadows are often complex and vary from image to image
- Inconsistent lighting across a listing can reduce its visual impact
- Manual editing is time-consuming and difficult to scale
- High-quality real estate marketing requires accuracy and consistency
- Mistakes in shadow removal can make images look unnatural or over-edited
- Experienced editors focused exclusively on real estate photo editing
- Natural flash shadow removal that preserves depth and texture
- Consistent lighting and color balance across all listing photos
- Fast turnaround times without compromising quality

Photo Post-production Specialist
Hi, I’m Vivian Nguyen, a Photo Post-production Specialist at Rotider Media, specializing in real estate image editing and professional post-production workflows. My work focuses on HDR and flambient editing, color correction, image retouching, virtual twilight, and quality control for high-volume real estate photography. Through hands-on production experience, I share practical insights into photo editing techniques, workflow optimization, and visual standards for real estate media.
Was this article helpful?
Your feedback helps us create more useful real estate media guides.


No Spam, Just Updates
Our fresh blogs provide technical and industrial information that helps strengthen your business. Sign up to be the first to receive the new updates
Related Posts

Real Estate Post-Production: A Complete Guide for Photographers and Media Teams
Oct 2, 2026
AI in Real Estate: A New Leap for Property Professionals
Sep 9, 2026
AI for Real Estate Marketing: A Practical Guide for Agents and Agencies
Sep 9, 2026
AI for Real Estate Agents: Practical Uses and Future Trends
Sep 7, 2026
15 Real Estate AI Companies to Know in 2026
Sep 5, 2026