Good exterior real estate photography helps viewers recognize the property, find the entrance, and understand how the home connects to its outdoor spaces. Start with a clear front photo, then add views that show something the first image leaves out, such as a side entrance, a covered patio, or the relationship between the house and the yard.
This guide covers how to plan the shoot, choose a listing cover, and build a complete exterior gallery without repeating angles.
What Should Exterior Real Estate Photos Show?
Start with a front photo that shows the facade and entrance. Add a rear view that shows how the house connects to the yard, then include access, parking, or outdoor features when they matter to the listing.
Give each photo a job. For a townhome, show which unit is listed and how to reach its door. For a home with a pool, show where the pool sits in relation to the patio and house.
Plan the Exterior Shoot Around Light and Access
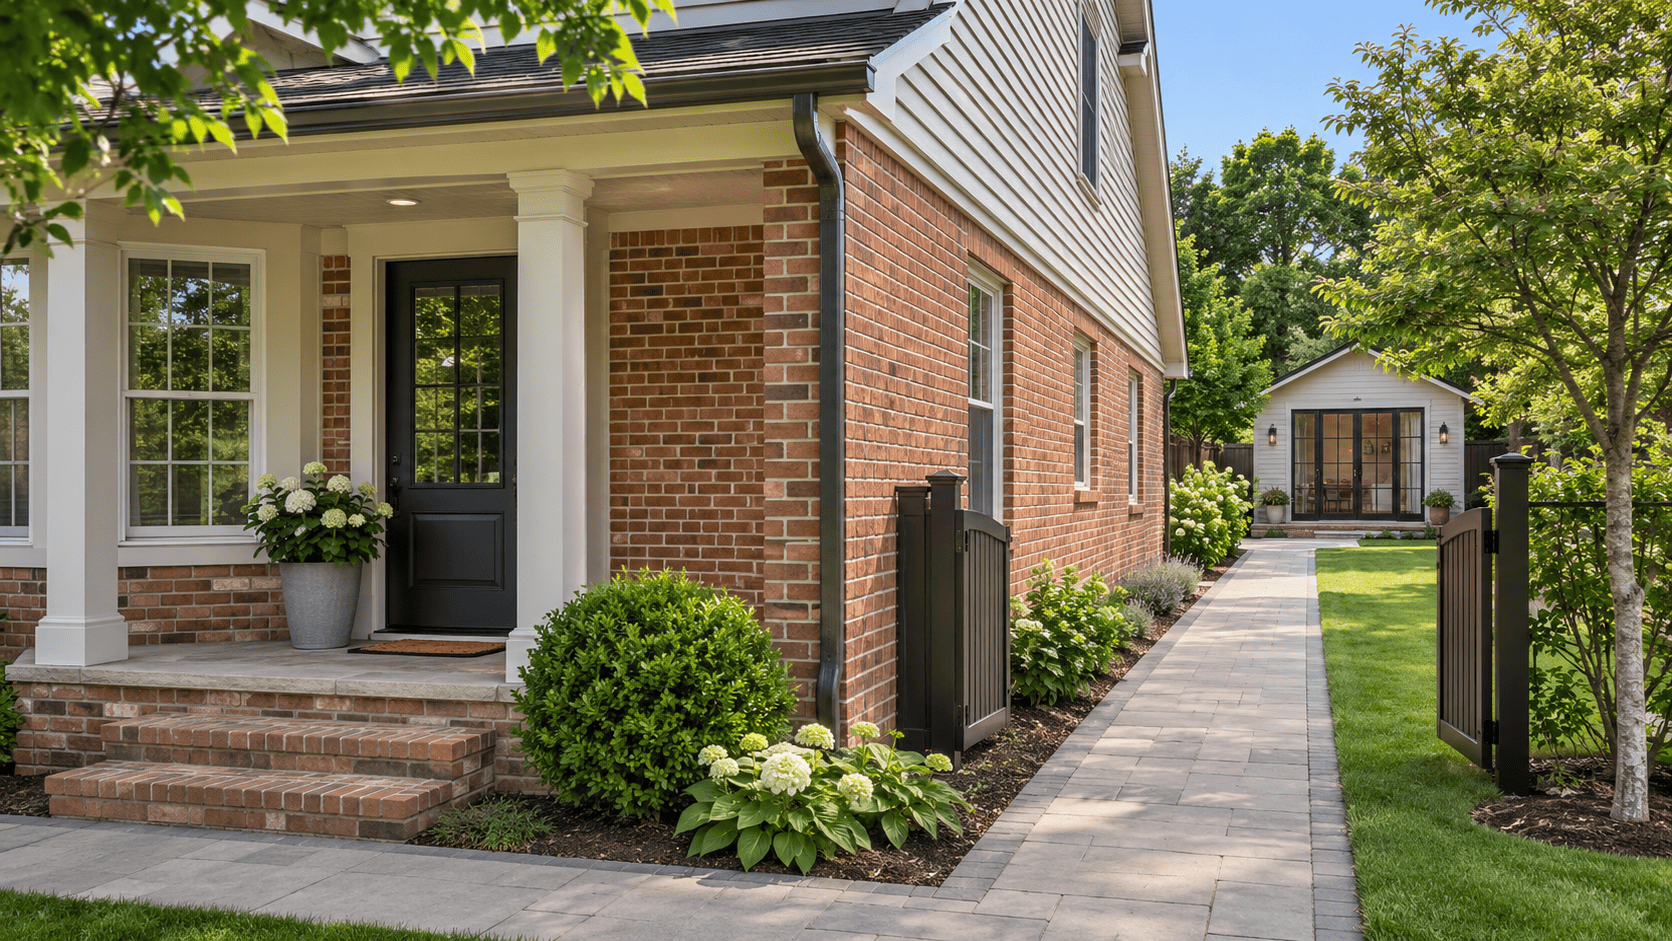
Scout the Front, Rear, and Side Elevations
Before setting up, walk the areas you can access. Locate the entrance, paths, and outdoor structures included in the shoot. Check whether gates, parked vehicles, or foliage block key views.
If a side path leads to a detached building, show where it starts and where it ends. A close-up of the gate alone won’t show where the path goes.
Plan Your Shooting Order Around Sun Direction and Weather
Check the light on the front of the house and in the backyard before deciding where to start. If the front is shaded and the backyard has even light, shoot the rear first and revisit the front if the light improves. Nearby buildings and trees can block direct sunlight regardless of the home’s orientation.
Side lighting can bring out the texture of brick or stone. Bright overcast light can make a recessed entrance easier to expose. At golden hour, check whether the light helps show the feature you want to highlight. See our guide to lighting for exterior and twilight property photos.
Clear Temporary Distractions Before the First Frame
Coordinate with the homeowner or listing agent beforehand to clear away parked vehicles, trash bins, garden hoses, and portable equipment wherever feasible. Scan the outer edges of your viewfinder and inspect glass window reflections carefully to catch stray objects you may have missed during your initial walk-around. Capture a quick test frame to verify the scene before deciding whether additional clutter needs to be moved out of sight.
Move temporary distractions when practical. Keep permanent features such as utility meters and retaining walls visible, and avoid framing neighboring structures in a way that makes them look like part of the listing.
How to Choose the Best Front Exterior Photo
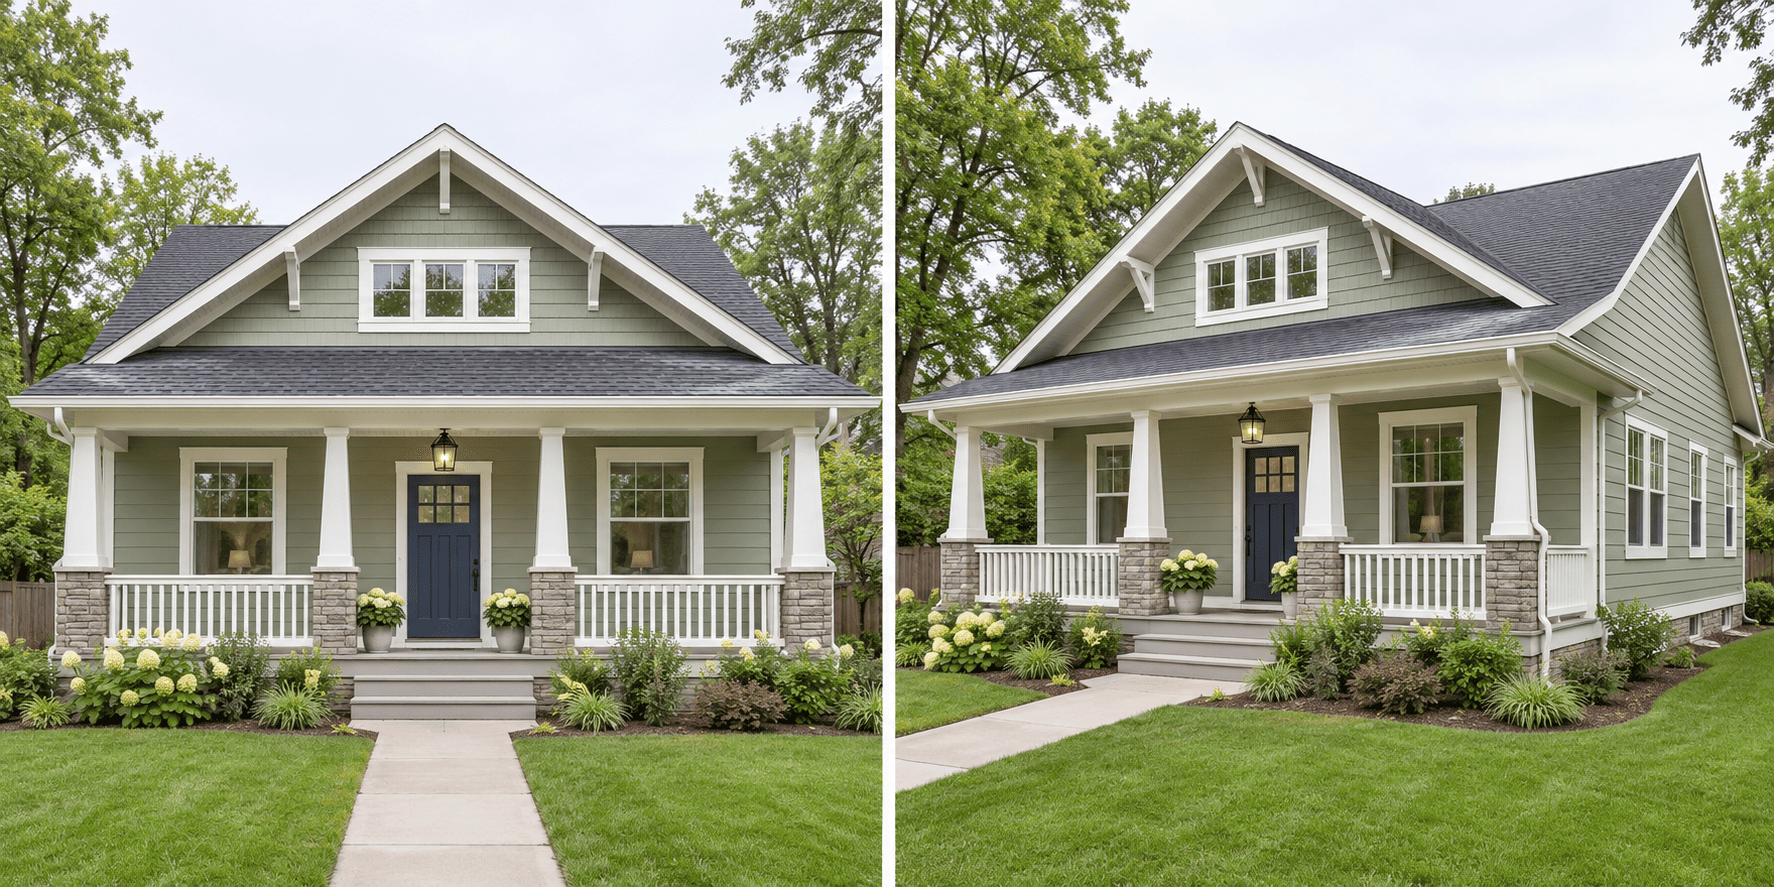
Use a Straight-On View to Show the Facade and Entrance
Try a straight-on view when symmetry, window placement, or a centered entrance helps viewers recognize the home.
Keep the camera level and leave room around the roofline for cropping. If the roof is tight against the frame, step back where space allows. Keeping the camera level helps limit converging verticals in architectural photography.
Use a Three-Quarter Front View to Show Depth and Access
A three-quarter view shows the facade and one side of the house. Use it when that angle makes the driveway, wraparound porch, or setback easier to understand.
Compare both sides when space allows. One angle might reveal the front walk, while the other might put a garage or porch column in front of the door. Keep a second view only if it adds useful context.
Choose the Cover Based on What the Angle Reveals
If the client and listing platform allow a front exterior cover, preview your candidates at thumbnail size. Choose the one that makes the home recognizable and the entrance easy to find. Leave room around the roofline and entry for cropping.
If the door is recessed, the angled view may show the walkway more clearly. Use it if the entrance stays visible and the house is still easy to recognize.
An Exterior Real Estate Photography Shot List
Use this shot list to decide what the listing needs. Keep a supporting angle when it clarifies access, shows how spaces connect, or documents a feature the overview misses.
|
Area |
Start with |
Add another view when |
|
Front elevation |
A clear view of the facade and entrance |
An angled view reveals the approach, porch, or driveway. |
|
Entry and approach |
The path or steps leading to the main door |
The entry is recessed, shared, or difficult to identify from the street. |
|
Rear elevation |
The back of the house in context with the yard |
A second view shows how the deck, patio, or rear entrance connects to the home. |
|
Outdoor living |
The patio, deck, or pool in context |
A tighter image shows a permanent feature such as an outdoor kitchen or built-in seating. |
|
Access and parking |
The driveway, garage, assigned space, or side route when relevant |
A separate view explains an access point that the front or rear images miss. |
Front Elevation, Entry, and Approach
If landscaping hides the entry or the door sits around a corner, show the route to it. A close-up of the door can show its hardware but won’t tell buyers where it is.
For a townhome or duplex, show which door belongs to the listed unit. Confirm whether a path or courtyard is private or shared before describing it in the listing.
Rear Elevation, Yard, and Outdoor Living Areas
If a deck is a selling point, include the doors that lead onto it. A reverse view from the deck can show the yard or the view beyond it.
Once the overview shows how the pool or patio connects to the house, add a closer photo only if it reveals a distinct feature, such as built-in seating.
Side Access, Parking, and Property Features Worth Showing
Show side access when it explains a route to the backyard, a detached workshop, or rear parking. Frame the parking area in relation to the entrance, and confirm which spaces are assigned to the unit before labeling them in the listing.
While fencing visually demonstrates how a yard is enclosed, a photograph alone cannot establish legal property boundaries. If a listing requires official lot lines or parcel boundaries, request verified survey documentation from the listing agent and treat that deliverable as a separate scope item.
How to Handle Difficult Exterior Shooting Conditions
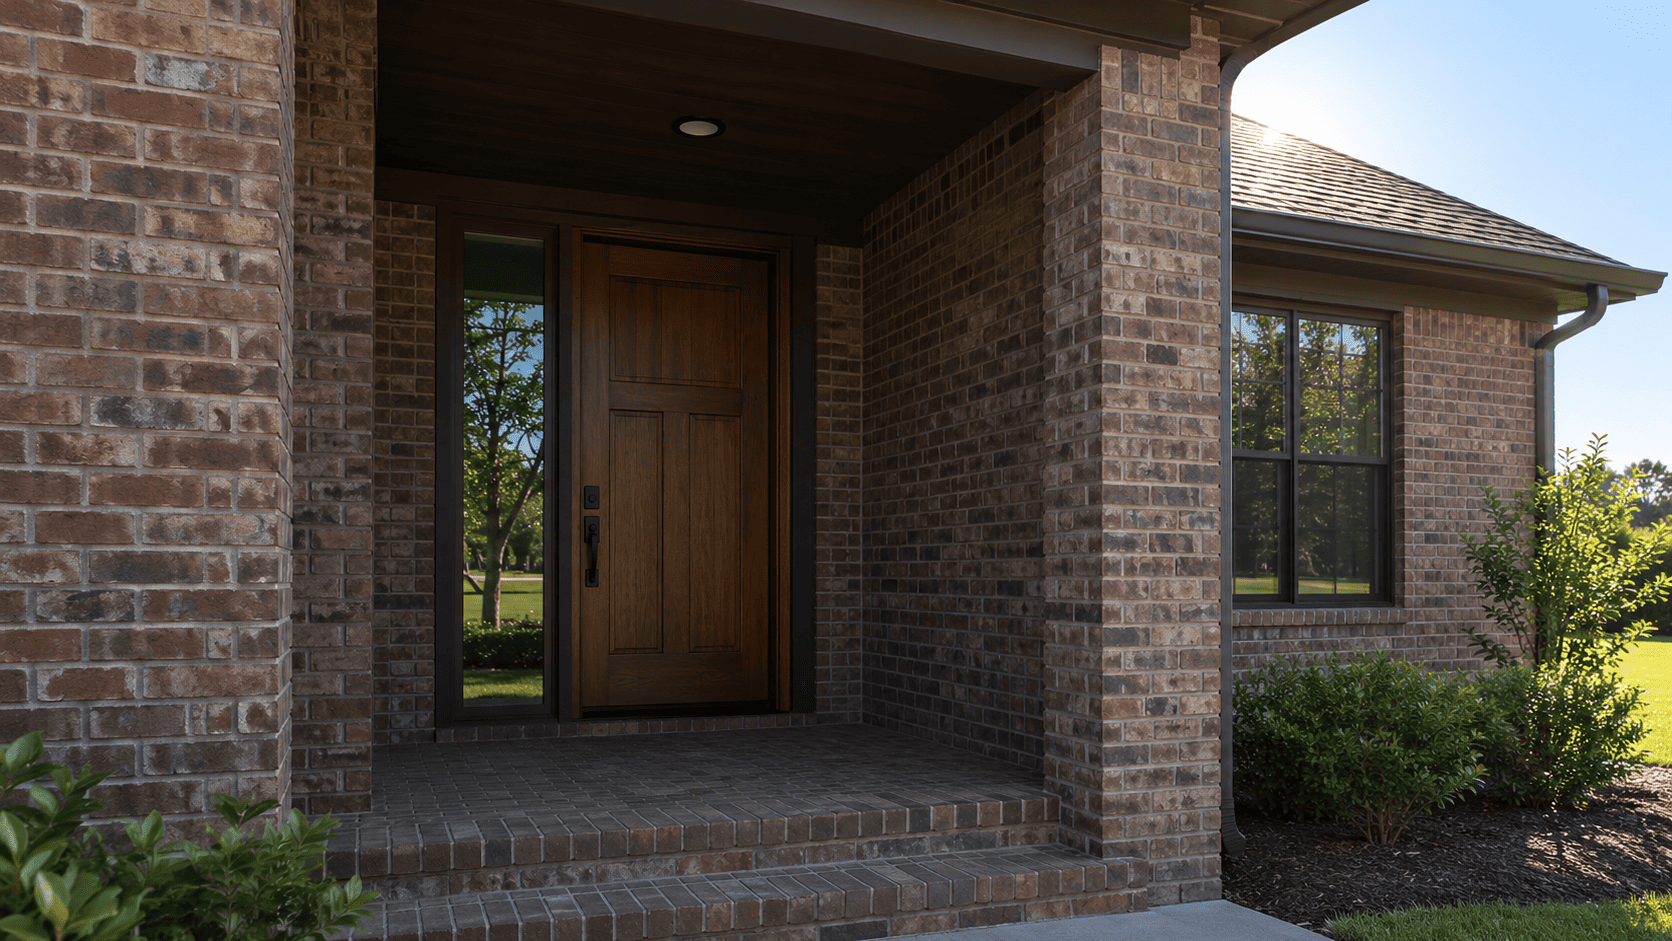
Backlit Facades and Deep Porch Shadows
Capture a test frame and inspect key architectural details across the house before deciding how much sky detail needs to be preserved. If the front facade appears overly dark, adjust your camera angle so direct sunlight does not flare straight into the lens while ensuring the main entrance remains unobstructed. Whenever scheduling permits, return at a different time of day when natural light falls more favorably across the structure.
If one exposure can’t retain the highlight and shadow detail you need, keep the camera position fixed and bracket for an HDR merge. Check the result for ghosting around moving branches, flags, or pedestrians. If one frame already shows the important details, use it.
Tight Lots, Parked Cars, and Obstructed Views
Start from a safe spot you’re allowed to use. If you can’t step back far enough to show the house and entrance clearly in one frame, use one view for the house and another for the entry.
If a nearby garage or parked vehicle looks disproportionately large, step back where space allows. Once the proportions look right, choose a focal length suited to the available distance.
Glare on Windows, Pools, and Other Reflective Surfaces
If glare hides an important feature, try a small change in camera height or angle. Compare test frames before settling on a position.
Preserve subtle, natural reflections that lend realism and depth to glass and water surfaces. However, whenever harsh glare obscures an essential architectural detail, adjust your shooting angle or capture a supplementary perspective on-site rather than assuming lost detail can be salvaged later in post-production.
When to Add a Twilight or Elevated View
Use Twilight When Exterior Lighting Adds Useful Information
Add a twilight photo when exterior lighting shows how a porch, patio, or path looks at dusk. Pair it with a daytime view if the entrance, siding, or landscaping is harder to see.
Set your composition and confirm which fixtures work before the light fades. Use a stable tripod when the shutter speeds needed at dusk are too slow to handhold reliably. As the sky darkens, recheck exposure so the building remains readable and the fixtures don't dominate the frame.
Use an Elevated View When Ground-Level Photos Miss the Layout
Use a higher viewpoint when it shows something the ground-level photos miss, such as how the house, yard, and detached garage fit together on a sloped lot.
An upper-story window, a balcony you’re allowed to use, or a safe spot on higher ground can give you that view. Include a ground-level photo if the higher angle doesn’t show how to reach the entrance.
Edit and Review the Exterior Listing Gallery
Correct Perspective and Balance Exposure Without Changing the Property
Use doorframes, siding edges, and other reliable architectural references when correcting image geometry in Lightroom. Check the crop after straightening so the roofline, entry, or steps remain visible. On an angled view, the building's horizontal lines can recede naturally; they do not all need to look parallel to the frame.
Open shadows enough to show features such as the front door or porch steps while retaining a believable difference between sunlit and shaded areas. Keep the colors of siding, masonry, and trim recognizable across views. Leave permanent features and material conditions visible.
Check Coverage, Color Consistency, and Duplicate Angles
Review the exterior images in listing order. Start with the cover, then check whether the rest of the set makes the approach, rear elevation, and outdoor features easy to understand. If two images show the same facade and entrance with little difference, keep the clearer one and check whether a more useful view is missing.
Compare shared surfaces across frames. White trim can look cooler in shade than in direct sun, but an abrupt shift in siding color can make the gallery feel inconsistent. For real estate post-production, group bracketed files by angle, flag the cover candidate, and note which features must remain visible after straightening or cropping.
Frequently Asked Questions
What Is the Best Time to Photograph a House Exterior?
Photograph each side when the light makes the facade and entrance easy to read. The best time depends on orientation, nearby obstructions, weather, and which views matter most. The front and rear may be ready at different times, so plan the shooting order accordingly.
Is a Straight-On or Angled Photo Better for the Listing Cover?
Choose the view that makes the home easiest to recognize at thumbnail size and keeps the main entrance visible. Use the angled view if it also makes the approach clearer.
Do You Need a Drone for Exterior Real Estate Photography?
No. Ground-level photos can cover many listings. Consider a drone or another elevated viewpoint when it shows a useful relationship that is hard to see from the ground, such as the connection between the main house, a detached building, and the yard.
Conclusion
Choose a front photo that makes the property recognizable, then give each supporting frame a specific job. Show how someone reaches the entrance, how the house connects to the outdoor spaces, and which permanent features deserve a closer look. Before leaving, check for missing views; before delivery, remove redundant angles and review the gallery in listing order.