
June 30, 2025
Photo Editing
Ultimate Guide To Interior Real Estate Photo Editing
In the world of real estate, great interior photos can make a noticeable difference. While raw images capture the space, a bit of editing often helps bring out its full potential. From adjusting lighting to correcting angles, interior photo editing can enhance how a room feels online. In this guide, we’ll explore how Interior Real Estate Photo Editing helps your listings look more polished and appealing.
1. What is Interior Real Estate Photo Editing?
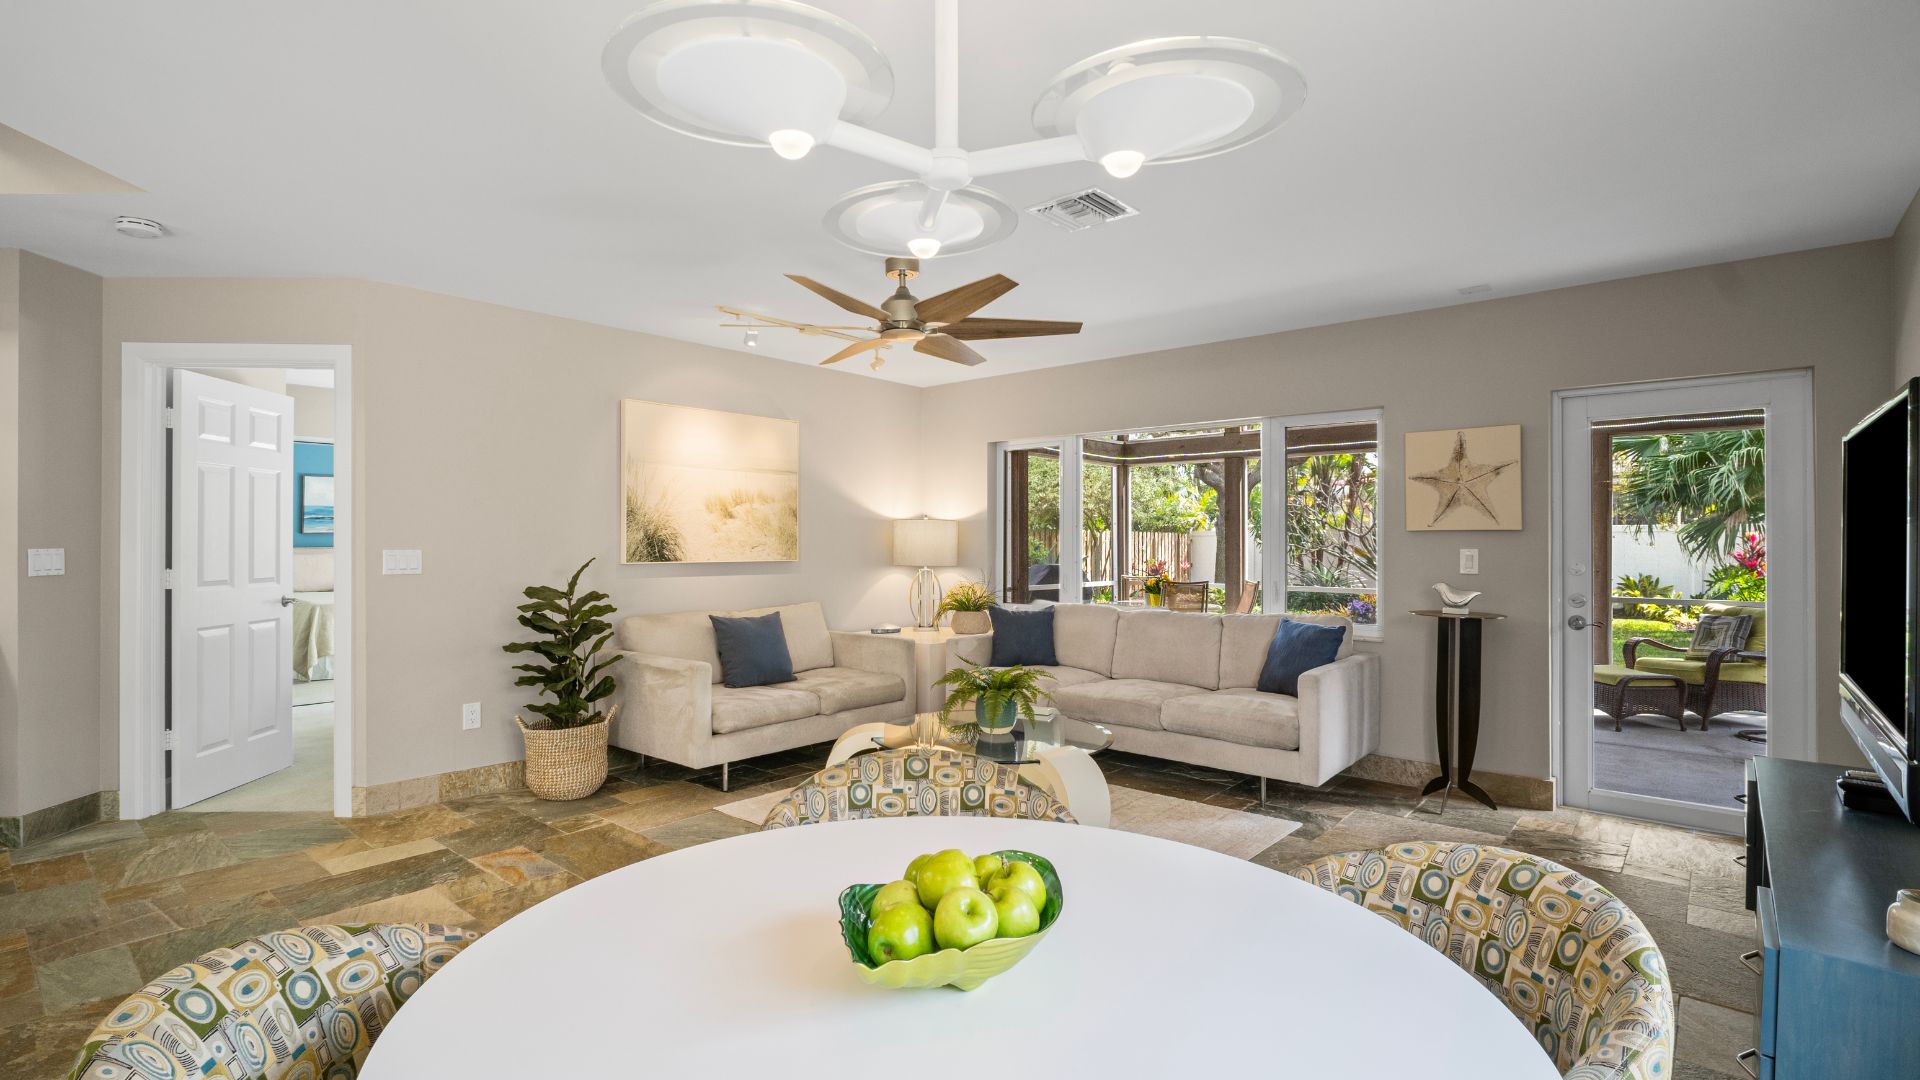
Interior real estate photo editing is the process of enhancing photographs of indoor spaces to make them visually appealing, accurate, and market-ready. In a digital-first property market, interior visuals play a critical role in attracting potential buyers and renters. Whether it’s a cozy living room, a modern kitchen, or a spacious bedroom, the way an interior is presented online can greatly influence a buyer’s first impression.
Raw photos often fail to reflect the true potential of a space due to issues like poor lighting, lens distortion, or color imbalance. That’s where interior photo editing comes in. By adjusting brightness, contrast, white balance, perspective, and removing unwanted distractions, editors can transform dull images into polished, inviting visuals.
Ultimately, interior real estate photo editing isn’t just about beautifying images; it’s a strategic tool to highlight property features, improve engagement, and accelerate the selling process.
Read more:
2. Guide To Interior Real Estate Photo Editing In Photoshop
Interior photos help potential buyers imagine themselves living in a space. However, raw interior images often lack balanced lighting, accurate colors, and visual clarity. Adobe Photoshop provides precise control to correct technical issues and enhance interior photos while keeping them realistic and trustworthy. Below are the key editing steps and how to perform them in Photoshop:
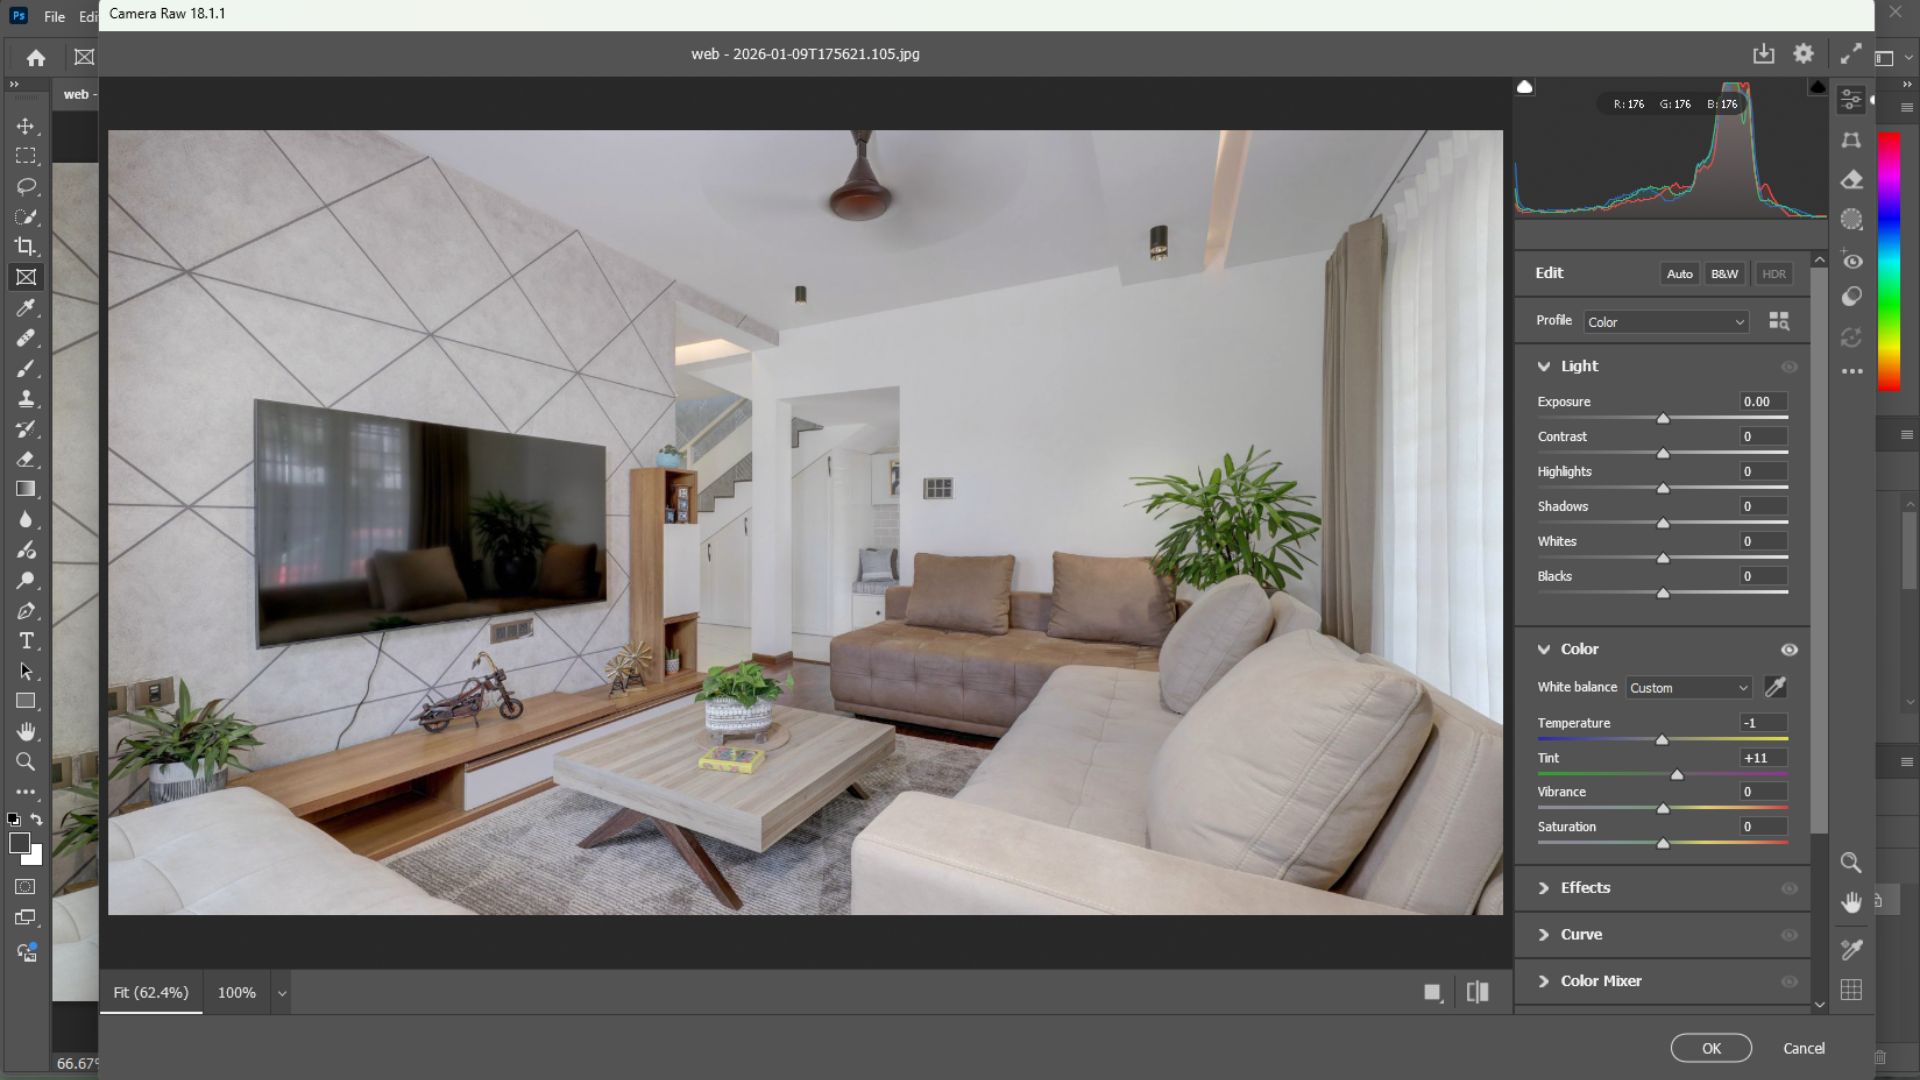
2.1. Correct White Balance
- Open the image and add a Camera Raw Filter
- Select the White Balance Tool (Eyedropper)
- Click on a neutral area, such as a white wall or ceiling
- Fine-tune the Temperature and Tint sliders until whites appear clean and colors look natural
2.2. Adjust Exposure and Brightness
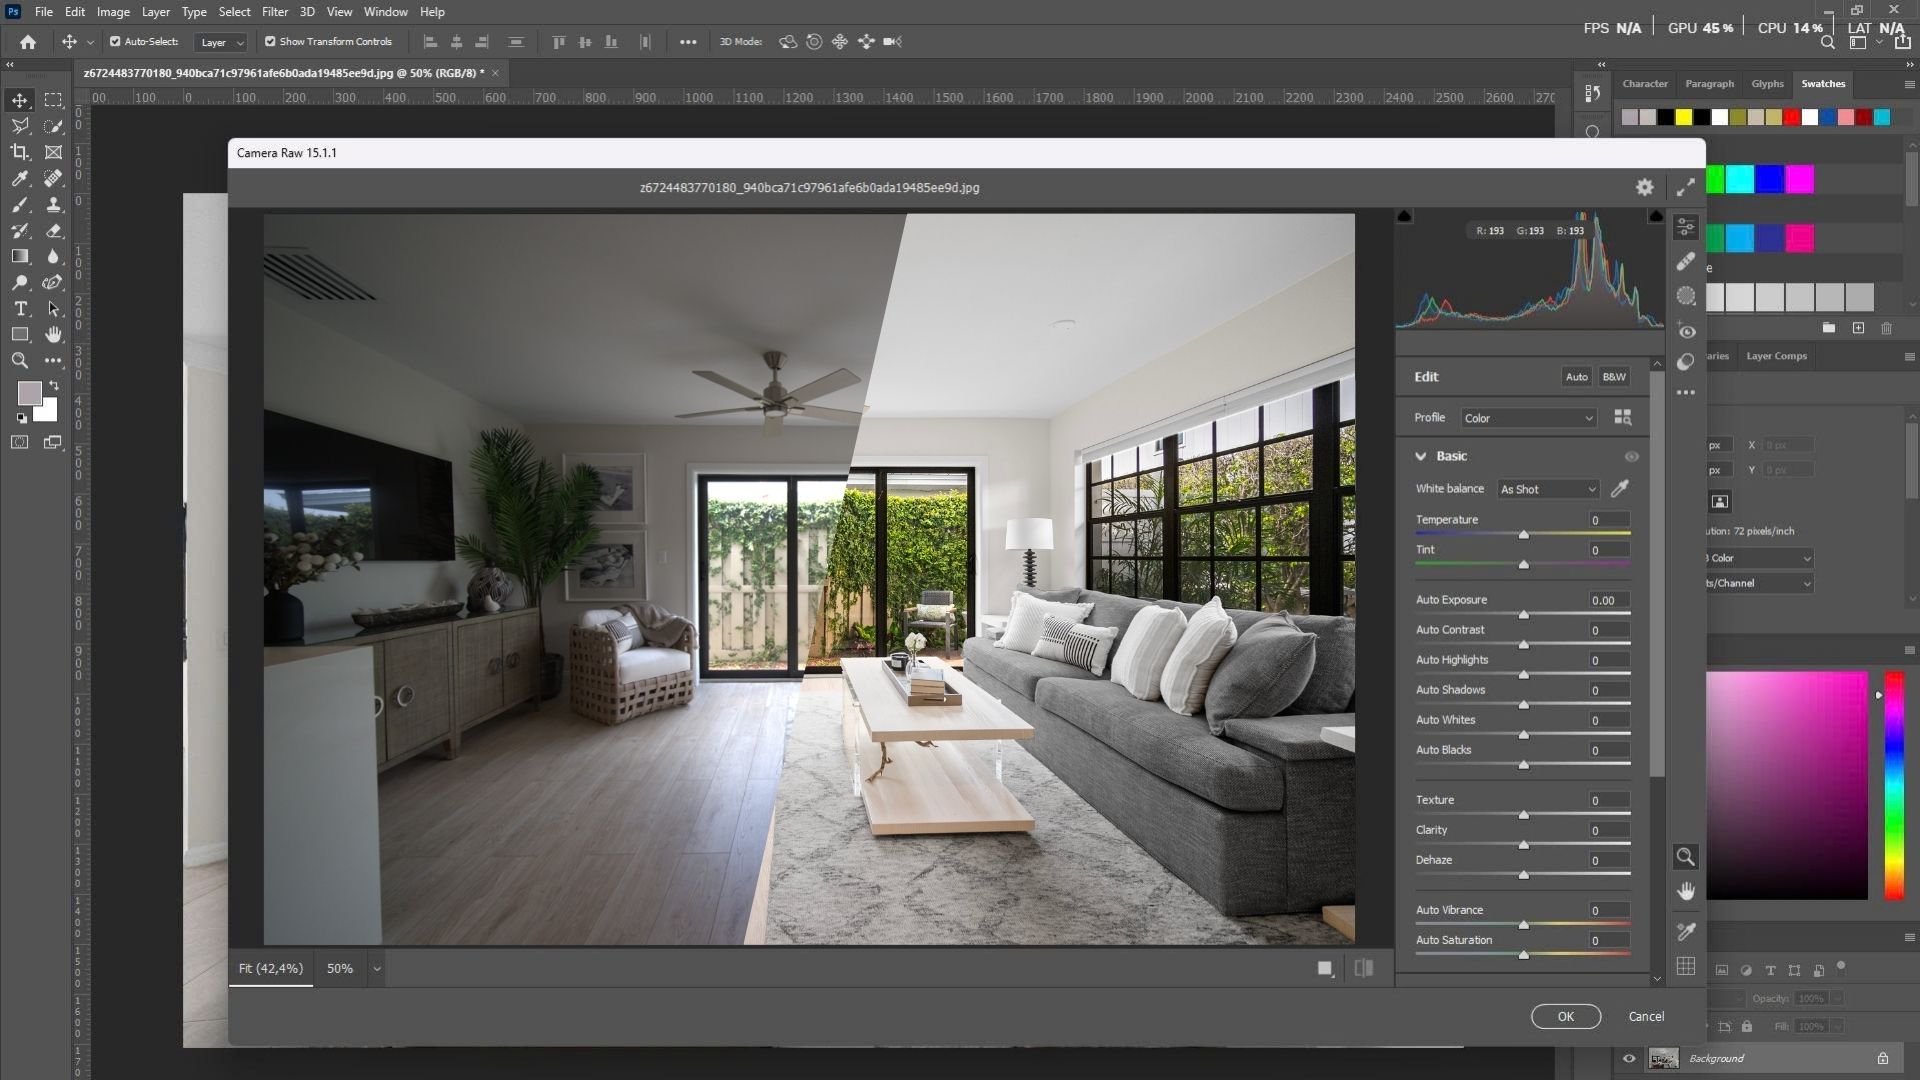
- In Camera Raw Filter, increase Exposure slightly to brighten the room
- Reduce Highlights to recover window detail
- Increase Shadows to reveal darker areas
- Adjust Whites and Blacks to maintain balanced contrast
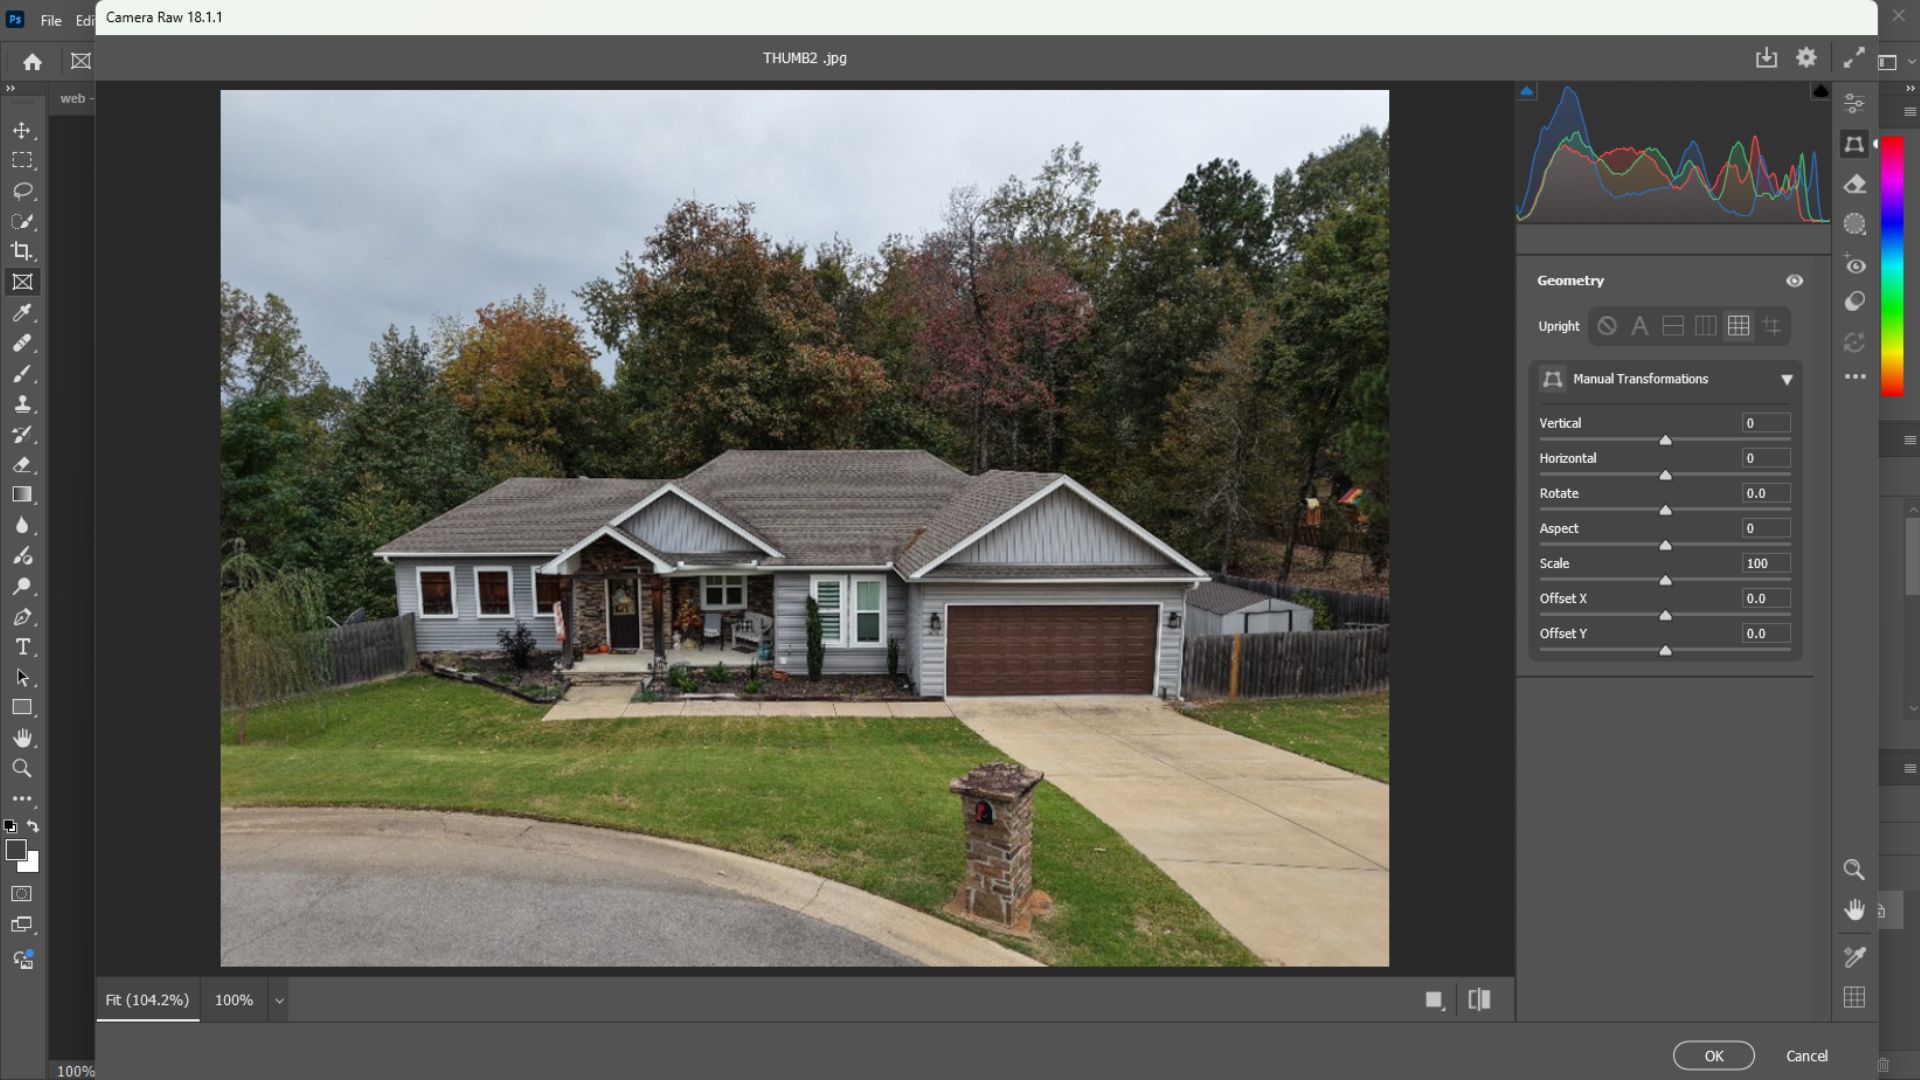
2.3. Fix Perspective Distortion
How to do it in Photoshop:
- Open Camera Raw Filter > Geometry
- Use Auto or Vertical correction first
- If needed, apply Guided Upright by drawing lines along walls or door frames
- Crop the image to remove empty edges after correction
2.4. Balance Contrast and Tone
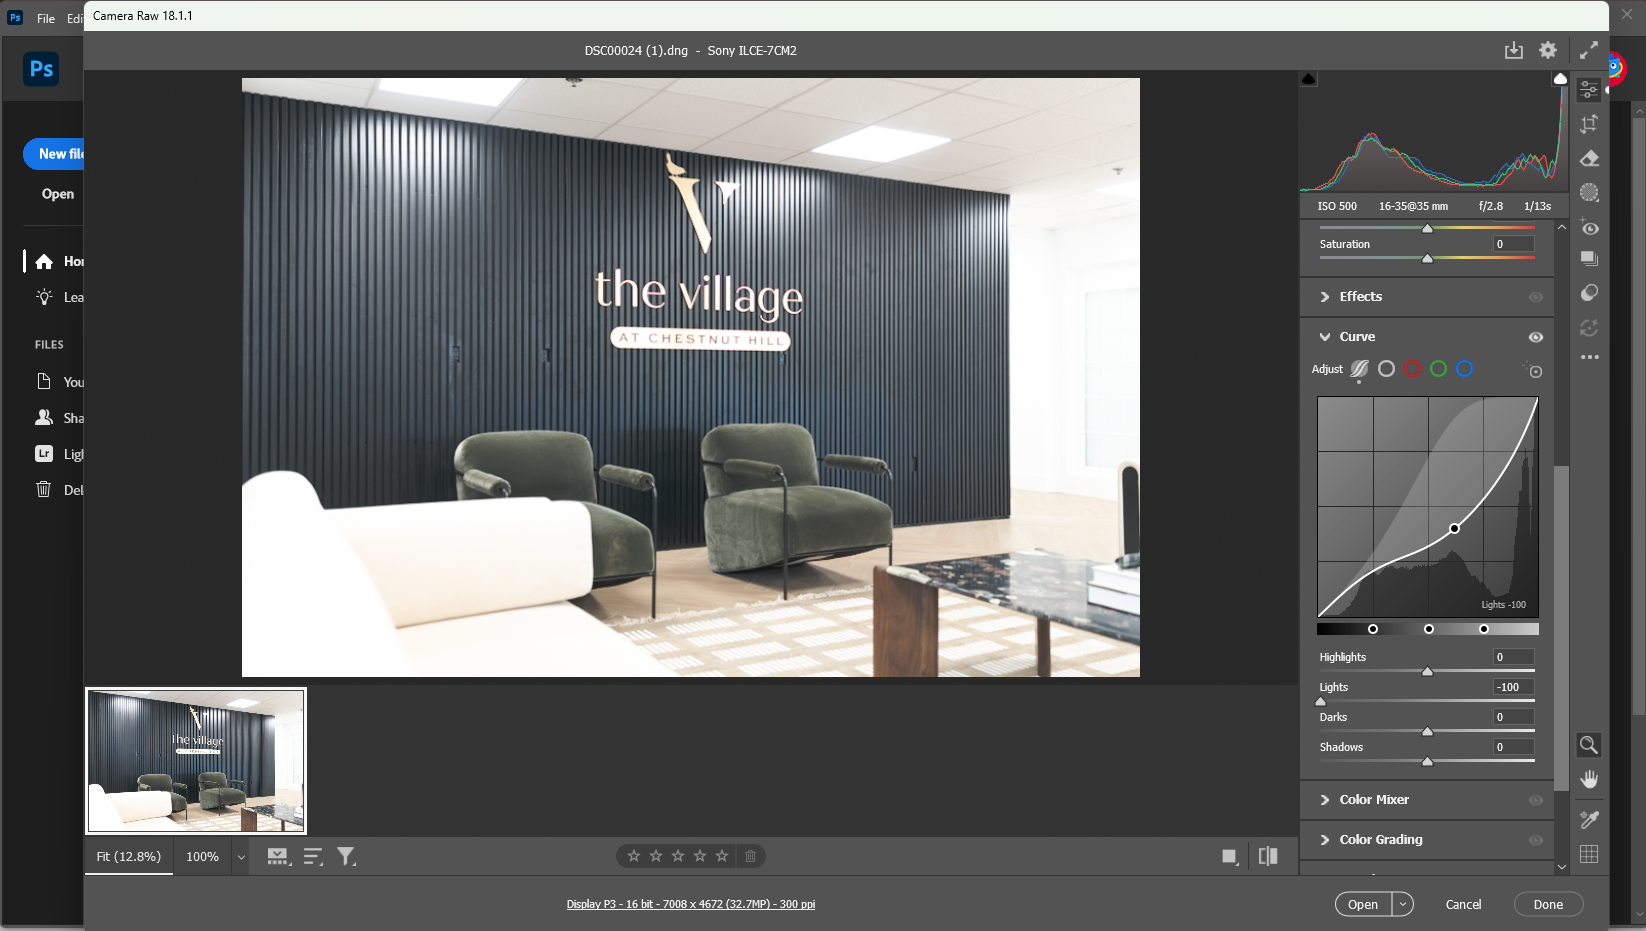
- In Camera Raw Filter, increase Contrast moderately
- Use the Tone Curve to slightly deepen shadows and lift highlights
- Keep transitions smooth to preserve a soft interior appearance
2.5. Apply Color Corrections
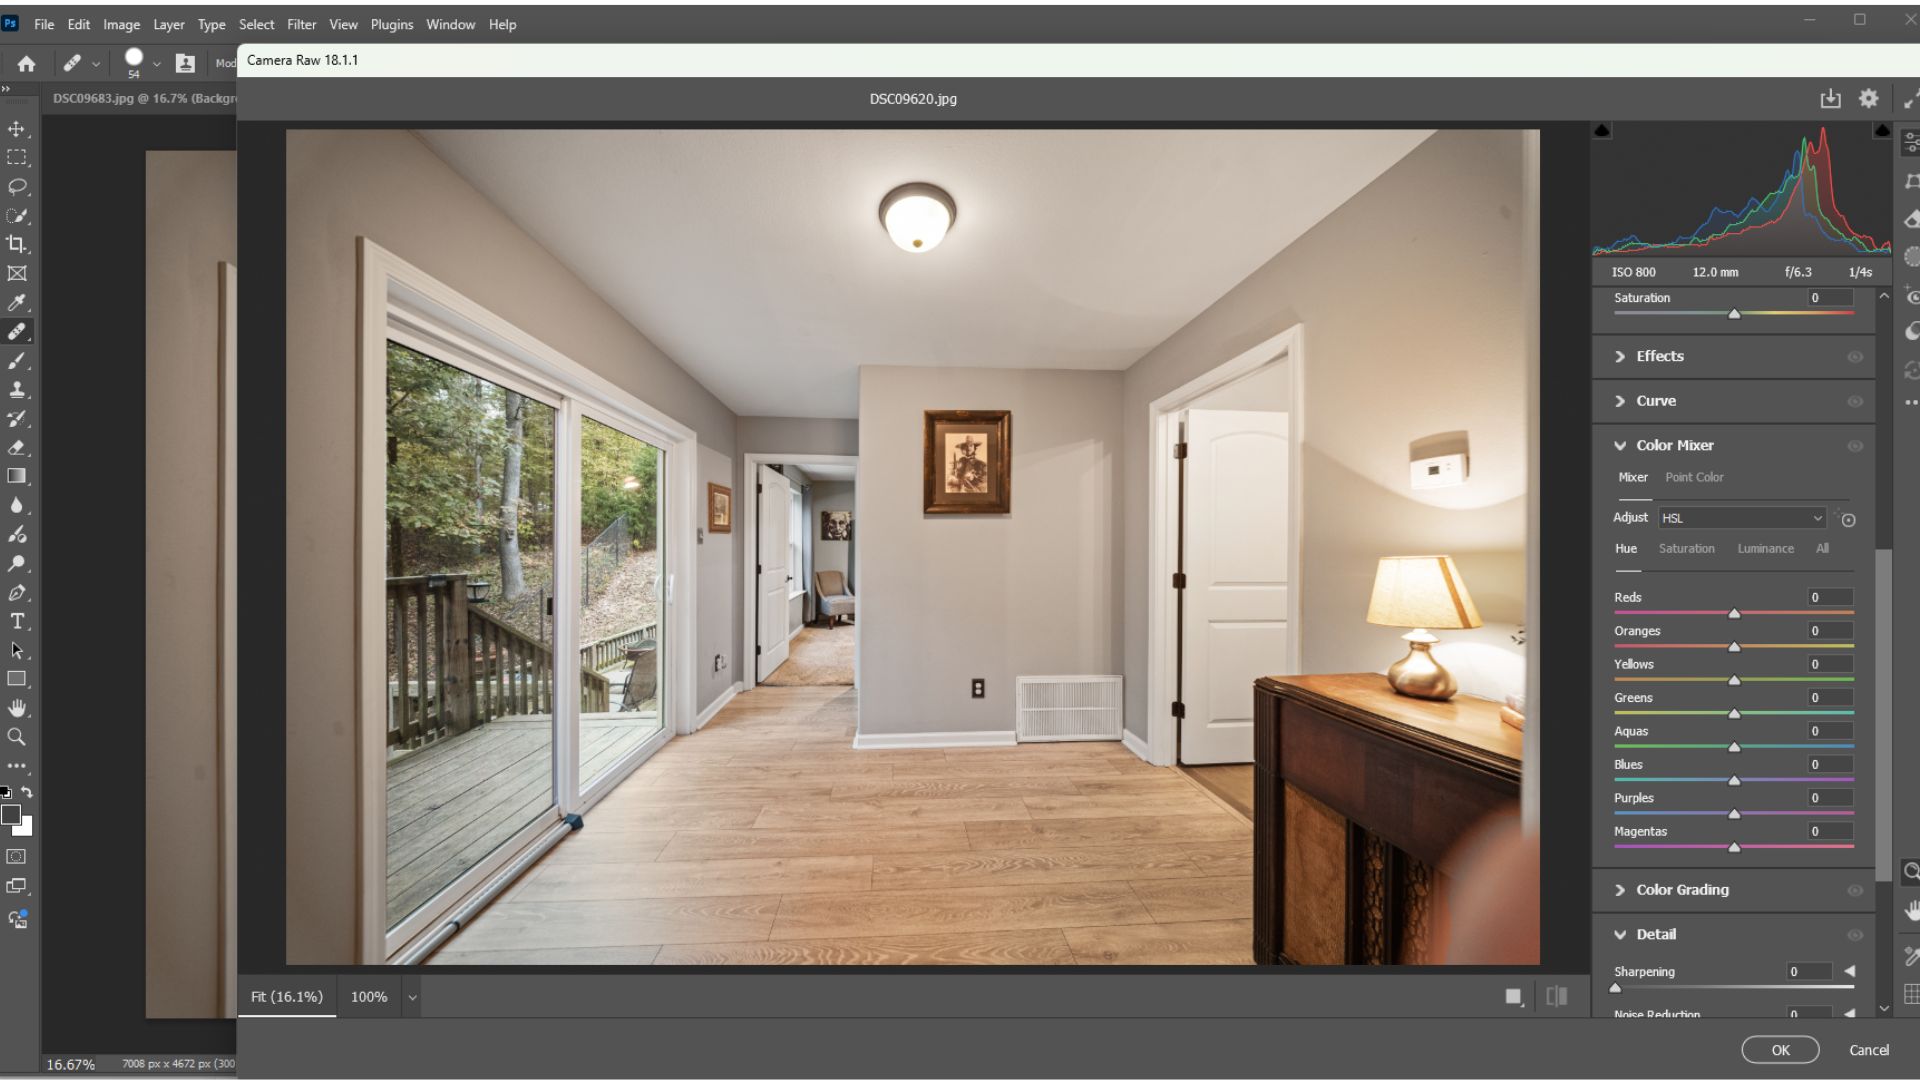
- Adjust the temperature for overall warmth or coolness
- Use HSL / Color Mixer to reduce overly strong colors
- Fine-tune Saturation and Luminance to ensure accurate, consistent tones
2.6. Reduce Noise and Enhance Sharpness
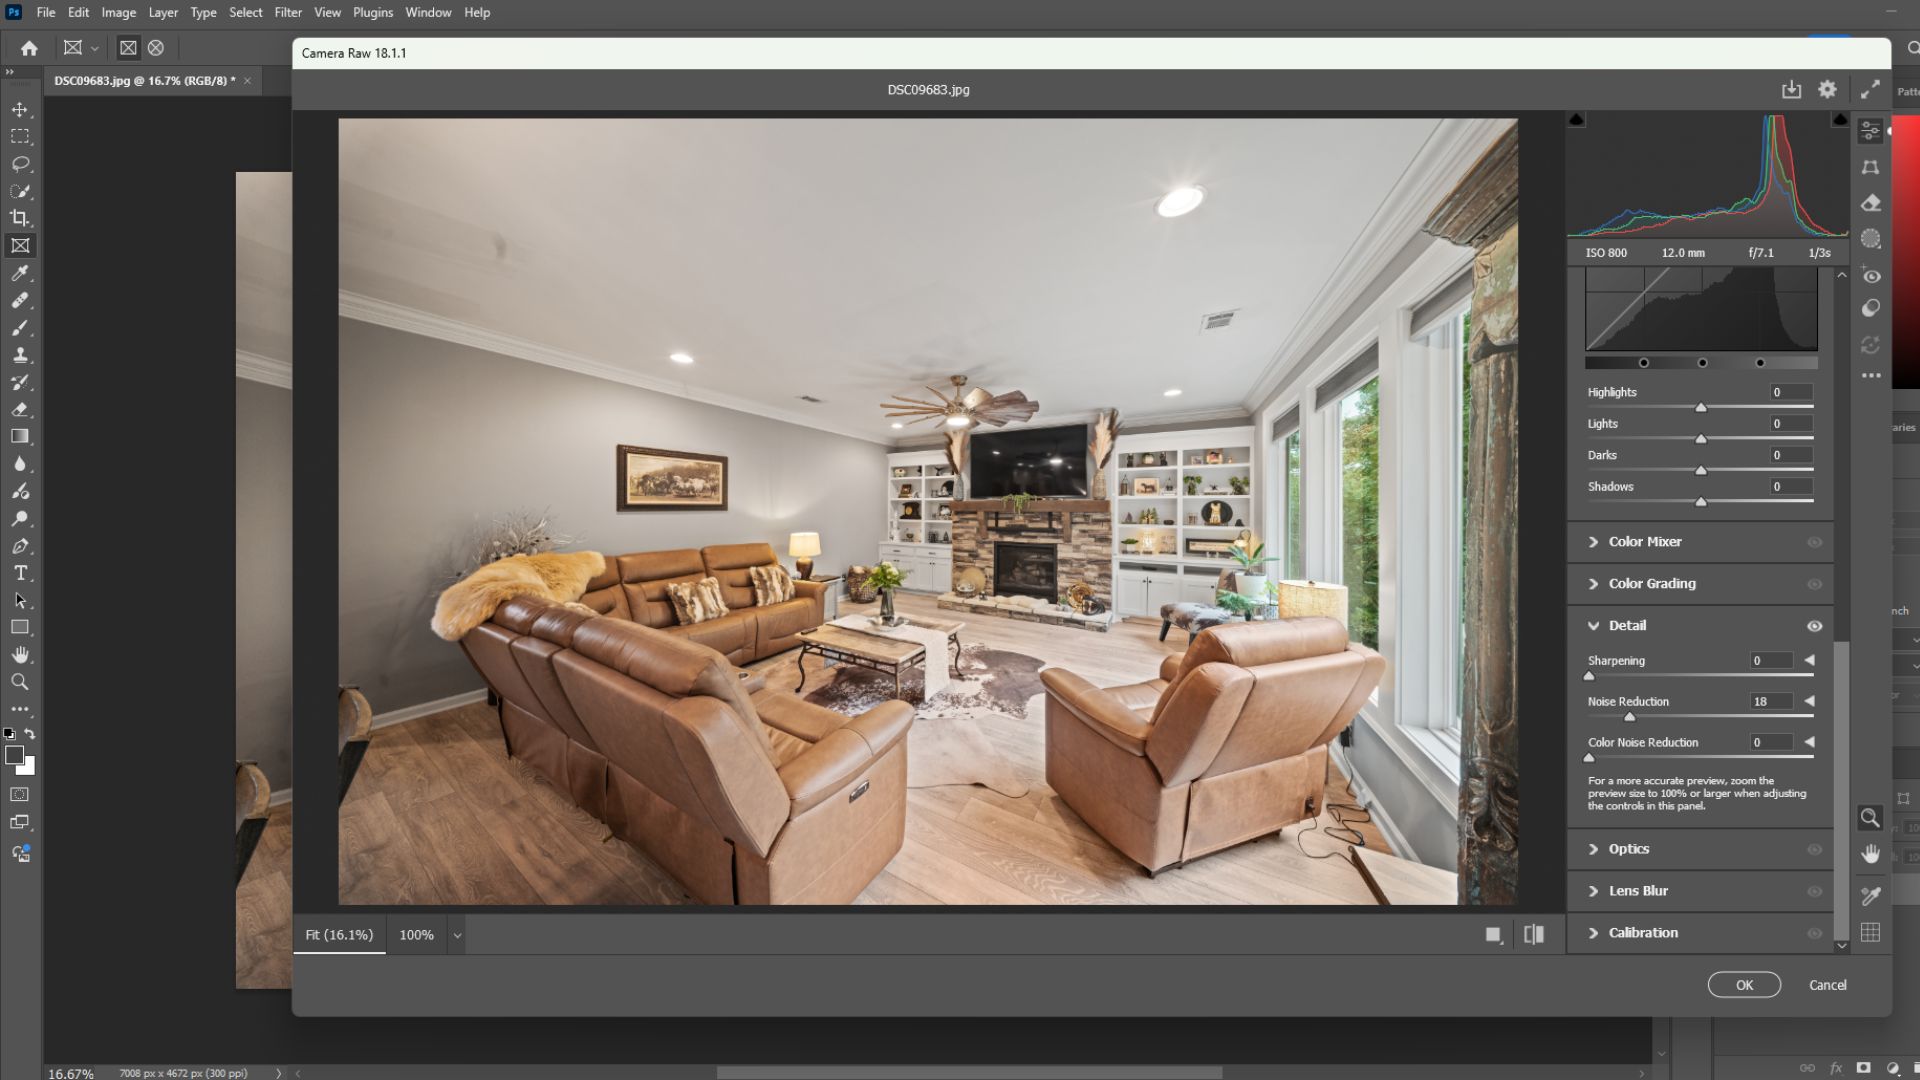
- In Camera Raw Filter > Detail, apply Noise Reduction to the shadow areas
- Increase Sharpening moderately
- Use the Masking slider to sharpen edges while protecting flat surfaces like walls
2.7. Soften or Remove Flash Shadows
- Create a Layer Mask
- Use the Brush Tool with low opacity to paint over shadow areas
- Lighten shadows using Curves or Exposure Adjustment Layers
- Reduce Clarity slightly in those areas for a softer look
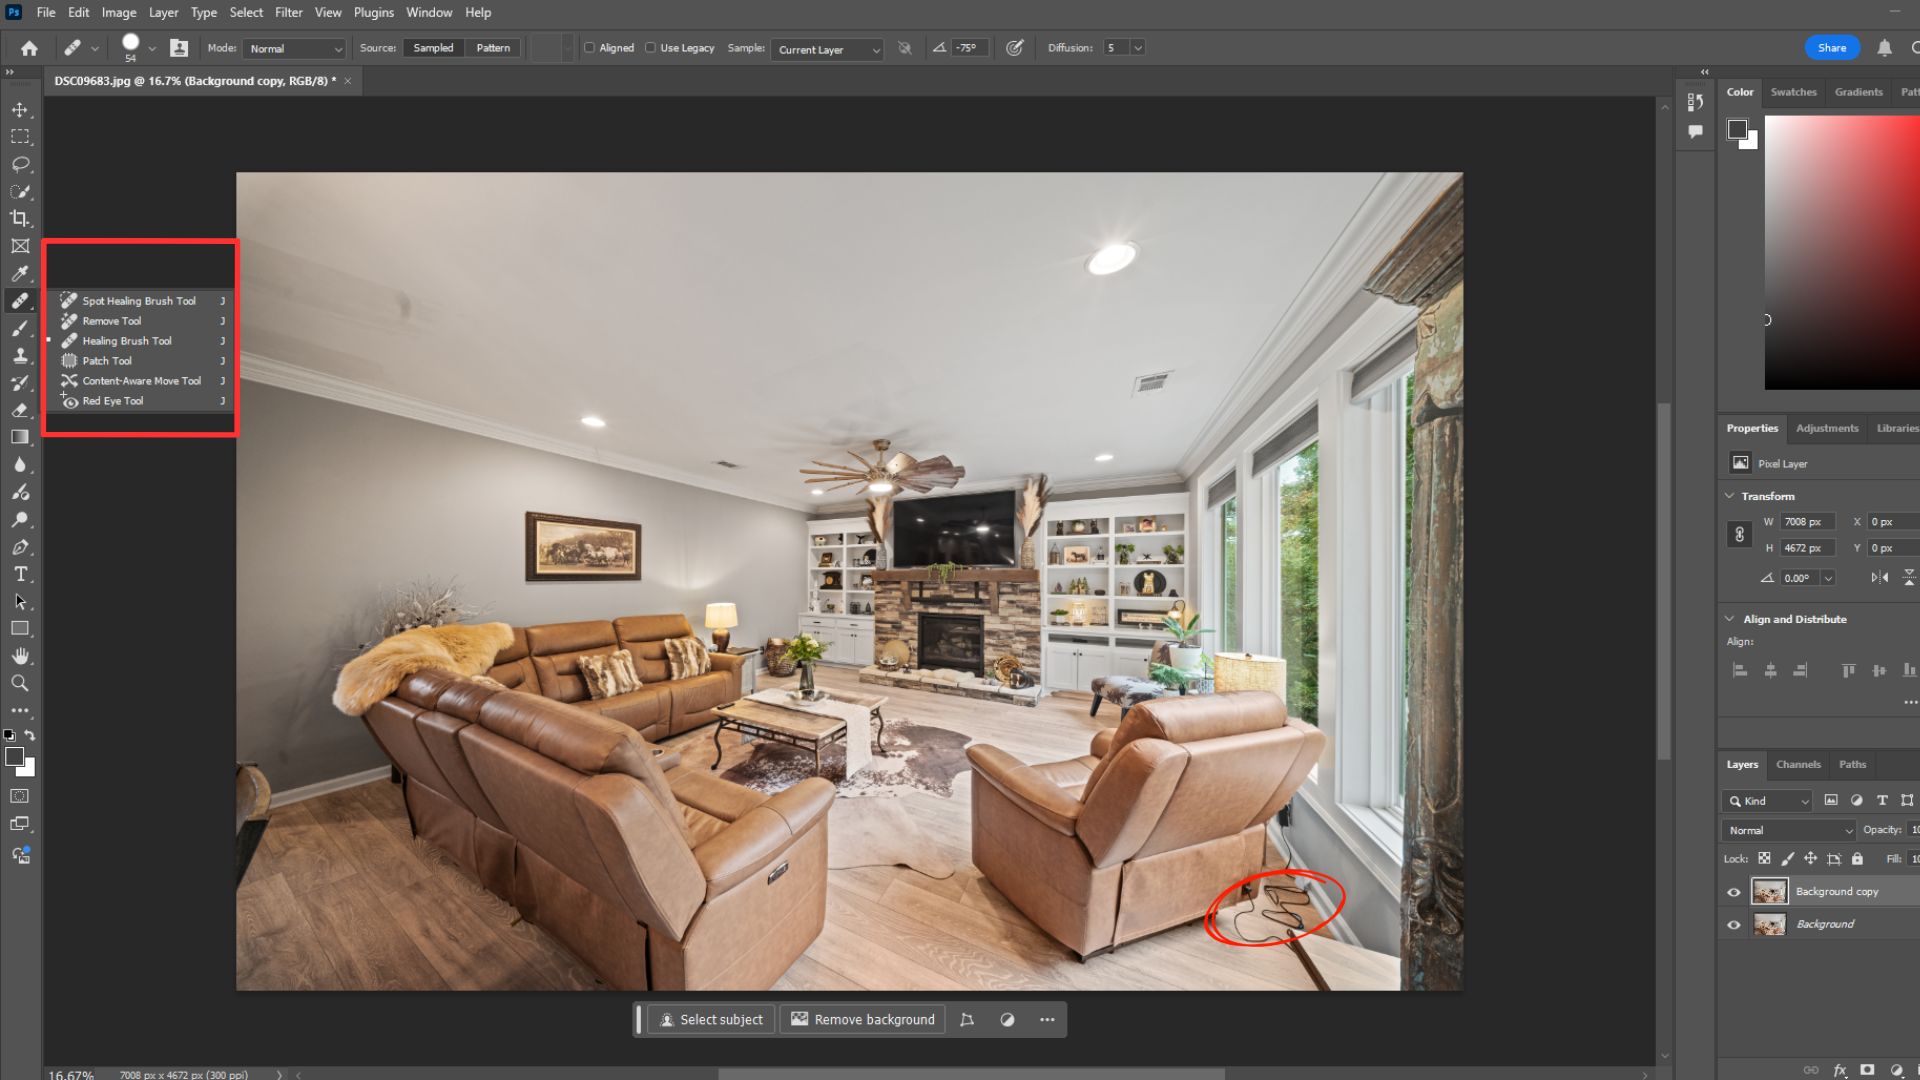
2.8. Clean Up and Remove Objects
- Use Healing Brush Tool for small imperfections
- Apply Clone Stamp Tool for edges or patterned areas
- Use Content-Aware Fill for larger unwanted objects
- Zoom in to check texture consistency after removal
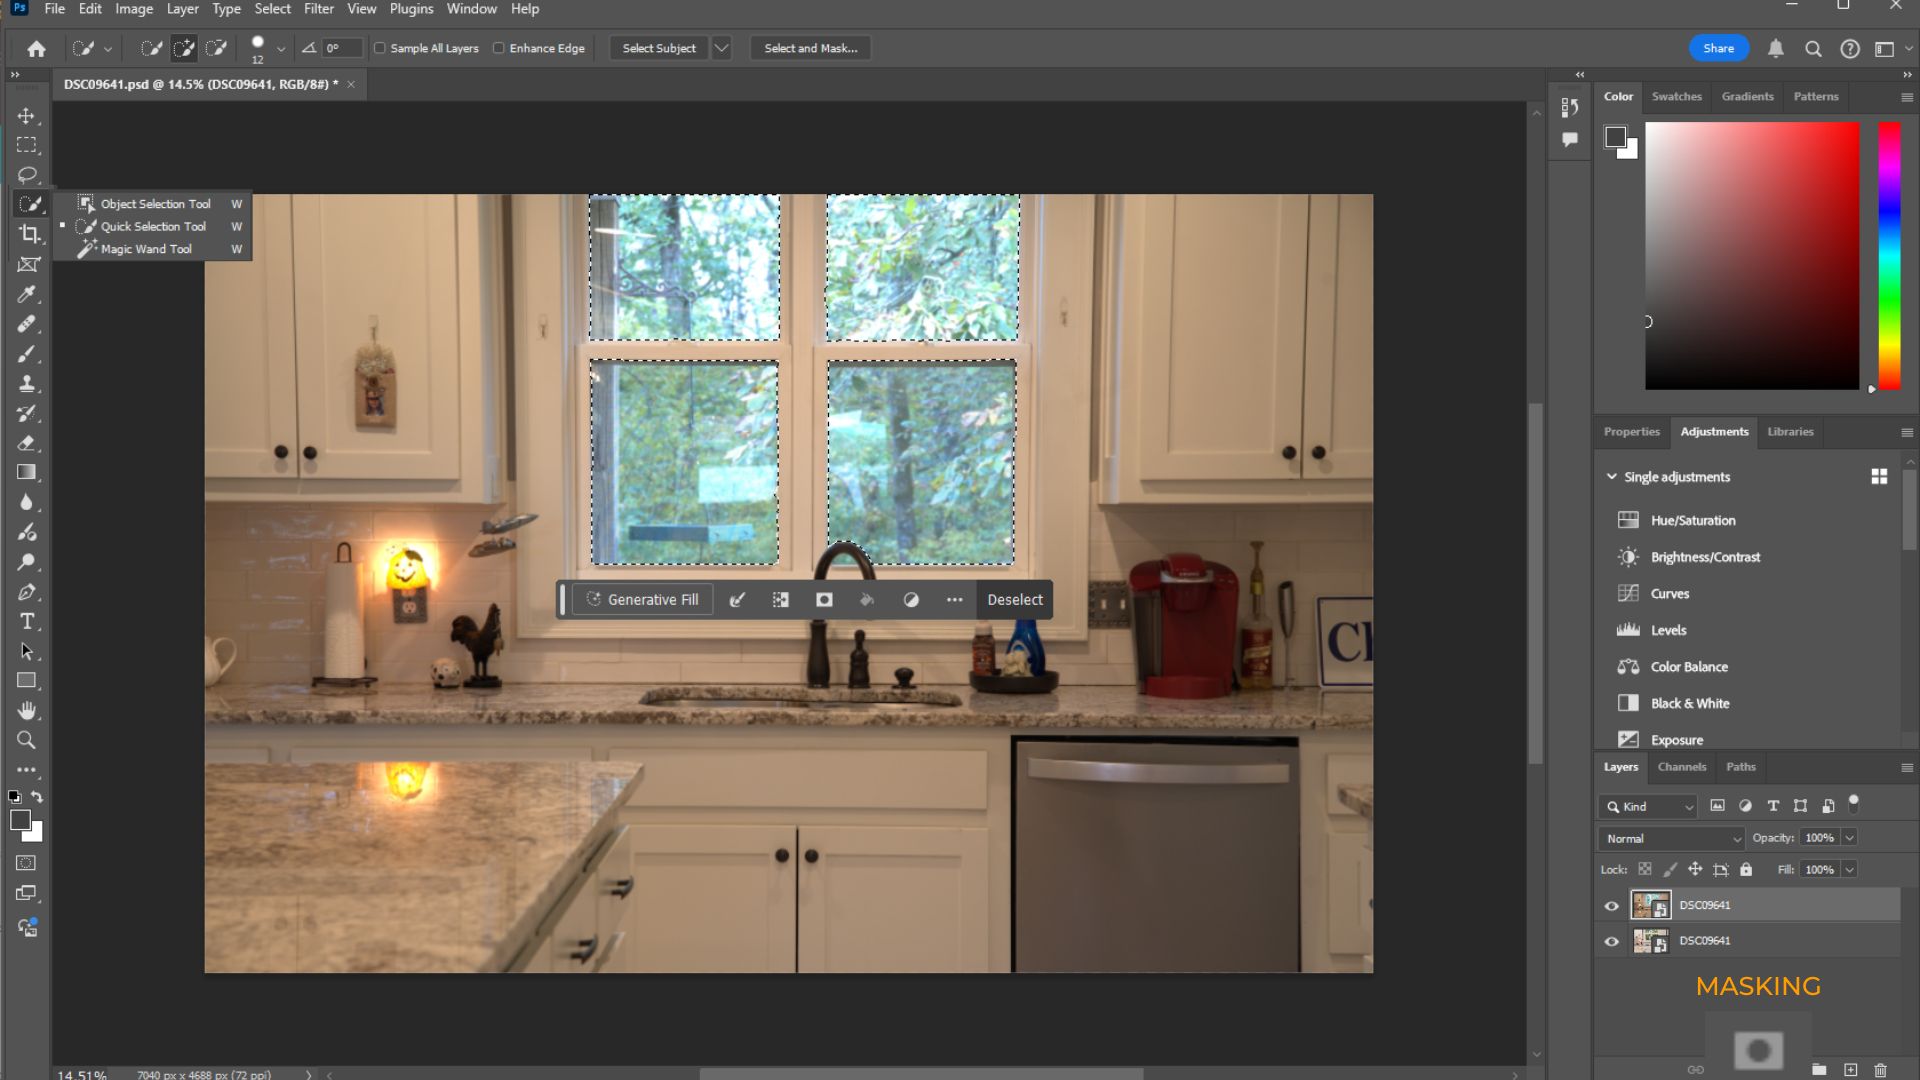
2.9. Mask or Replace Window Views
- Select window areas using Quick Selection or Pen Tool
- Create a Layer Mask
- Reduce exposure to recover detail or insert a new exterior image
- Match brightness, color temperature, and add a slight blur to maintain realism
3. Professional Interior Real Estate Photo Editing Services
In a highly visual real estate marketing market, interior photography has the power to influence a buyer’s interest in seconds. While taking great photos is essential, professional photo editing is what turns them into powerful marketing assets. That’s where professional interior photo editing services come in.
These services specialize in enhancing your home’s interior real estate images by correcting lighting, adjusting colors, straightening perspectives, and removing distracting elements without altering the authenticity of the space. The goal is to present each room in the most appealing, accurate, and consistent way possible.
At Rotider Media, we specialize in turning ordinary home photos into beautiful, high-impact images that sell properties faster. Our real estate interior photo editing services are tailored to highlight the unique personality of each space, making rooms appear brighter, cleaner, and more inviting without compromising authenticity.
Here’s why our interior photo editing services are trusted by real estate professionals:
- Fast turnaround time (12–24 hours)
- Natural-looking edits that reflect the real space
- Custom styling to fit your branding or listing needs
- Affordable and scalable for photographers, agents, and companies
Contact us to get started with premium Interior Real Estate Photo Editing tailored to your brand and timeline.
Annie Doo
Professional Video Editor
Hi, I’m Annie Doo, a professional video editor specializing in real estate post-production. Through hands-on experience with real-world projects, I’ve developed a strong understanding of visual storytelling, pacing, color, sound, and the workflows behind polished real estate videos. Here, I share practical insights, editing techniques, and production knowledge drawn from my day-to-day work in video post-production.
Was this article helpful?
Your feedback helps us create more useful real estate media guides.
Share this article


No Spam, Just Updates
Our fresh blogs provide technical and industrial information that helps strengthen your business. Sign up to be the first to receive the new updates
Related Posts

AI in Real Estate: A New Leap for Property Professionals
Sep 9, 2026
AI for Real Estate Marketing: A Practical Guide for Agents and Agencies
Sep 9, 2026
AI for Real Estate Agents: Practical Uses and Future Trends
Sep 7, 2026
15 Real Estate AI Companies to Know in 2026
Sep 5, 2026
How to Find Real Estate Image Editing Jobs in the USA
May 2, 2026