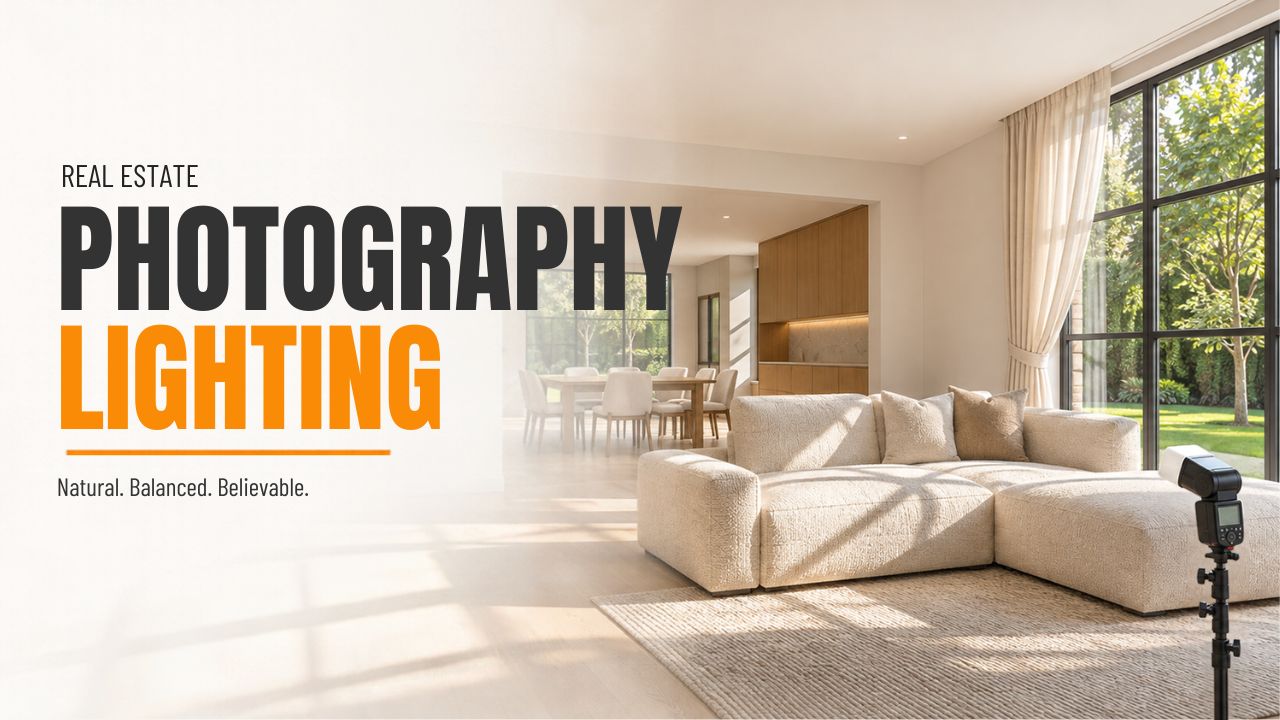
Good real estate photography lighting makes a property easy to understand while preserving its actual colors, materials and atmosphere. The goal is to balance brightness, contrast and light direction so the finished photographs feel clear and believable.
This guide explains how to assess existing light, choose between available light and flash, solve common lighting problems, and capture files that support consistent post-production.
What Makes Good Real Estate Photography Lighting?
Good lighting makes the room’s layout and materials clear without making every surface equally bright. Buyers should be able to distinguish finishes, understand how adjoining spaces connect and see important details without distracting glare or color casts.
Shadows help define furniture, texture and depth while preserving the direction of window light. Removing too much shadow can make an image look flat, while excessive shadow recovery can distort the appearance of materials.
Evaluate the lighting across the whole composition, including adjoining spaces. Check bright countertops and darker hallways as well as the main seating area. Preserve natural differences in brightness while keeping important details clear.
Assess the Property’s Lighting Before You Shoot
Check Window Direction, Weather and Time of Day
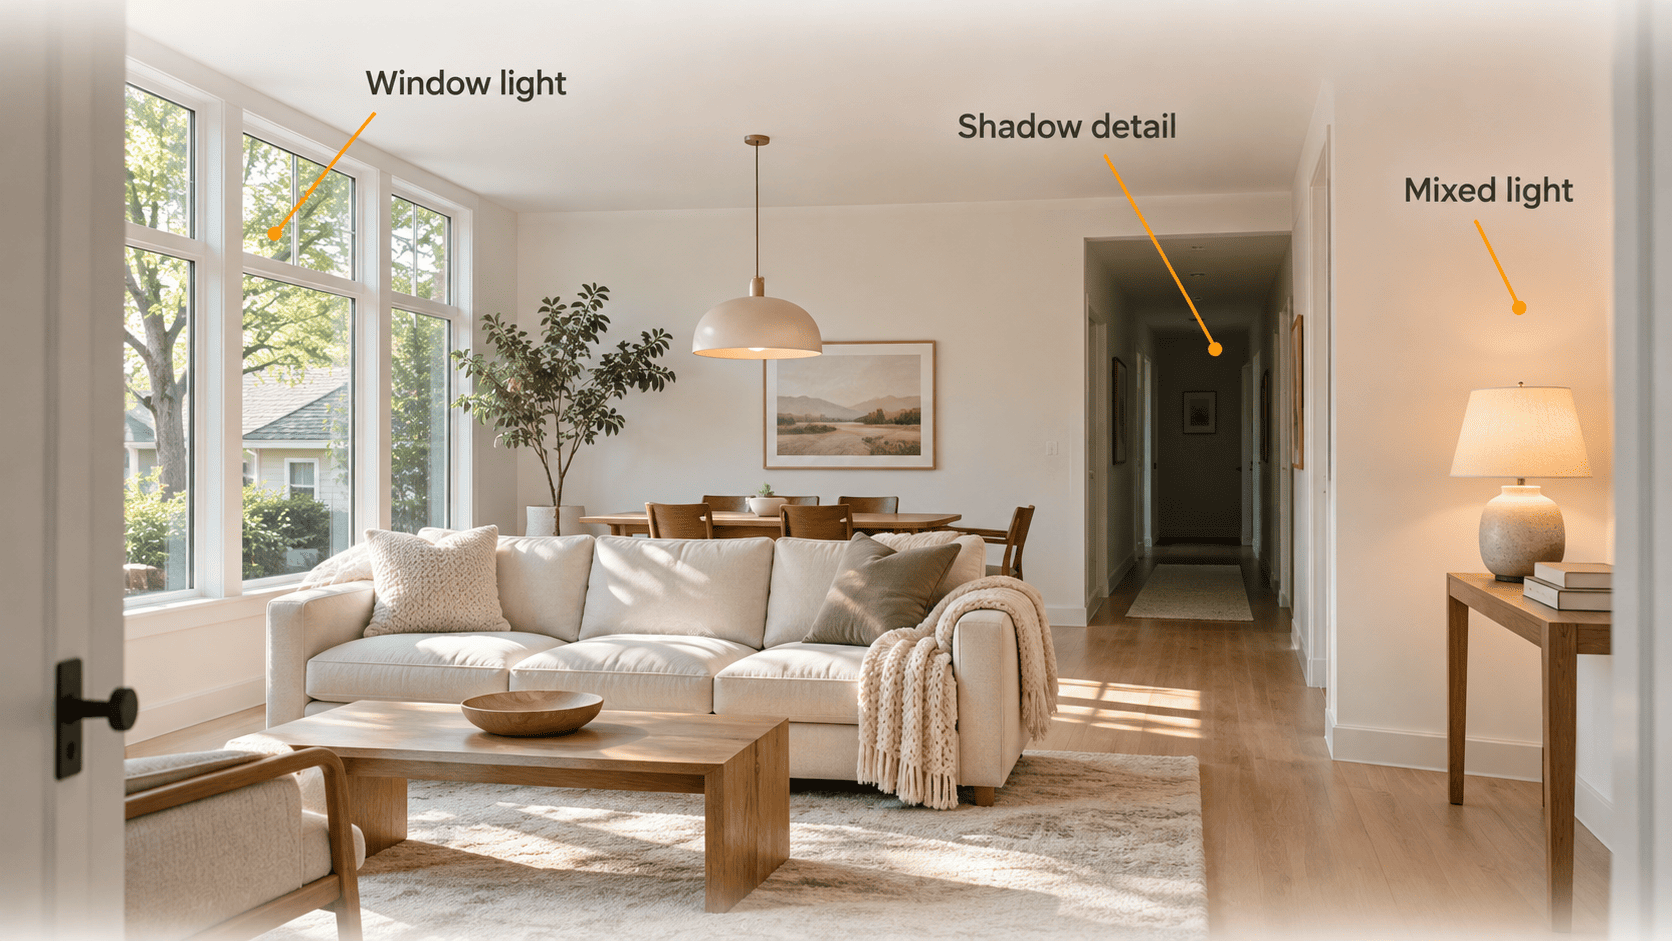
Walk through the property before setting up equipment. Identify the main windows, where direct sunlight falls and which areas receive little daylight.
Window orientation helps with planning, but it should not determine the schedule alone. Nearby buildings, trees, roof overhangs, seasonal sun angles and cloud cover also affect the light entering a room.
For natural light real estate photography, overcast conditions can soften direct sunlight and reduce harsh patches, though deeper areas of the room may still need additional exposure or fill light. On clear days, sunlight can emphasize textures or create distracting contrast. Assess the actual conditions rather than assuming golden hour is always best.
Identify Bright Windows, Deep Shadows and Mixed Light
Take a test exposure and check important highlights, shadows and neutral surfaces. Use the histogram and clipping warnings as guides, remembering that the camera’s processed preview may not show the full highlight latitude of the RAW file.
Distinguish clearly between overall underexposure and uneven spatial lighting. Extending exposure duration brightens the entire frame, yet it does not bridge the wide luminance gap between a bright exterior window and a dark interior corner.
Inspect white walls, ceilings and cabinetry for inconsistent color casts. Daylight and warm interior lamps may affect different parts of the room. For interior photography lighting, controlling conflicting sources and applying local color corrections can help address casts that a global exposure adjustment cannot fix.
Decide Which Interior Lights to Keep On or Turn Off
There is no universal rule about leaving interior lights on or off. Turning them off can simplify color correction when daylight provides enough illumination. Keeping selected fixtures on can show their design, brighten enclosed spaces and preserve the room’s atmosphere.
Take test exposures with the fixtures on and off, then compare their effect on surrounding surfaces. Fill flash can reduce the contrast between dark interior areas and bright windows when its output and coverage suit the scene.
Where practical, use bulbs with similar color temperatures. If the editor needs frames with the lights both on and off, keep the camera position consistent and identify each set clearly. Agree on the required source frames before the shoot.
Choose the Right Real Estate Photography Lighting Approach
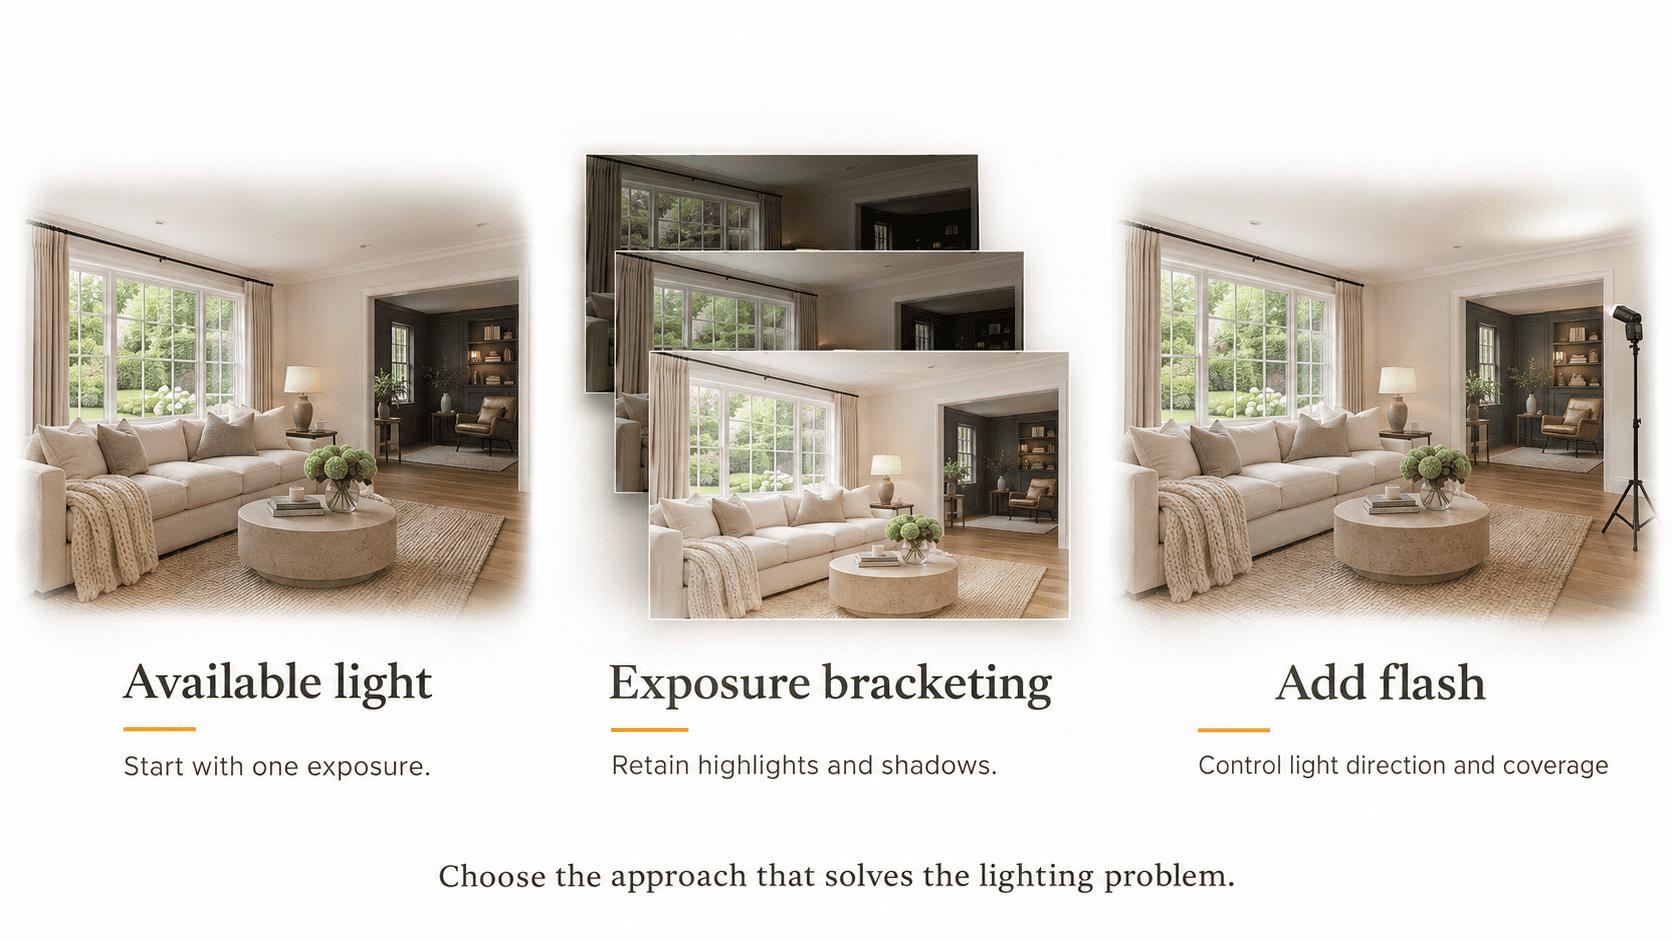
When Available Light Is Enough
Available light includes daylight and existing fixtures. It may be enough when a single exposure can record the important highlights and shadows with usable detail.
A sturdy tripod supports longer shutter speeds in static interiors and helps keep framing consistent. It does not change light direction or balance brightness across the room.
Begin with a single baseline exposure whenever it succeeds in capturing all critical shadow and highlight details with clarity. Introduce multi-exposure bracketed shots or supplementary lighting setups only when test captures reveal exposure challenges that a single-frame approach cannot resolve.
When Exposure Bracketing Helps
Use exposure bracketing when one exposure cannot retain the important highlights and shadows. Keep the camera position consistent and check that the sequence records the detail needed for blending.
For static interiors, keep aperture, ISO, focus and framing consistent while varying shutter speed. Choose the exposure range to cover important highlights and shadows rather than using the same bracket count in every room.
According to Adobe, bracketed exposures can be blended to clearly present both interior details and exterior window views simultaneously. While this technique expands the recoverable dynamic range, it does not modify light directionality or eliminate unwanted surface reflections.
Flash vs Natural Light for Real Estate Photography
Daylight preserves the room’s existing lighting character, while flash gives you another way to control direction and coverage. Choose according to contrast, color, composition and the intended result.
Use flash to illuminate specific areas or reduce the relative influence of unwanted ambient light. If daylight already provides balanced results, additional flash may be unnecessary.
You can also capture separate ambient and flash frames to blend in post-production, a technique often called “flambient” photography. These frames give the editor different lighting options. Keep the camera position consistent and agree on the required source sets before the shoot.
Neither flash nor bracketing guarantees better results in every property. Choose according to the lighting problem and the time available for capture and editing.
How to Use Natural Light for Property Photography
Adjust Blinds and Curtains to Control Incoming Light
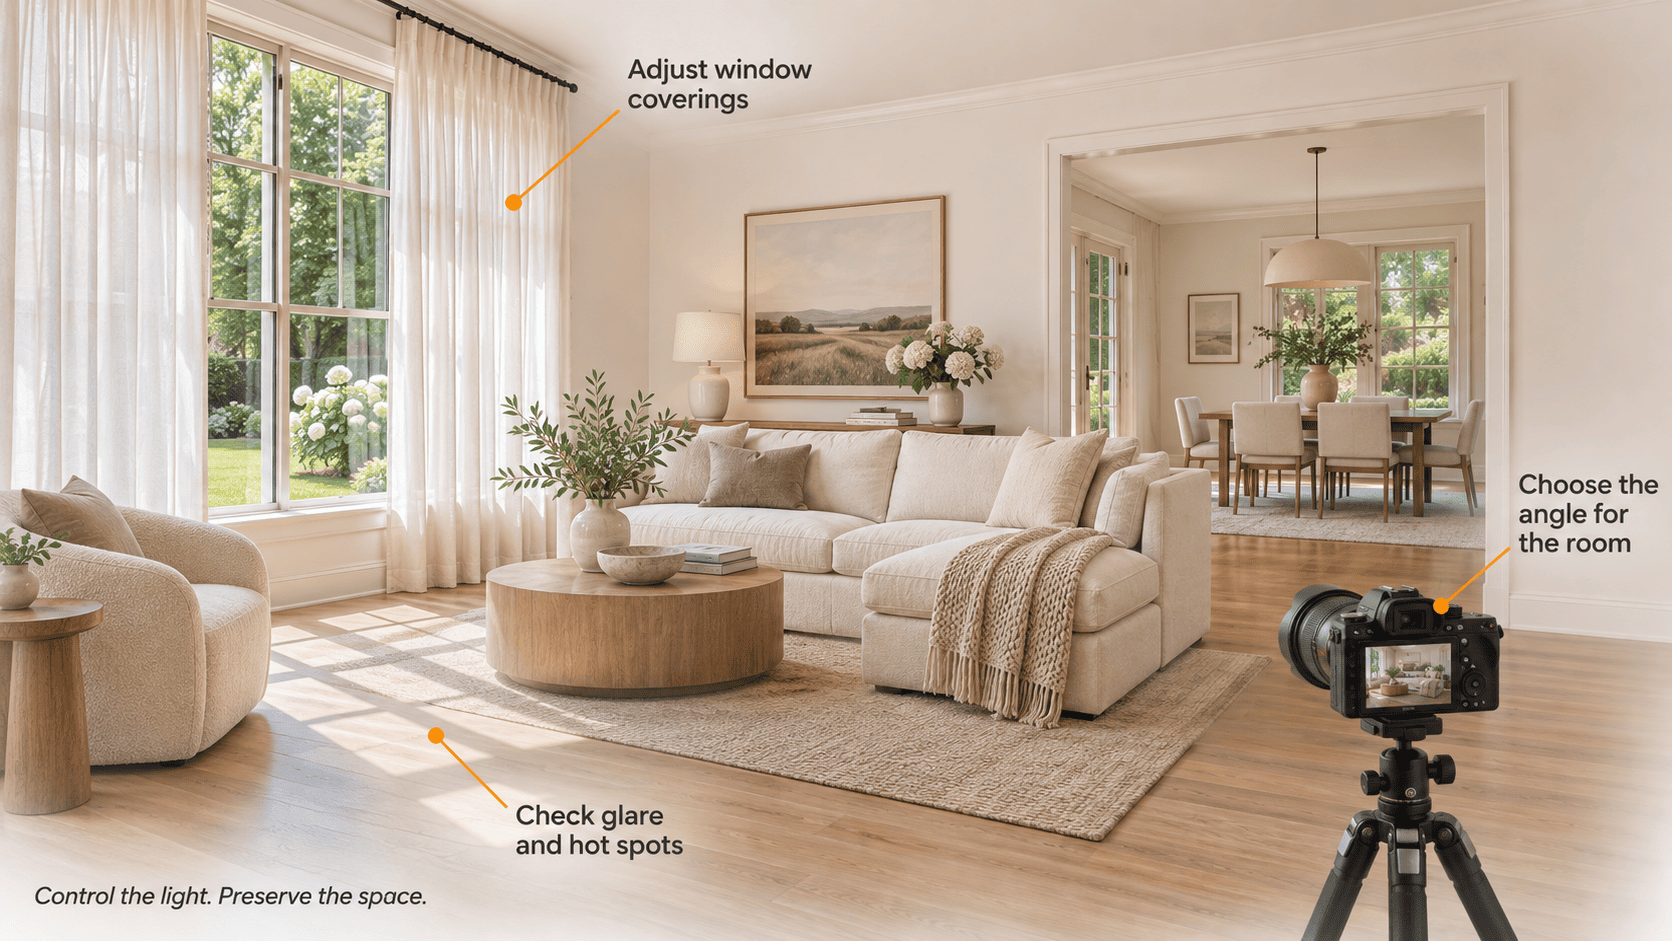
Adjust window coverings just enough to introduce usable ambient daylight while preserving essential exterior views, then evaluate the frame. Opening every blind completely is not always the ideal choice, as it can introduce harsh sun flare or uncomfortable specular glare.
Angle blind slats to redirect or limit direct sunlight, or use sheer curtains to diffuse it when appropriate. Window treatments can also reduce light levels, introduce a color cast or obscure a view, so check the result.
Ensure all window coverings present a clean, orderly appearance. Across connected open-concept spaces, leaving window treatments set at inconsistent heights can create visual distraction, even if interior light levels have been properly balanced.
Choose Camera Positions That Work with the Light
Camera position affects which reflections are visible on glass, mirrors and glossy surfaces. Compare nearby angles before setting up to see whether a small change improves texture, shadows or glare.
Shooting toward a large bright window can require more exposure control than shooting across its light. An easier exposure does not always produce the most informative listing photo.
Prioritize camera positions that highlight key architectural flow, then tailor your lighting setup accordingly. Avoid repositioning the camera excessively just to mitigate contrast, as doing so may obscure vital spatial connections or key selling features.
Manage Direct Sunlight and Uneven Illumination
Direct sunlight can accent structural textures and create spatial depth, yet severe highlight patches risk overpowering the composition. Inspect flooring, countertops, and furnishings to identify harsh flare or distracting hot spots that draw focus away from the core room volume.
Try changing the shot order, adjusting window coverings, shifting camera position or adding controlled fill. Bracketing can retain detail in bright sunlit areas, but it does not soften their shadow edges.
When direct sunlight shifts rapidly, execute exposure sequences without delay. Moving shadow lines between individual frames introduce complex alignment issues during image post-processing, even with the camera locked down on a rigid tripod.
How to Add Flash Without Making Interiors Look Artificial
Establish the Ambient Exposure Before Adding Flash
When setting up your lighting scheme, begin with a test exposure captured strictly without flash. Determine the precise balance of ambient daylight, window detail, and practical light output that should be preserved in the final image.
For static interiors, choose an aperture for the required depth of field and an ISO appropriate to the camera and image-quality needs. Then adjust shutter speed to establish the ambient exposure.
At or below the camera’s normal sync speed, changing shutter speed mainly affects ambient exposure when aperture, ISO and manual flash output remain fixed. This relationship changes in high-speed sync. Check the camera’s sync limits and supported shutter modes.
Read more: Real Estate Photography Camera Settings for Sharp, Balanced Photos
Choose a Suitable Bounce Surface and Light Position
A suitable wall or ceiling acts as an indirect key light when bouncing flash illumination off its surface. Select target bounce zones based on color neutrality, distance, and orientation relative to the primary subjects requiring fill.
White or neutral bounce surfaces are less likely to introduce a strong color cast than saturated walls or dark wood. Nikon explains that bounce direction changes the direction and quality of light.
No single bounce angle suits every room. Test the direction and coverage, then check mirrors, windows and glossy finishes for visible flash reflections or bright spots.
Adjust Flash Output and Check Whether More Coverage Is Needed
Add flash gradually and compare each test with the ambient exposure. Check that it improves the intended areas without overpowering daylight or making the foreground too bright.
If nearby surfaces become too bright while distant areas remain dark, reconsider flash position and coverage before increasing power.
If one light cannot cover the required areas, consider a second flash or another suitable light source. Use additional lights to solve specific coverage problems rather than treating them as a requirement for every room.
Read more: Best Flash for Real Estate Photography Based on Your Lighting Needs
How to Solve Common Real Estate Photography Lighting Problems
Bright Windows and Dark Interiors
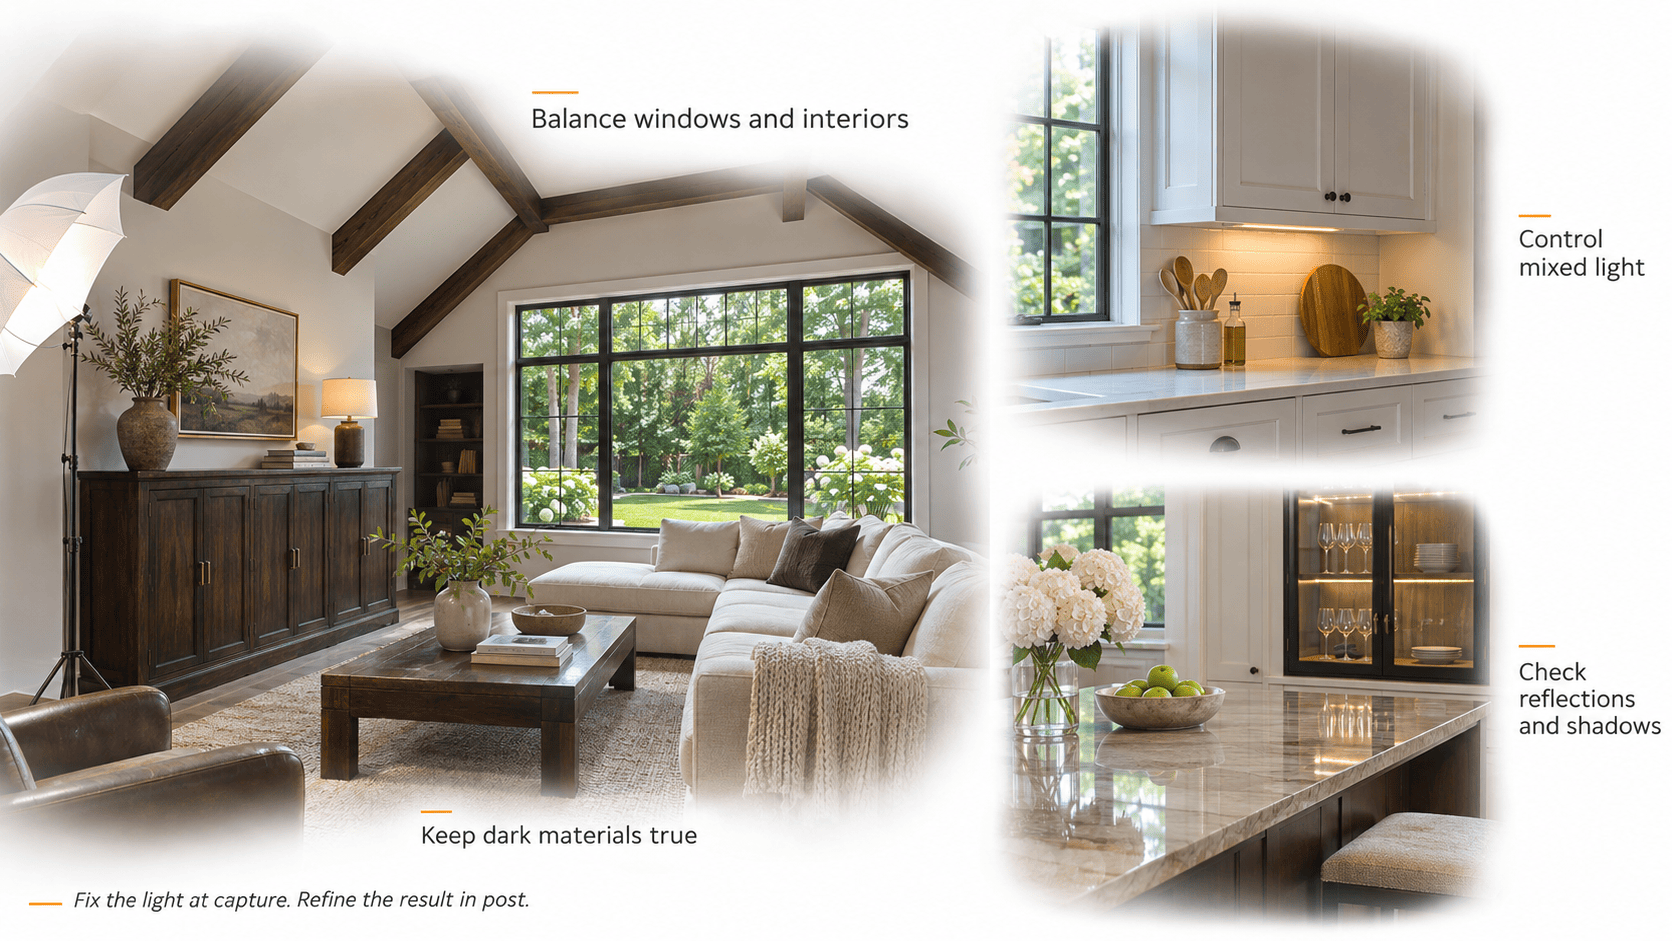
Decide how much exterior detail the image needs. A useful view deserves careful capture, but making every window dark, saturated and highly detailed can look unnatural.
If one exposure cannot retain the required detail, use bracketing to record a wider exposure range, or add interior fill to reduce the brightness difference during capture.
For window pull exposures intended for manual blending, capture a dedicated frame locked from the exact tripod position. Pay close attention to glass reflections, window frame edges, and exterior highlights. Exposure blending alone cannot erase surface reflections simply by darkening the glass area.
Mixed Color Temperatures and Color Casts
Achieving clean illumination in interior spaces requires identifying sources of unwanted color contamination prior to adjusting white balance settings. Turn off conflicting practical fixtures, standardize light bulb temperatures where possible, or control active light sources to streamline color management.
A camera’s global white balance setting applies one overall correction to the image. It cannot independently balance a wall lit by cool daylight and another surface lit by warm lamps. Canon notes that white balance presets may not fully correct colors under mixed lighting.
Maintain a consistent white balance setting throughout a sequence under unified lighting conditions, re-evaluating only when the ambient light changes. Capturing in RAW format offers maximum flexibility during post-processing, though RAW data alone cannot fully resolve severe color cast conflicts caused by unmanaged mixed lighting.
High Ceilings, Dark Surfaces and Uneven Light Coverage
High ceilings extend the distance bounced light must travel, whereas dark surface materials reflect far less ambient light back into the living volume. A bounce setup that functions effortlessly beneath low white drywall can fail completely under dark timber beams or vaulted ceilings.
Try a closer neutral reflector, a suitable modifier or a different flash position. If distant areas remain too dark, a separate light may provide better coverage than increasing power from the original position.
Preserve the authentic tonal depth of dark architectural surfaces. The objective is to define their surface texture and physical shape, rather than over-exposing them until they mimic entirely different materials.
Reflections, Hotspots and Harsh Shadows
First, approach surface reflection issues as layout challenges. Shift the position of your light sources and observe the resulting changes; if necessary, make subtle camera position adjustments while safeguarding the integrity of your overall composition.
For harsh shadows, assess the effective light-source size and direction. A larger effective source, created by a suitable bounce surface or modifier, can soften shadow transitions. Check reflections separately.
Inspect the whole frame after each setup change. Fixing glare on cabinetry may introduce another bright reflection on a window or countertop. Check that the photographer, tripod and other equipment are not visible in reflective surfaces.
Lighting for Exterior and Twilight Property Photos
Plan Around Sun Direction and Facade Lighting
For daytime exterior shots, prioritize lighting conditions that define the structural volume and accentuate key architectural features. Assess whether the primary facade receives direct illumination, is backlit, or is segmented by strong shadow lines.
Golden hour can provide warm, directional light, but it does not suit every building orientation. A shaded facade may still be difficult to photograph even when the surrounding landscape is well lit.
Sequence your shot list based on solar orientation and space priority. If the front elevation receives optimal light for only a brief window, capture that perspective first before transitioning to secondary angles with more flexible timing constraints.
Balance the Sky with Interior and Exterior Fixtures
For twilight photographs, prepare compositions and check the required fixtures before the light fades. Watch the relationship between the sky, building surfaces, windows and landscape lighting.
Begin capturing while useful ambient light remains, then reassess exposure as conditions change. The best balance varies with weather, season, location and the brightness of the fixtures; use the scene rather than a fixed number of minutes after sunset.
Bracket when needed, keeping individual sequences short and aligned. Avoid letting bright fixtures dictate the entire exposure if doing so leaves the building unreadable. Nikon’s dusk and night photography guidance provides additional background on working in fading light.
What Can Post-Production Fix and What Needs Better Capture?
Exposure Blending and Local Color Corrections
Post-production can combine usable exposure information, refine contrast and apply selective corrections to areas with different color casts. These adjustments help reconcile the capture with the intended appearance of the property.
For example, an editor may use a darker frame for window detail and a brighter frame for interior surfaces, then refine the transitions. Local color corrections can address a particular wall without applying the same adjustment to the entire room.
Group ambient, flash and window exposures by camera position. Note whether fixtures should remain on, how much window detail to retain and which approved reference the editor should follow.
Missing Highlight Detail, Reflections and Inconsistent Source Frames
Clipping warnings in the camera preview do not always mean the RAW highlight data is lost. However, detail that was not recorded in any source exposure cannot be recovered as an authentic record of the scene.
Strong reflections can hide important detail. Capture an alternate source frame where possible rather than assuming a global lighting adjustment will reveal what was obscured.
Moving curtains or blinds can cause ghosting, camera movement can misalign edges, and changing sunlight can create inconsistent shadows between frames. Capture any additional source frames needed while you are still at the property.
Frequently Asked Questions
Do You Need Flash for Real Estate Photography?
No. Available light and exposure bracketing can be sufficient for many properties. Flash is useful when you need to change light direction, improve coverage or control the balance between ambient light and added illumination.
Does HDR Replace Additional Lighting?
No. HDR combines exposure information; it does not physically change the illumination. It can retain bright and dark detail, but it does not automatically soften hard shadows, remove reflections or correct mixed-color light.
Is an Overcast Day Better for Interior Photography?
Sometimes. Cloud cover can soften direct sunlight and reduce strong patches, but it may also leave interiors darker. Window size, orientation, surrounding obstructions and the desired appearance matter more than a universal weather preference.
Can White Balance Correct All Mixed Lighting?
No. A global setting cannot independently correct different light sources affecting different areas. Controlling sources during capture and applying local corrections afterward may both be necessary.
Are Continuous LED Lights Useful for Real Estate Photos?
Yes, provided their output, color quality and coverage suit the scene. They allow you to observe the lighting before capture and can support detail shots or video. Compare actual fixtures and modifiers; a small portable panel should not be expected to balance a large sunlit interior.
Conclusion
Effective real estate photography lighting starts with reading the property before choosing equipment or changing settings. Assess the direction, contrast and color of the existing light, then add only what the composition needs.
Natural light, bracketing and flash each solve different problems. Test the result, check important surfaces and capture complete, consistent source sets so post-production can refine the image accurately.
Rotider supports property photographers and media teams with photo editing that refines exposure, color and consistency across the final gallery. Clear capture decisions and a well-prepared editing brief help turn that work into dependable, marketing-ready images.