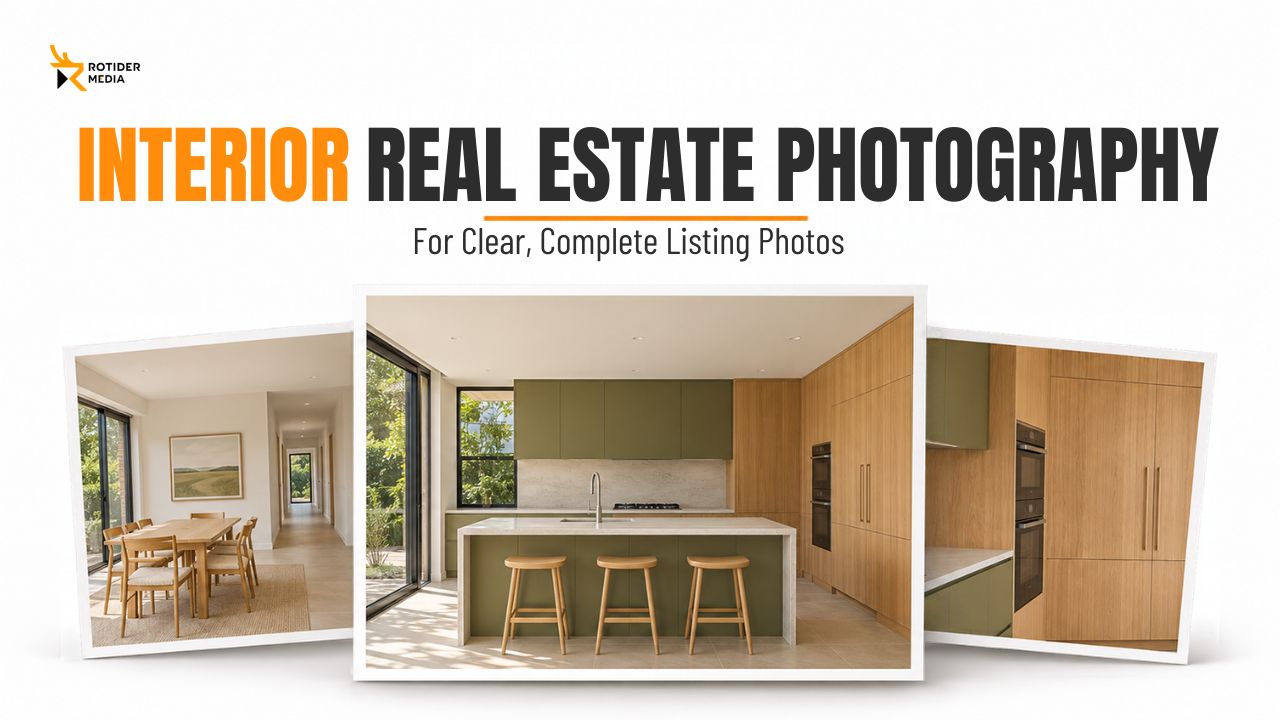
In interior real estate photography, a strong listing gallery shows what each room looks like, how the spaces connect, and which features matter. Start with a shot list and give each frame a job: establish the room, explain the layout, or reveal a feature the wider view misses.
These interior real estate photography tips take you from the initial walkthrough to the final gallery review.
What Should Interior Real Estate Photos Show?
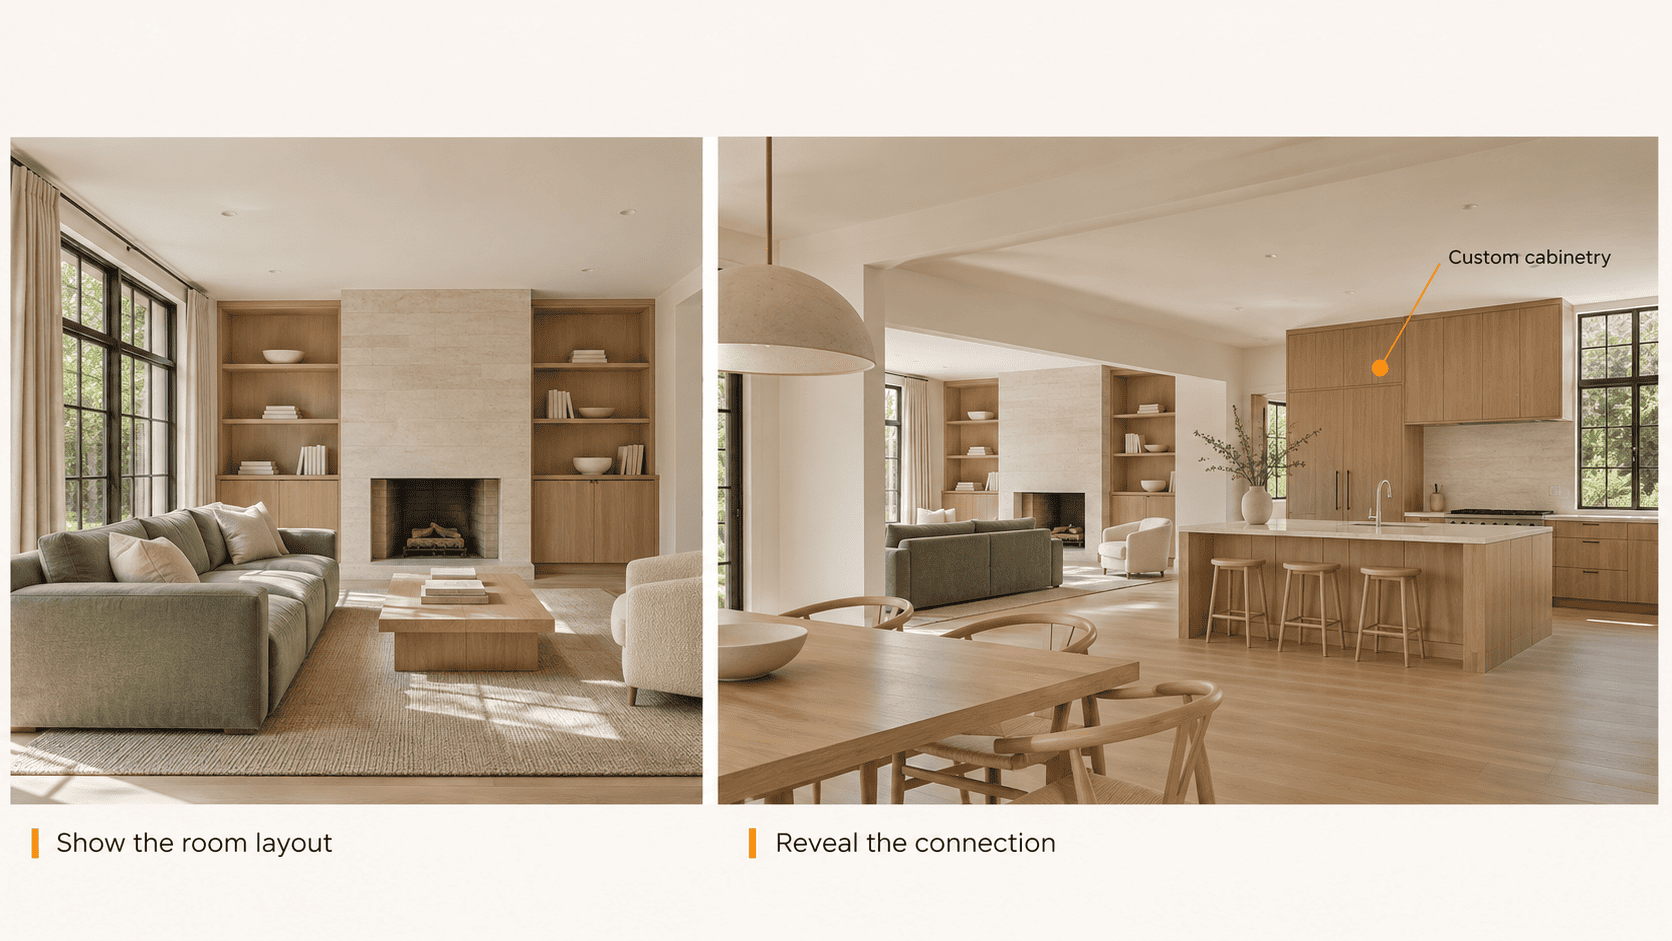
Start with a view that shows the room’s layout and main features. Add another angle if it reveals a connection or detail the first photo misses.
Room Layout and Connections Between Spaces
A wide view should make the room’s purpose and layout clear. Use supporting angles to answer questions the first view leaves open: Where does the hallway lead? Does the kitchen connect directly to the living area? Can you reach the patio from the dining room?
A living room overview might show the seating area and windows while leaving the kitchen out of frame. A second shot from the dining area can show how all three spaces connect.
Permanent Features, Finishes and Important Views
Prioritize permanent features and other details that matter to the listing, such as custom built-ins, fireplaces, renovated bathrooms, or a notable view. Show each feature in context before deciding whether it needs a tighter shot.
A wide kitchen photo can show the island in context. If custom cabinetry is a selling point and the wide view doesn’t show it clearly, add a tighter photo of the cabinetry rather than a close-up of temporary decor.
Prepare the Interior Before Setting Up
Walk Through the Property and Build a Shot List
Walk through the property with the client brief in hand. Note required rooms, features, and connections. If you have a floor plan, use it to identify transitions that may be hard to show in a single photo.
Choose an overview for each required room. For example, if the primary bedroom photo hides the entrance to the attached bathroom, add a second view if that connection matters to the listing.
Remove Distractions and Check Reflective Surfaces
With the homeowner’s or listing agent’s approval, move distracting items such as loose cords, cleaning supplies, and personal belongings out of the frame. Check the edges of the composition before shooting.
Check mirrors, shower glass, and glossy fixtures from the intended camera position. If you see the tripod or flash in a reflection, try a small change in camera height or position before settling on the composition.
Assess Daylight and Interior Fixtures
Note rooms with bright windows, uneven daylight, or fixtures with different color temperatures. If your schedule allows, prioritize rooms where daylight changes quickly.
Test the fixtures from your planned camera position. A pendant can highlight a kitchen feature, while recessed lights may cast warm light across neutral finishes. Compare test frames before deciding which lights to leave on.
Read more: Real Estate Photography Lighting for Natural, Balanced Property Photos
Choose Camera Positions That Explain the Space
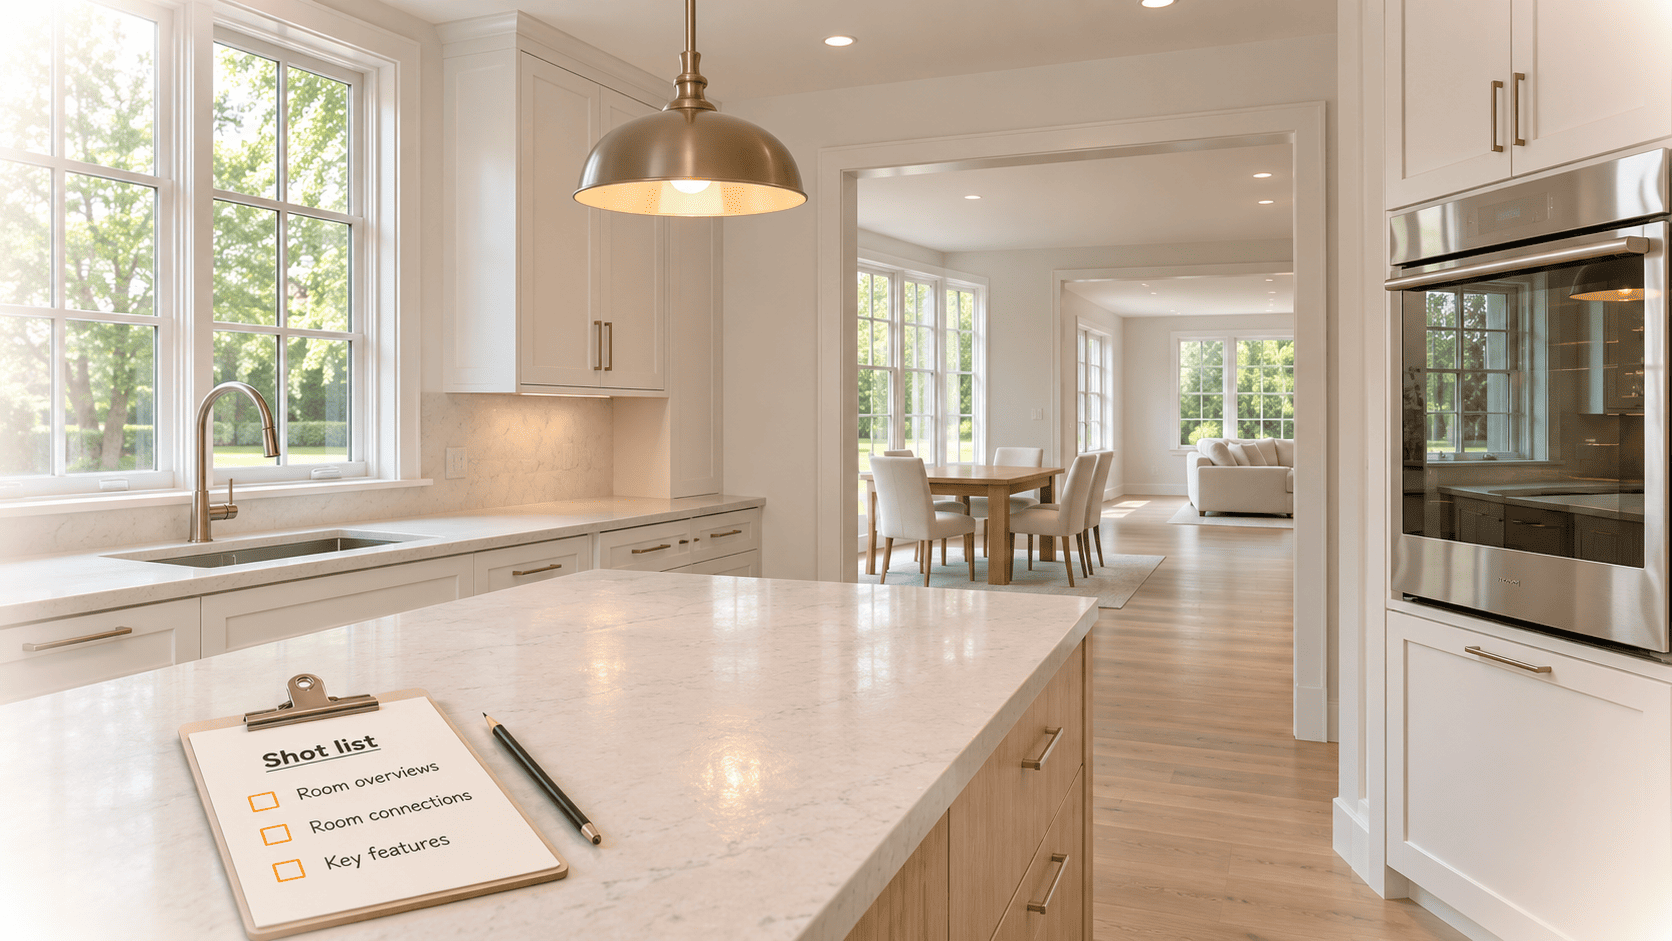
Use Straight-On Views for Alignment and Key Features
A straight-on view works well for feature walls, a centered fireplace, or a run of cabinetry. Aim the lens squarely at the main wall. Center the feature when symmetry helps the composition.
If the straight-on view makes the room look flat or hides an important connection, try a three-quarter view.
Use Angled Views to Show Depth and Connections
Use an angled view to show depth or how one room opens into the next. A doorway is a useful starting point, but check that the doorframe doesn’t block a key feature or dominate the foreground.
In an open-plan space, include part of the dining table and a clear view into the kitchen if both help explain the layout. You don’t need to fit the entire floor plan into one frame.
Adjust Camera Height and Focal Length Without Exaggerating Space
Choose a camera height that shows the surfaces that matter. A slightly higher position can show more of a kitchen countertop. In a living room, adjust height and framing so the ceiling doesn’t dominate the image. Use the camera’s level or grid to check verticals. Avoid tilting up or down unless the composition calls for it.
If a nearby sofa or vanity looks disproportionately large, step back if the room allows. Once the proportions look right, choose a focal length that gives you the framing you need.
Read more: Best Focal Length for Real Estate Photography
Set Exposure and Lighting for Interior Photos
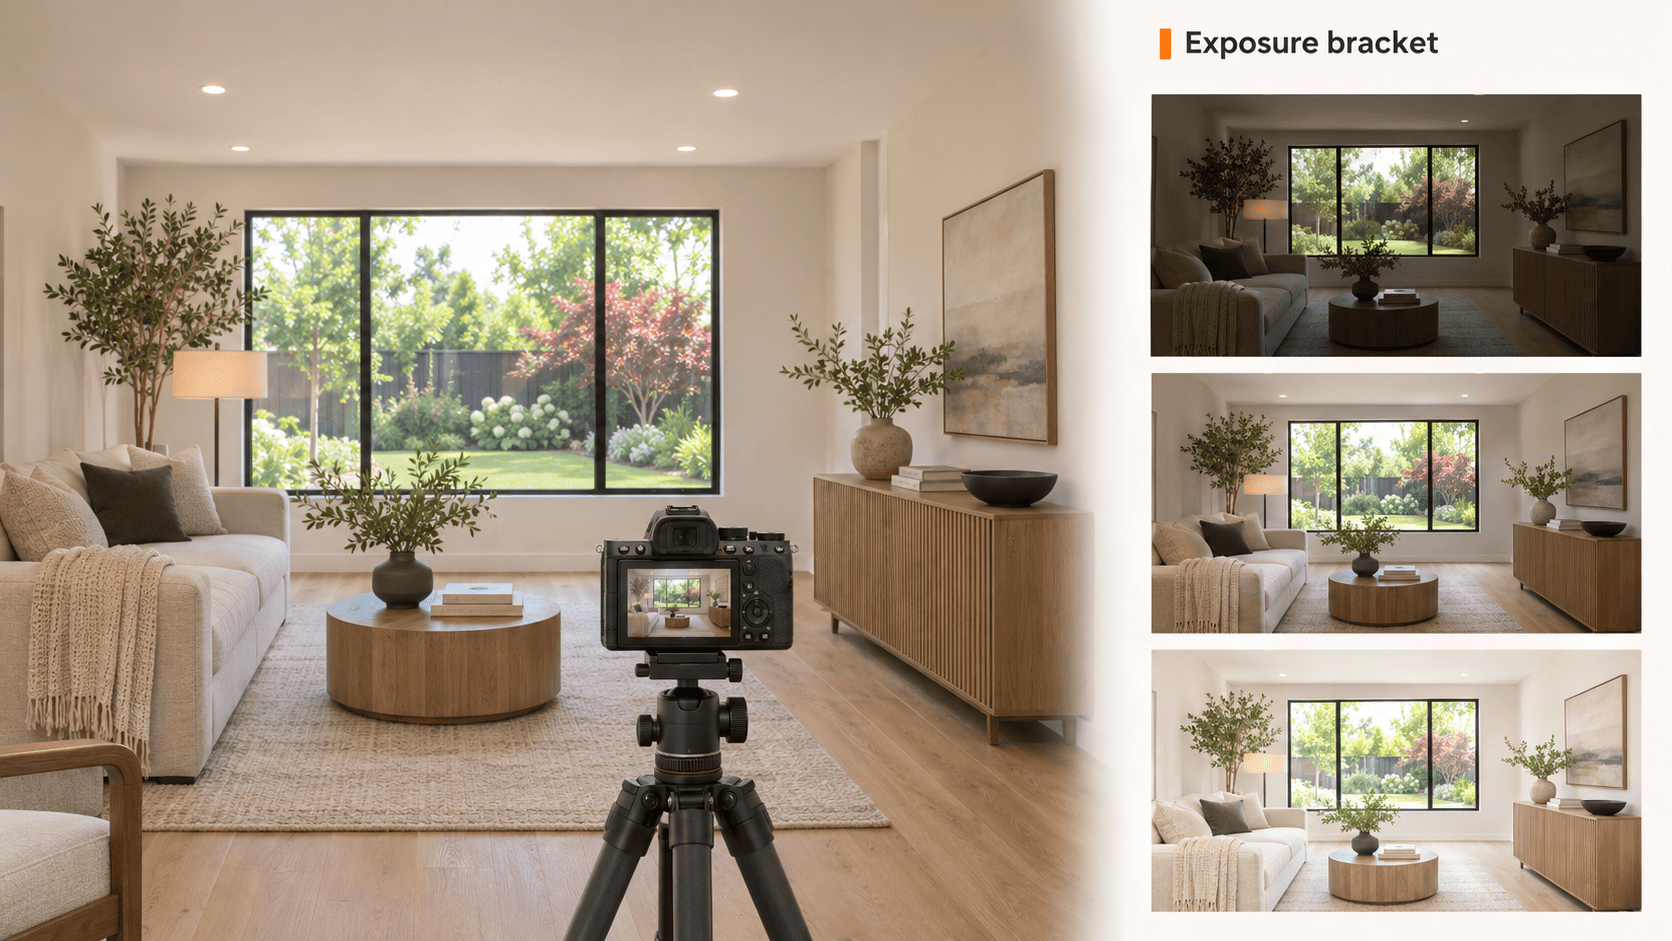
Start with a Stable Camera and Appropriate Depth of Field
Use a sturdy tripod for long exposures or bracketed sequences. Choose an aperture and focus distance that keep important near and far features acceptably sharp.
Magnify a test frame in playback to check critical detail, especially when a countertop or piece of furniture is close to the camera.
Read more: Real Estate Photography Camera Settings for Sharp, Balanced Photos
Decide Between a Single Exposure, Bracketing and Added Light
Use a single exposure if it captures the interior and the highlight detail you need. If the view outside matters and one exposure can’t retain both, capture a bracketed set for HDR merging.
Adobe’s HDR Photo Merge guide explains how Lightroom Classic combines bracketed exposures. If movement between frames causes visible artifacts, try deghosting and check the preview. The merge can retain detail in bright windows and darker interiors when the source frames capture it.
If the problem is the direction or coverage of the light, address it at capture. Bracketing gives you more exposure data, but it won’t move a harsh shadow or illuminate an area that needs a different light source.
Check Window Detail, Color Casts and Reflections
Check window detail, color casts, and reflections separately. Look for color shifts across large surfaces such as cabinetry and ceilings. Inspect mirrors, glass, and glossy appliances for unwanted reflections.
Decide how much of the view matters to the listing. Preserve useful exterior detail, and let the window remain brighter than the room when that reflects the scene.
Build a Complete Interior Listing Gallery
Capture Overviews Before Supporting Angles
If you’re learning how to photograph house interiors, use this shot list to choose the first view for each room and decide when another angle adds useful information.
|
Space |
Start with this overview |
Add this if it explains something new |
Skip this if it repeats the overview |
|
Living room |
Show the seating area and the main feature, such as a fireplace or window wall. |
Show the opening into the dining area or access to the patio. |
A nearby angle showing the same seating and windows. |
|
Kitchen |
Show the main work area, cabinetry, and island or peninsula. |
Shoot from the adjoining room to show how the kitchen connects to the rest of the home. |
A slight shift that reveals no new work area or feature. |
|
Dining area |
Frame the dining area with enough context to show where it sits. |
Include the kitchen or outdoor access if the overview hides that connection. |
A close-up of table decor that says little about the property. |
|
Bedroom |
Show the room layout, windows, and usable space around the bed. |
Show a walk-in closet entrance, ensuite access, or built-in storage if relevant. |
A reverse angle that shows little beyond the same bed and a blank wall. |
|
Bathroom |
Show the arrangement of the vanity, shower, or tub as clearly as the space allows. |
Add a view of a distinct feature that the overview cannot show clearly. |
A second tight angle that repeats the same fixtures. |
|
Entry, hallway, or stairs |
Show where the route begins and what it connects to. |
Add a landing or reverse view if the relationship between floors is unclear. |
A corridor photo that shows no useful destination or feature. |
Show Transitions Without Repeating Similar Compositions
For example, a kitchen overview can show the work area and counters, while a view from the living room may explain how the kitchen connects to the dining area.
Describe what each photo adds in one sentence. If two photos show the same features and connections, leave out the weaker one.
Laundry Rooms, Utility Rooms, and Closets
For laundry room real estate photography, start at the doorway and show the appliances and the space around them. Add a second angle only if it reveals a useful feature, such as a sink or folding counter. For utility room photography, show access and storage if they matter to the listing.
For closet real estate photography, show how the space is organized and whether there is room to move. For walk-in closet photography, include the passage between storage units. For dressing room photography, include a built-in vanity or dressing area if it helps explain how the room is used.
Add Detail Photos When They Communicate Property Features
Use a detail shot when the overview doesn’t show a feature clearly, such as the finish on a restored fireplace or the hardware on custom cabinetry. Include enough of the surroundings to show where the feature sits.
If the wider view already shows the feature clearly, skip the close-up.
Check Your Interior Photos Before Leaving
Verify Focus, Coverage and Complete Exposure Sets
Before leaving, check the required rooms and features against the shot list. Magnify key frames to verify focus and confirm that bracketed sets contain usable detail in the highlights and shadows you need.
Check whether the photos show how the key rooms connect. If that view is missing, capture it before packing up.
Compare Brightness, Color and Perspective Across Connected Spaces
Review adjoining rooms side by side. Check for unexpected color shifts in shared finishes and make sure any doorway shown from both sides is easy to place in the layout.
Keep natural differences in light. One room can be warmer or brighter than the next and still look consistent with the rest of the property.
Edit Interior Real Estate Photos for Consistent Delivery
Balance Exposure and Color While Preserving Materials
Select the strongest composition for each required view. If a view needs HDR blending, keep the full set of bracketed RAW files together.
Preserve the character of the materials when adjusting exposure and color. A dark hardwood floor should retain its texture and depth rather than matching the brightness of nearby walls. Compare finishes that appear in multiple frames.
Refine Perspective and Review the Complete Gallery
Use doorframes and cabinet edges as guides when correcting perspective. Lightroom Classic’s Upright and Transform controls can help straighten verticals. After correcting the image, check that the crop hasn’t cut off important features.
Review the exported photos in listing order. Check that transitions are easy to follow, supporting angles add useful information, and shared finishes look consistent. See our real estate post-production guide for the next steps in the editing workflow.
Frequently Asked Questions
How to Photograph a Laundry Room
Start from the doorway if it shows the appliances and the space around them without exaggerating their size. Add a tighter view only when it reveals a feature the overview misses.
How Many Interior Photos Does a Listing Need?
There is no fixed count. Start with an overview of each room the listing needs to show. Add views when they explain a connection, reveal a feature, or show a part of the room the overview misses. An open-plan main floor may need several views; a compact laundry room may be clear in one.
Should Every Room Be Photographed From a Corner?
No. A corner can show depth, but a straight-on view may explain a feature more clearly, and a doorway may show the room in relation to the hall. Choose the position that answers the most useful question about the space.
Should Interior Lights Be On or Off?
Keep fixtures on when they help show a feature or illuminate an area that daylight does not reach. Turn off selected lights if they introduce distracting color casts or reflections. Take two test frames from the same position if the choice is unclear.
How Do You Photograph Small Interiors Without Distorting Them?
Start from a doorway or another position that gives you enough distance from nearby fixtures. Keep the camera level and avoid placing large objects near the frame edges. If one wide shot makes a vanity or sofa look disproportionately large, two tighter views can represent the space more clearly.
Conclusion
In interior property photography, a complete gallery makes the layout easy to follow and shows features clearly. Before delivering it, check that the images work together and that the color, perspective, and brightness feel consistent from room to room.
If you outsource editing to Rotider, group original files by camera angle and keep each bracketed set together. Flag important window views and finishes, and include an approved reference if the gallery needs to match a specific look.