
June 25, 2025
Photo Editing
Step-by-Step Tutorial for Editing Real Estate Photos in Lightroom
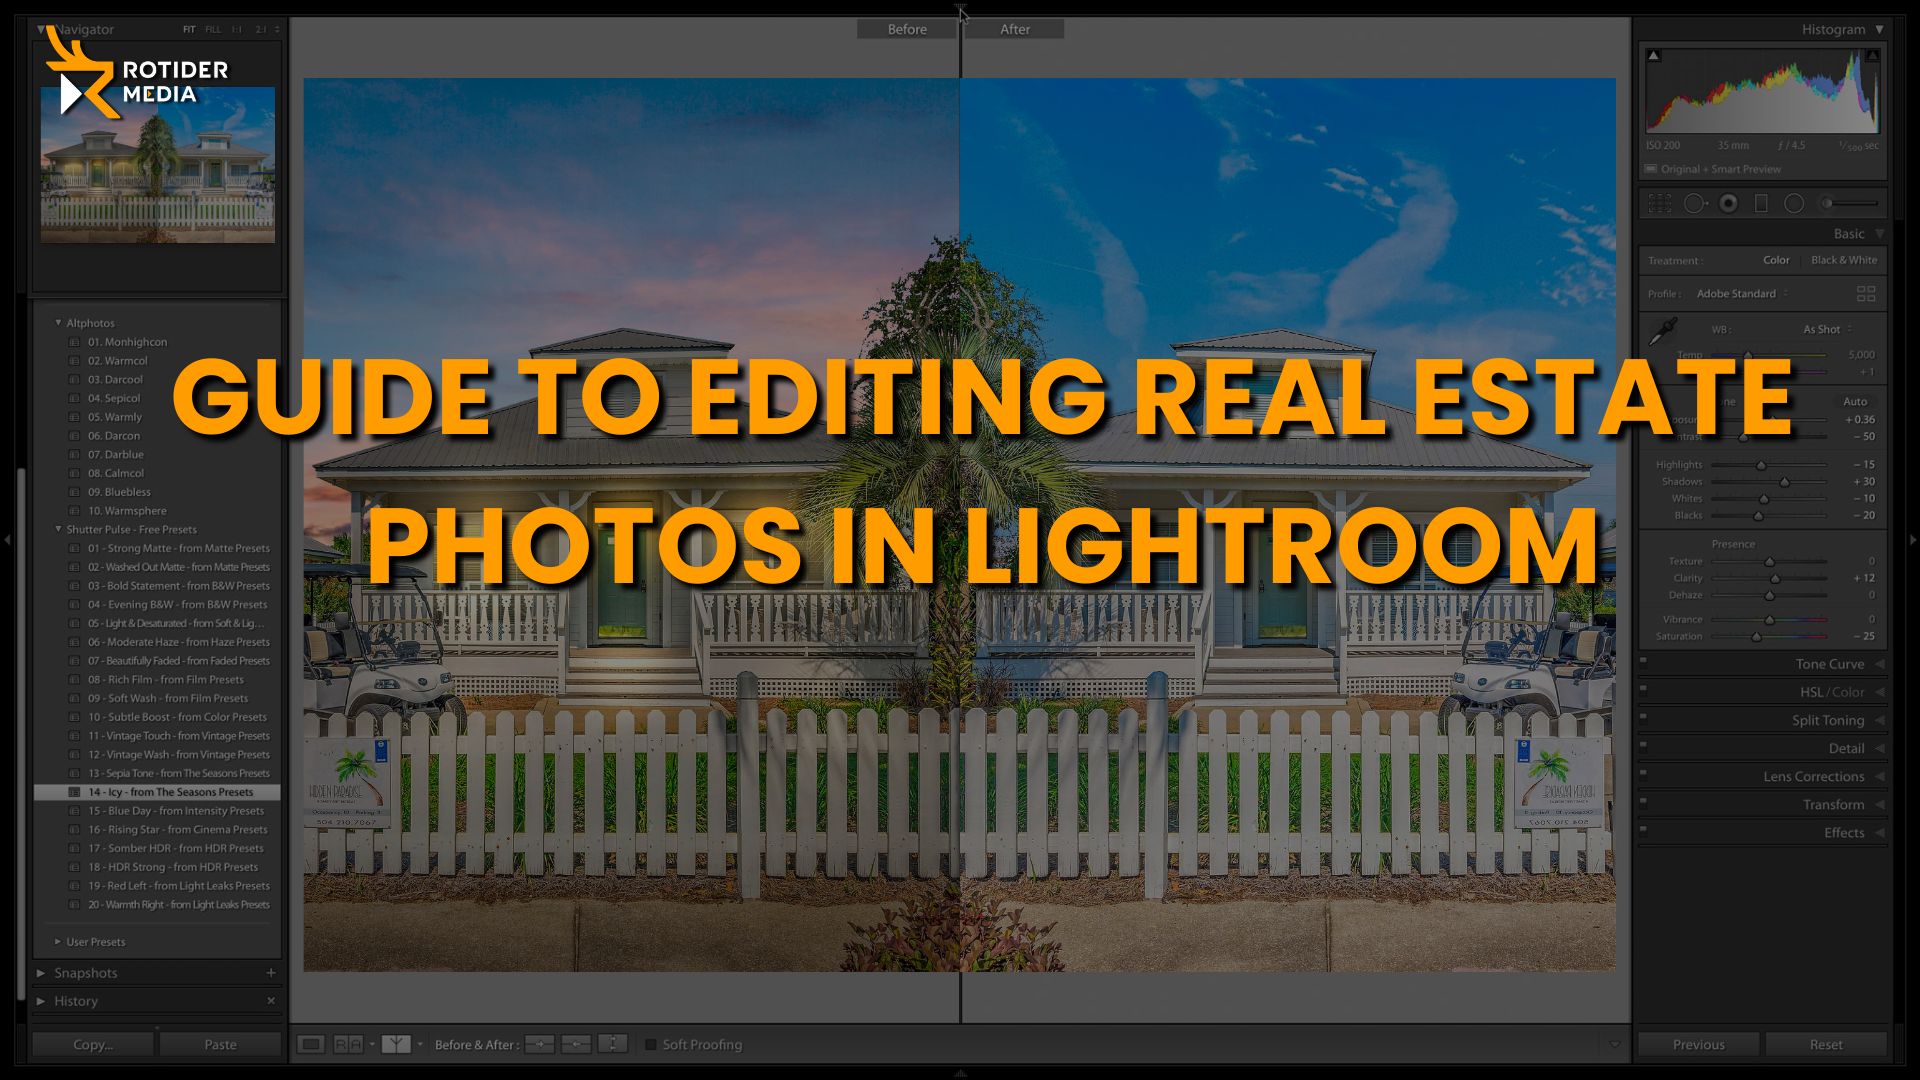
Lightroom is an ideal real estate photo editing tool that helps enhance your listing. Whether you are a professional photographer or an agent who wants to edit your photos yourself, you can use it. In this article, you will be guided to editing real estate photos in Lightroom that will help your images attract buyers at first sight.
Introduction to Editing Real Estate Photos in Lightroom
Editing real estate photos in Lightroom is one of the easiest ways to make property images look brighter, cleaner, and more professional. With the right adjustments, you can correct exposure, fix color balance, straighten vertical lines, recover window details, and create a consistent look across the entire listing.
For beginners, Lightroom is a practical tool because it offers a simple workflow for handling the most important real estate photo editing tasks. Instead of editing every detail manually from scratch, you can use tools such as Lens Correction, Transform, Exposure, Highlights, Shadows, White Balance, Masking, and Healing to improve a photo step by step.
In this guide, you will learn how to edit real estate photos in Lightroom using a basic, beginner-friendly process. We will cover the essential tools, the correct editing order, common mistakes to avoid, and when it may be better to outsource professional real estate photo editing.
Step-by-step guide to editing real estate photos in Lightroom
Adobe Lightroom provides essential tools for editing real estate photos, from basic exposure adjustments to advanced HDR and local masking. Below is a step-by-step guide to applying these features effectively:
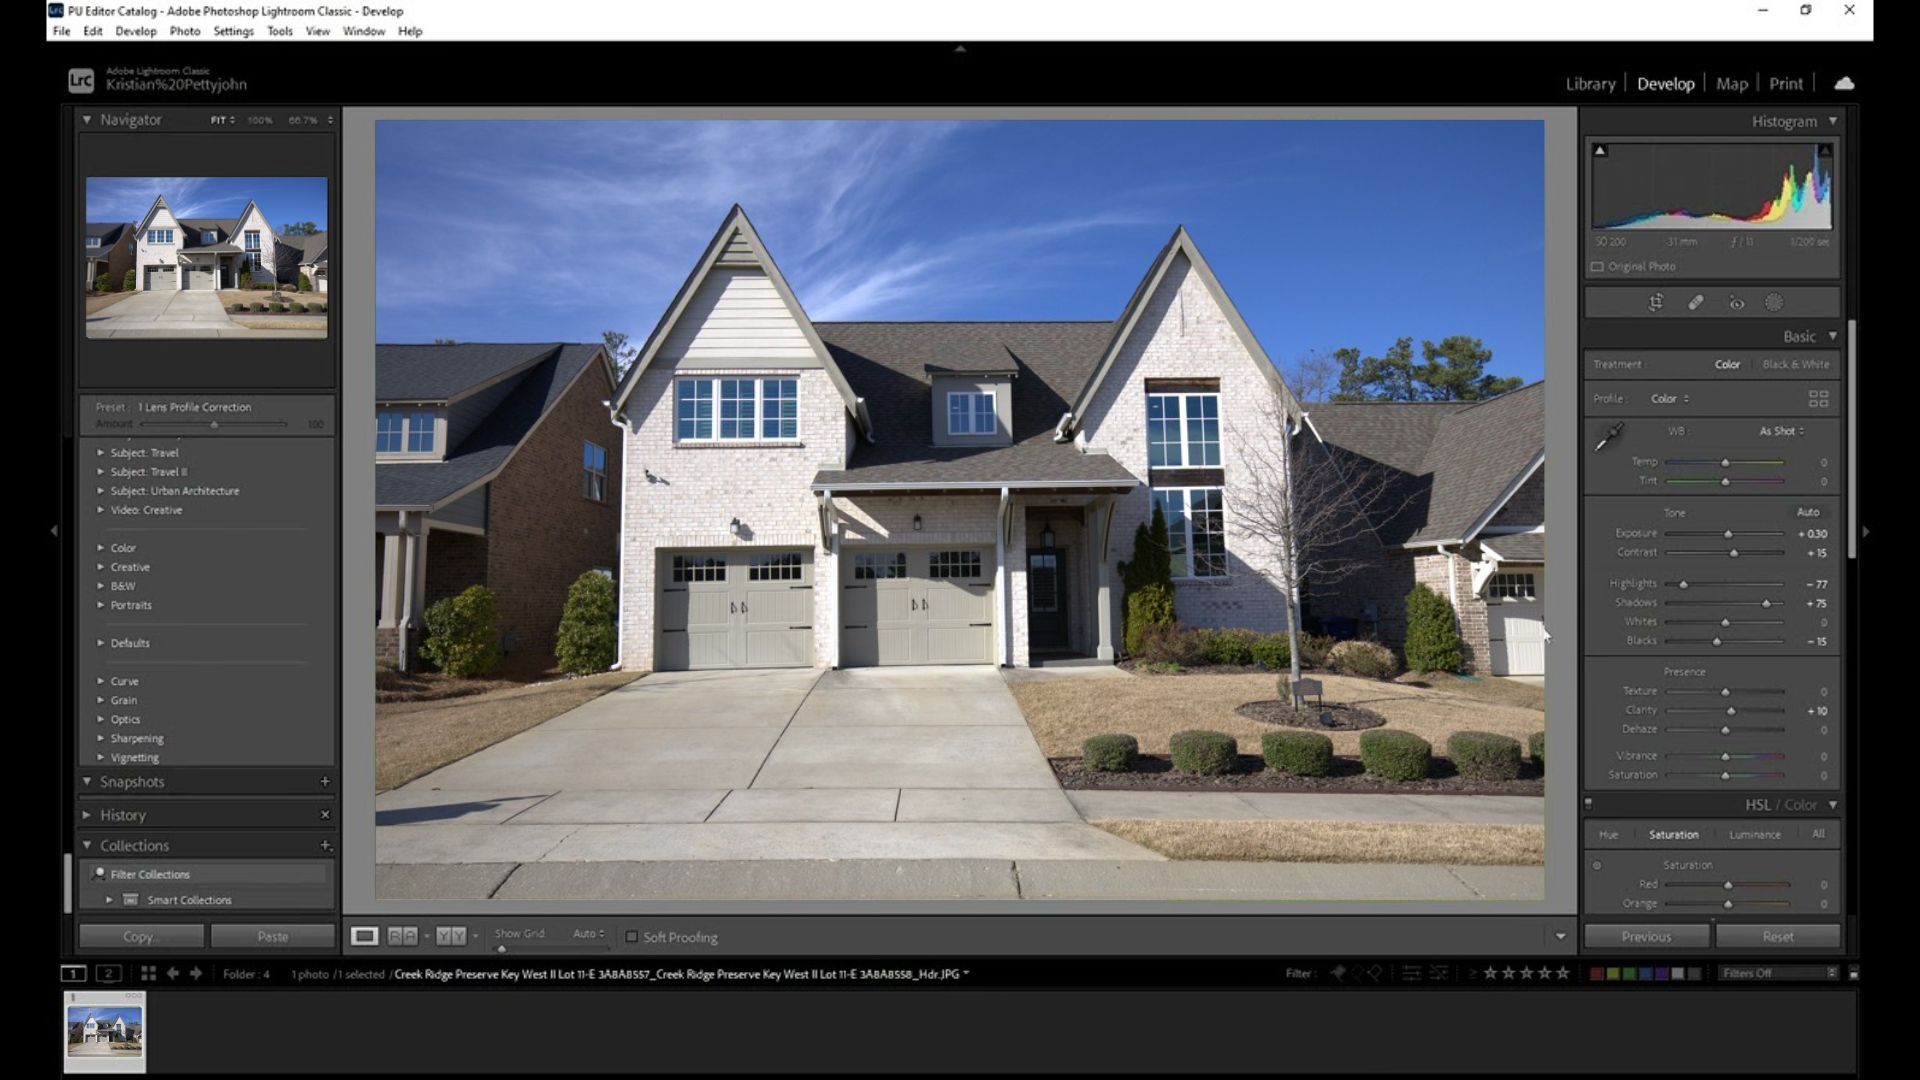
Import photos into Lightroom
Start by importing your images into Lightroom Classic:
- Open the Library module and click Import in the bottom-left corner.
- Select the folder containing your images (Shooting in RAW format is highly recommended, as it provides greater flexibility for exposure and color adjustments)
- On the right panel, choose the destination folder. You can also add keywords, metadata, or apply a preset to streamline your workflow.
- Click Import to add the photos to Lightroom’s catalog
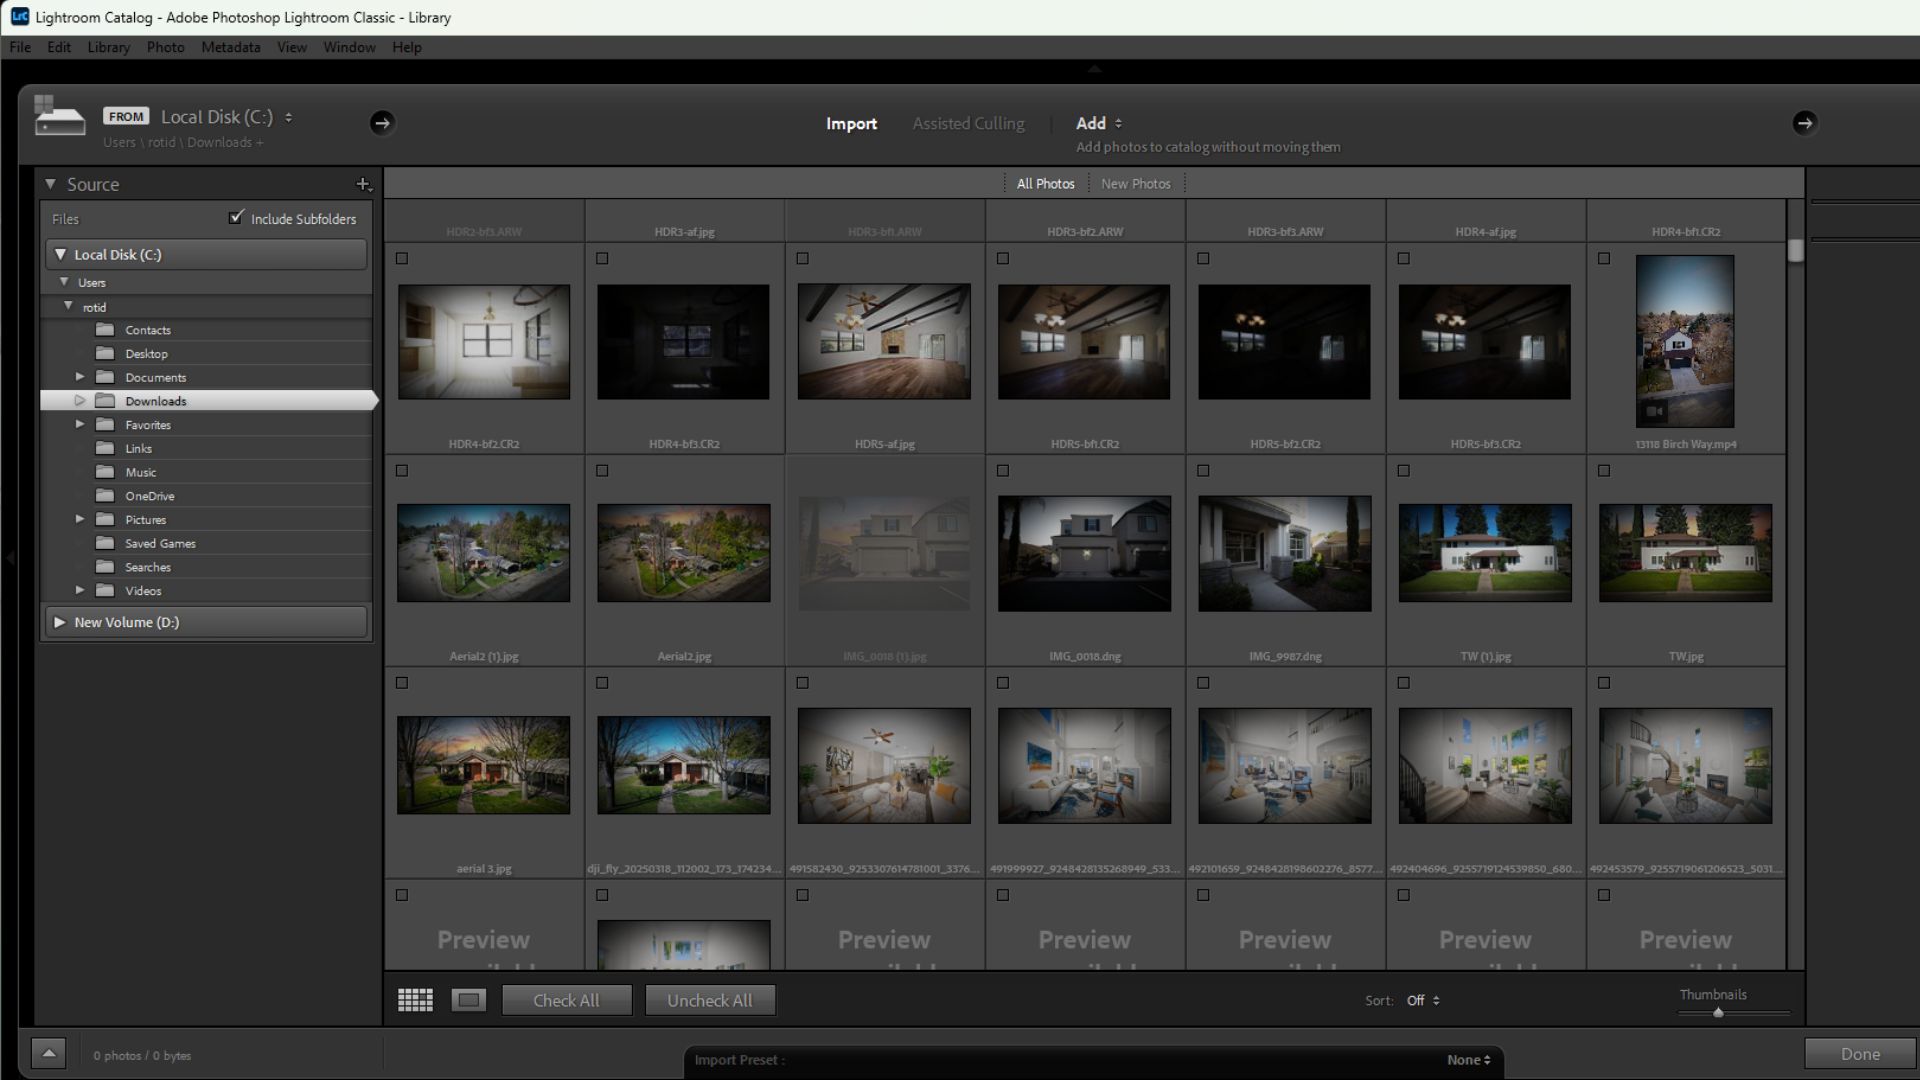
Select photos to edit
Once the images are imported, review and select the best shots.
Press G to enter Grid View. Flag your preferred images using P, or rate them with 1–5 stars. After selecting the final images, switch to the Develop module to begin editing
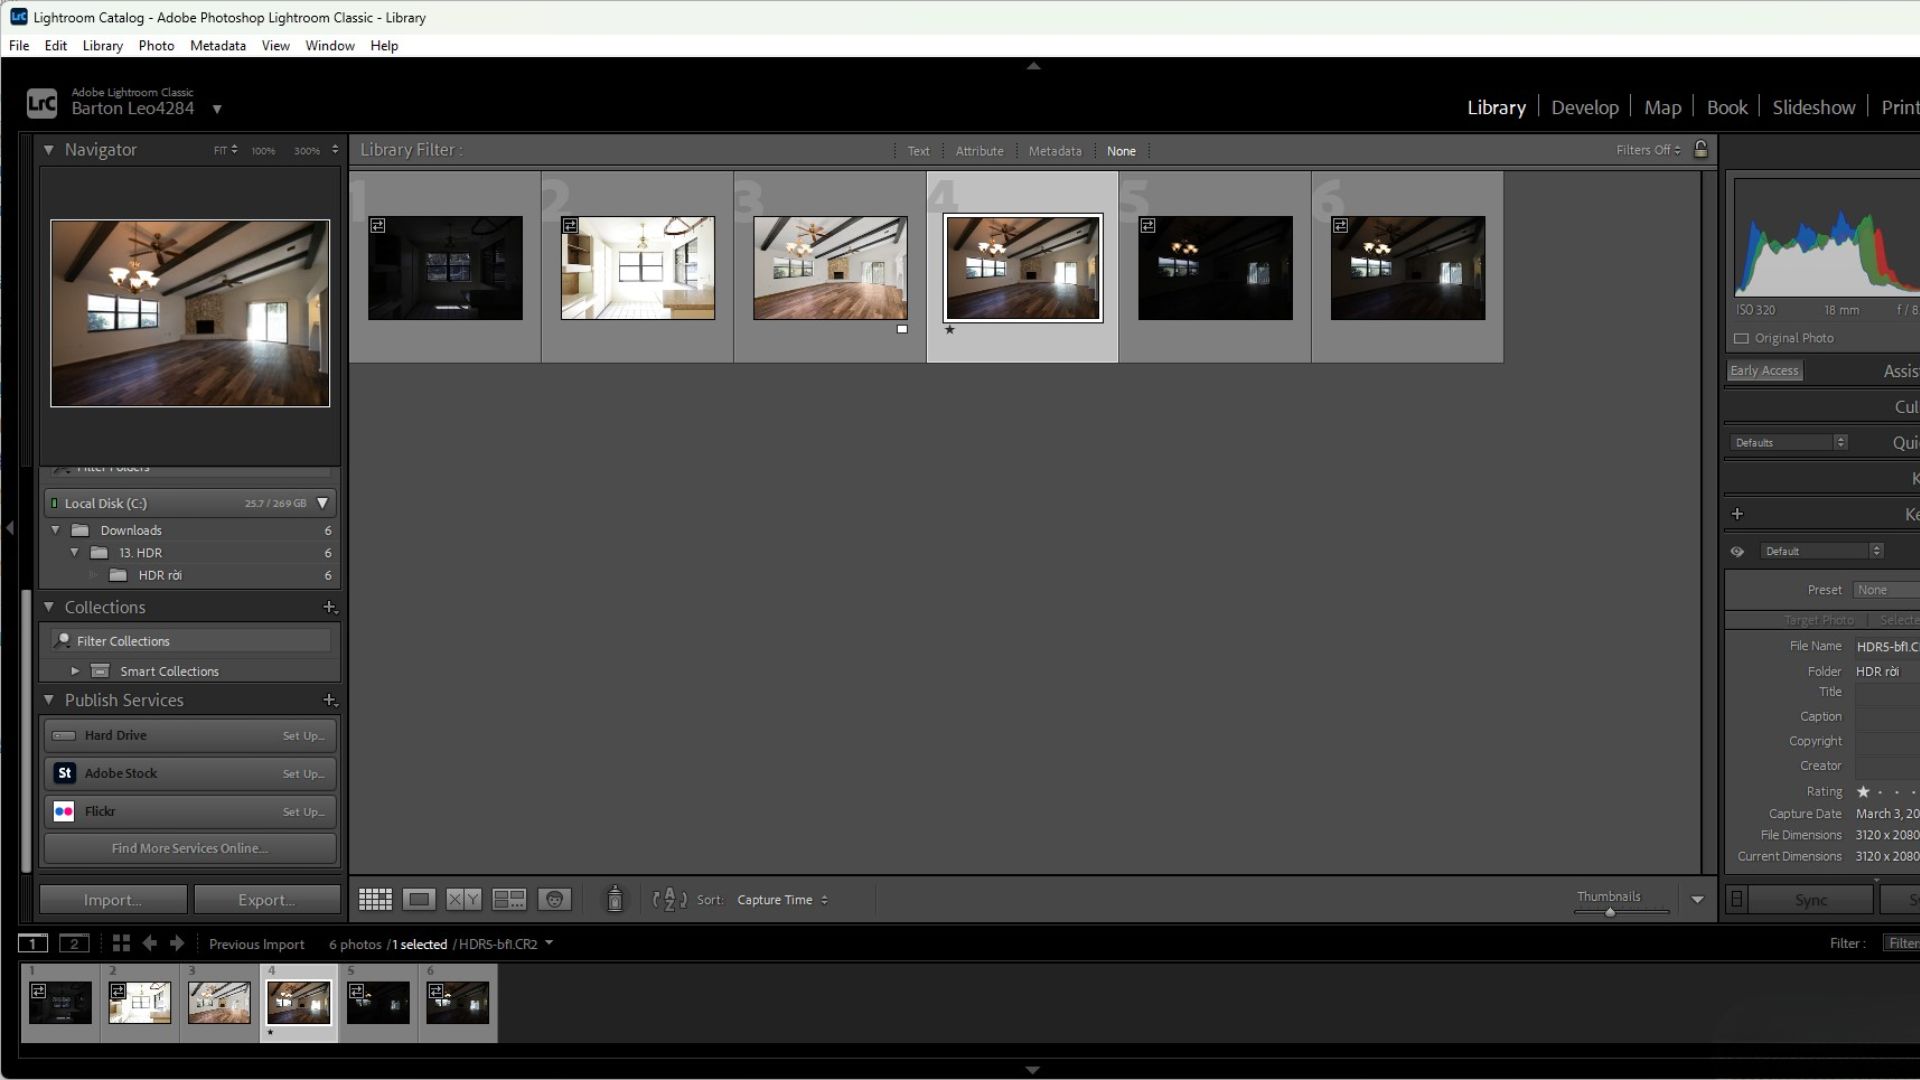
Basic adjustments for real estate photos
Basic adjustments form the foundation of real estate photo editing and ensure balanced lighting and natural colors.
Light adjustments
In the Develop module, start with the Basic panel:
- Exposure: Adjust overall brightness
- Highlights: Recover details in bright areas, such as windows
- Shadows: Brighten dark interior spaces
- Whites / Blacks: Define white and black points to improve contrast
- Contrast: Add depth and separation between tones
White balance correction
Accurate white balance creates a clean and inviting atmosphere.
- Use the WB Eyedropper to click on a neutral white or gray area
- Or adjust manually:
- Temperature: Warmer for a cozy feel, cooler for a modern look
- Tint: Correct green or magenta color casts
Clarity, texture, and dehaze
- Texture: Enhances fine surface details such as wood or stone
- Clarity: Increases midtone contrast for a sharper appearance
- Dehaze: Reduces haze and adds depth to flat lighting
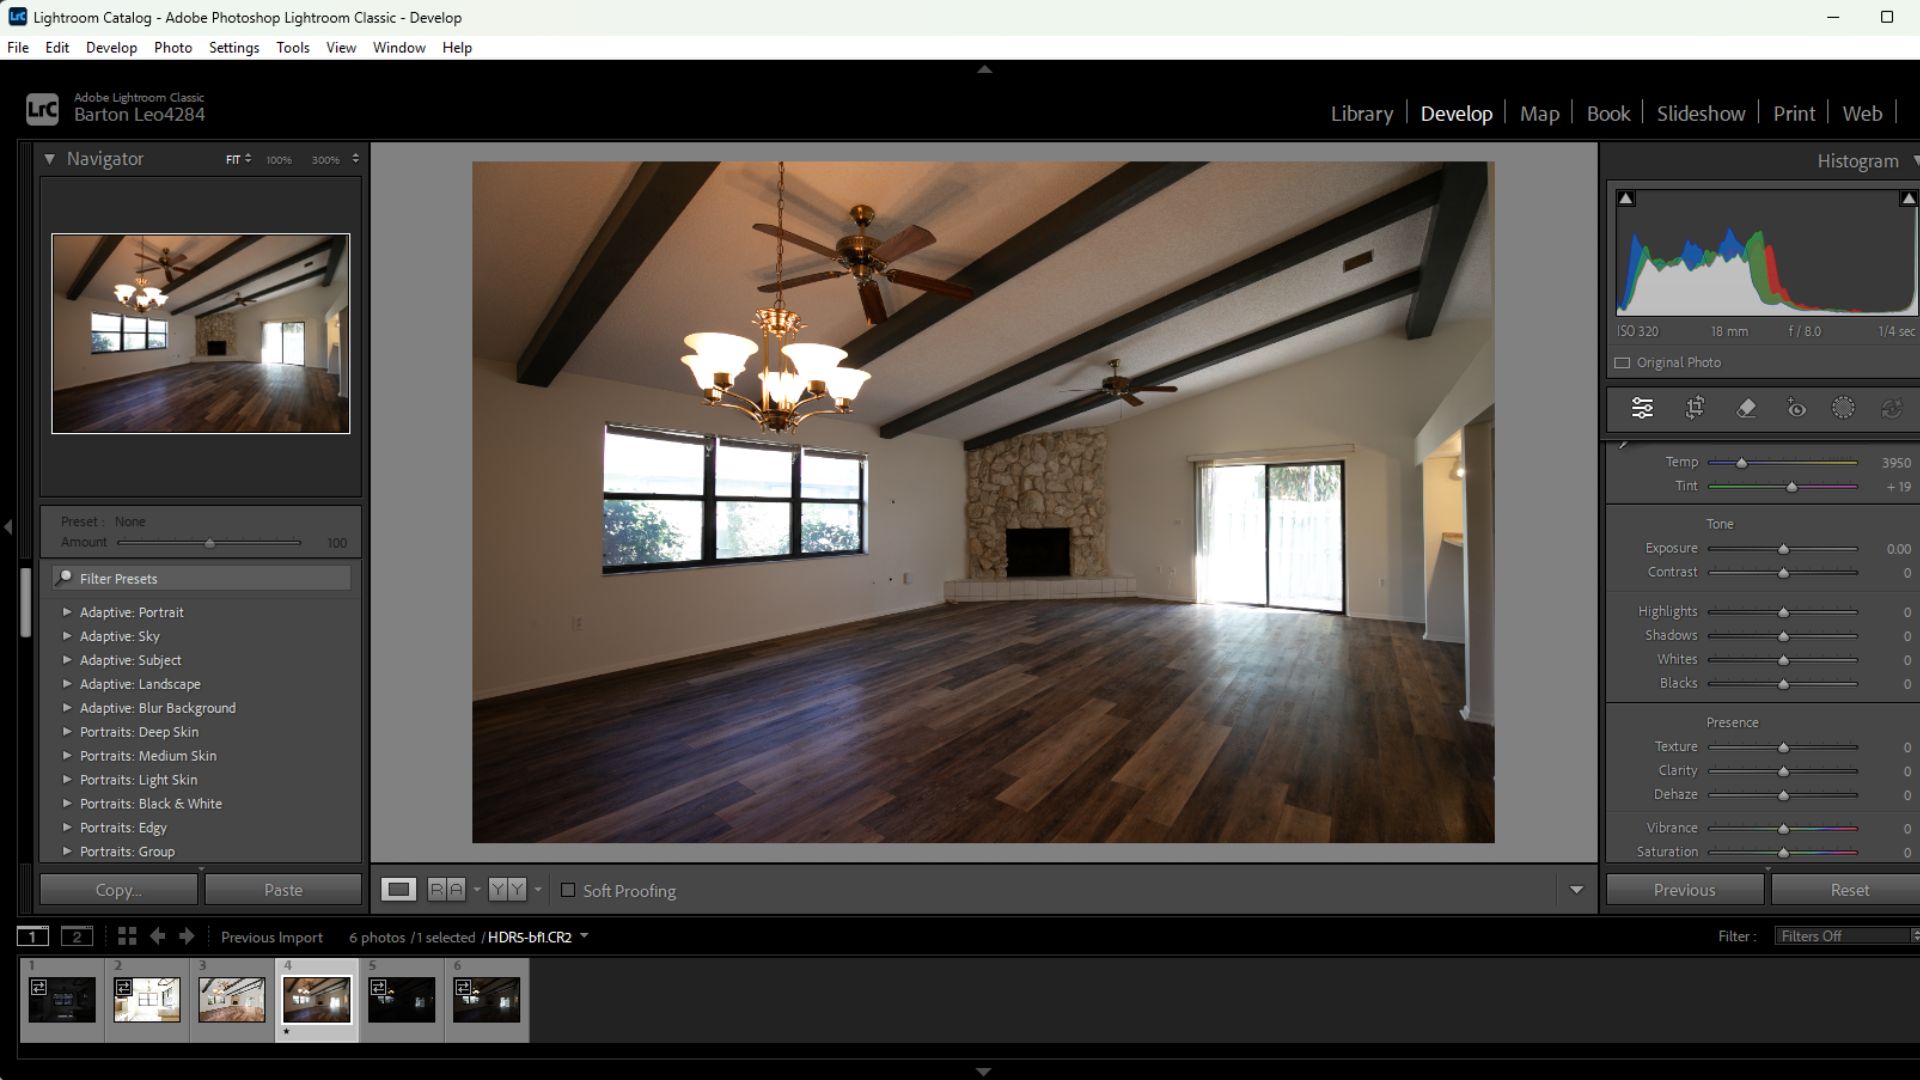
Crop and straighten
Press R to open Crop Overlay:
- Crop the layout neatly
- Use Auto or Vertical to align with walls and doors
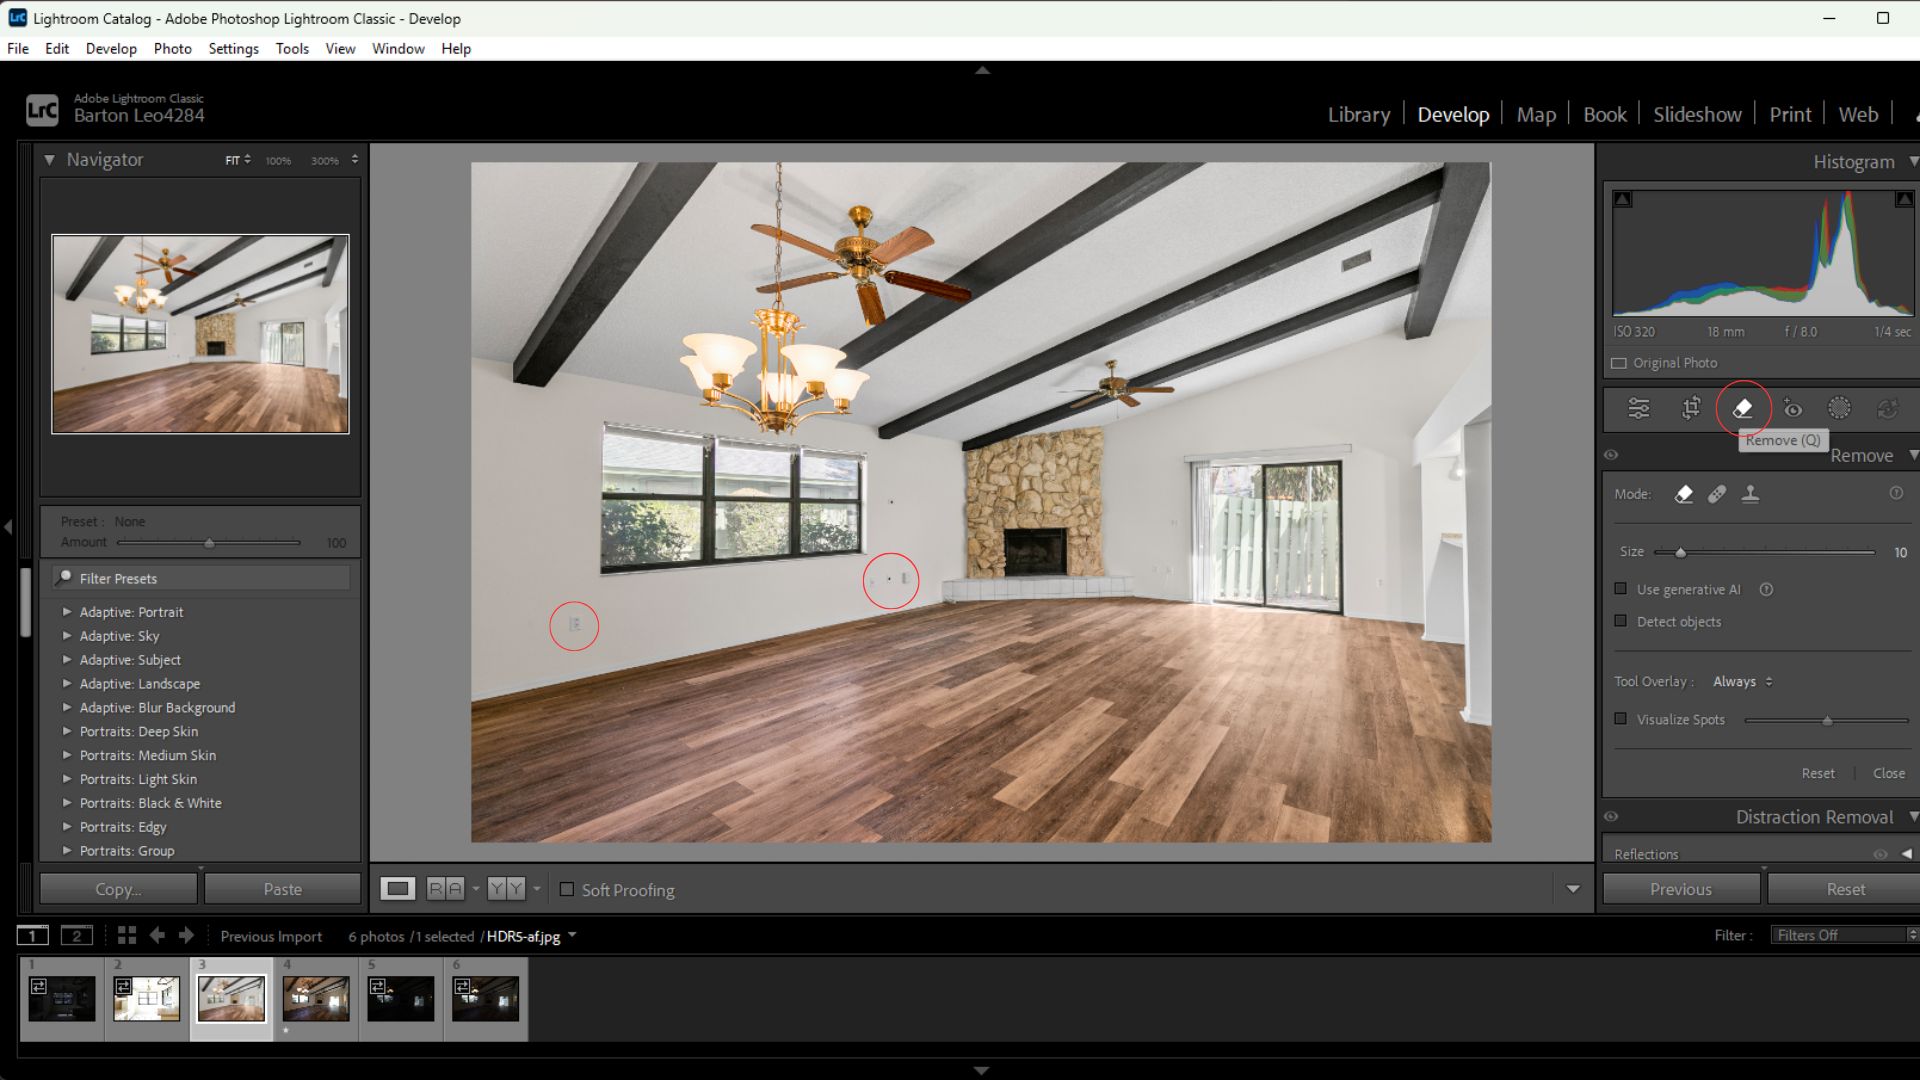
Remove unwanted objects in Lightroom
Real estate photos often contain small distractions such as trash bins, power outlets, cables, or wall marks.
Use the Remove Tool or Healing Tool:
- Choose Content-Aware Remove
- Brush over the unwanted object
- Lightroom automatically fills the area with surrounding textures
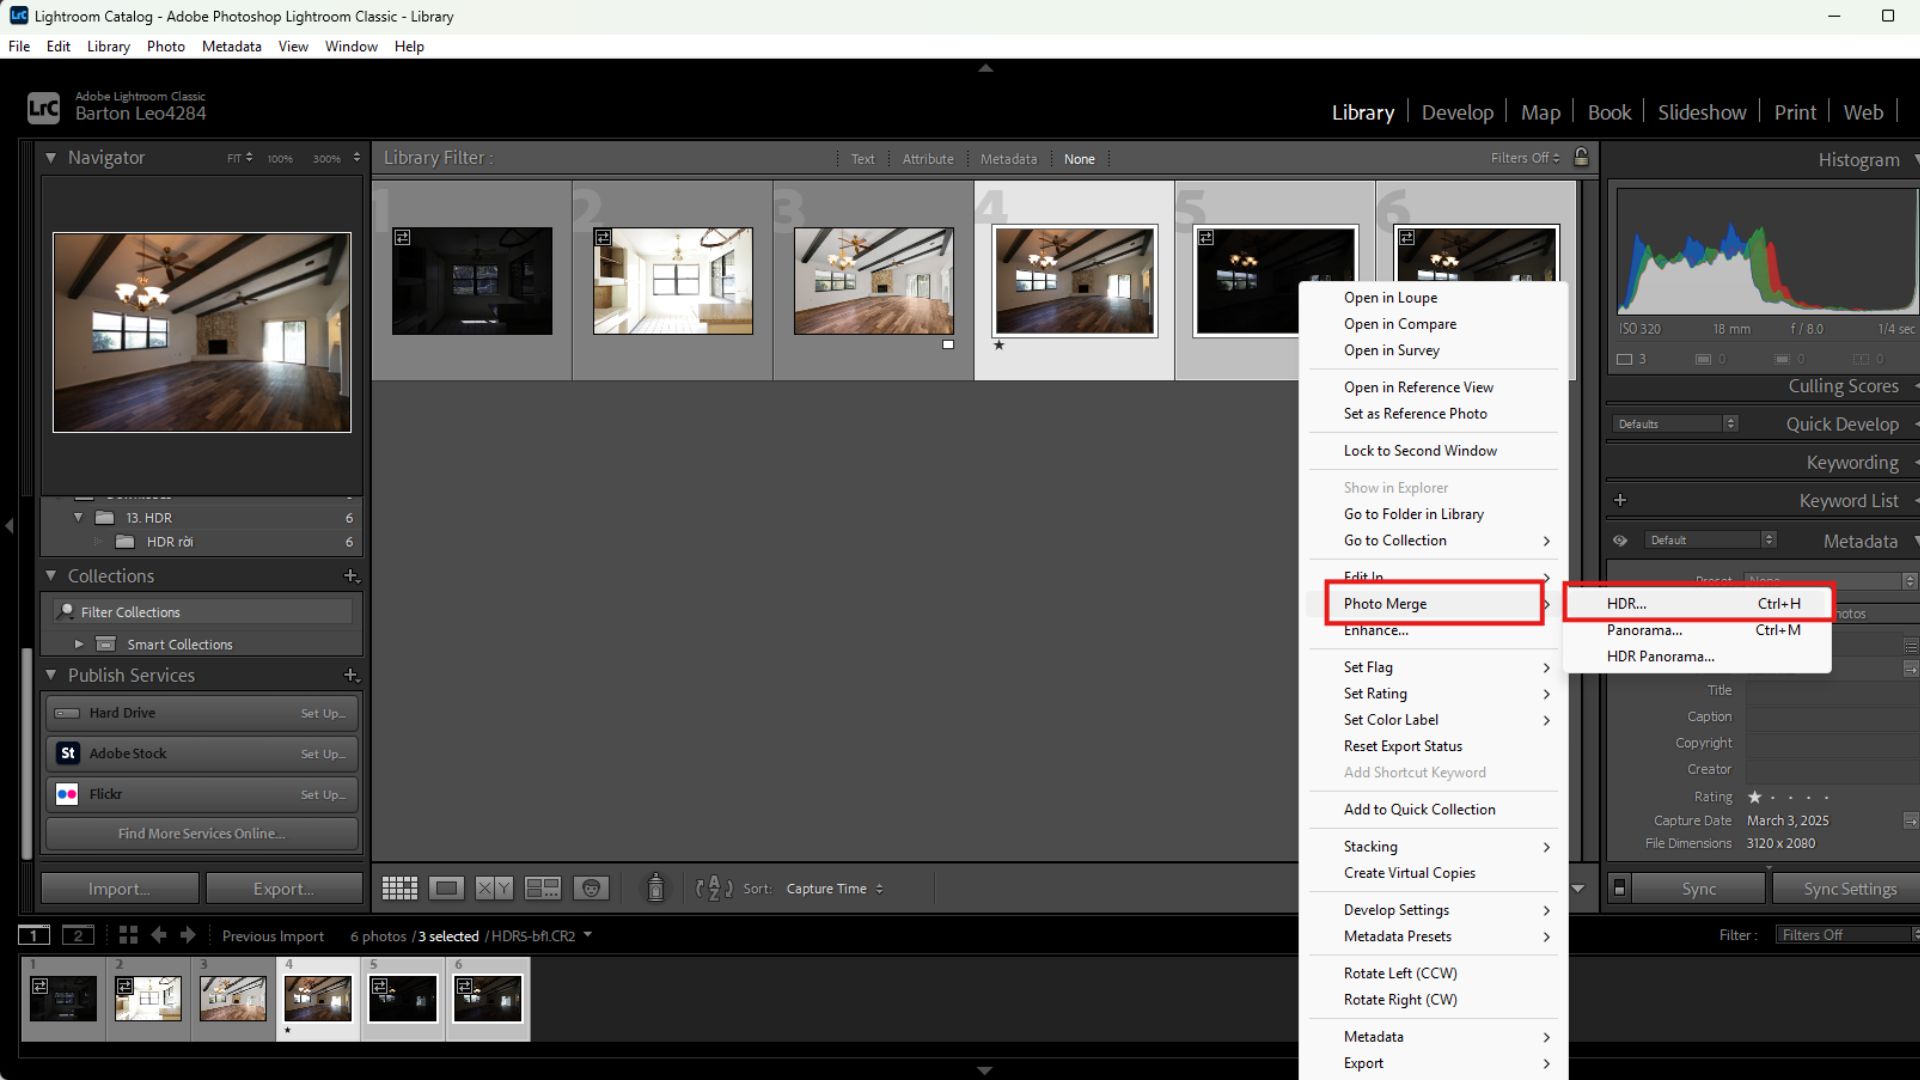
HDR blending for real estate photos
HDR blending is essential for scenes with extreme light contrast.
In the Library module:
- Select bracketed images
- Right-click → Photo Merge → HDR
- Adjust Deghost if needed
- Click Merge
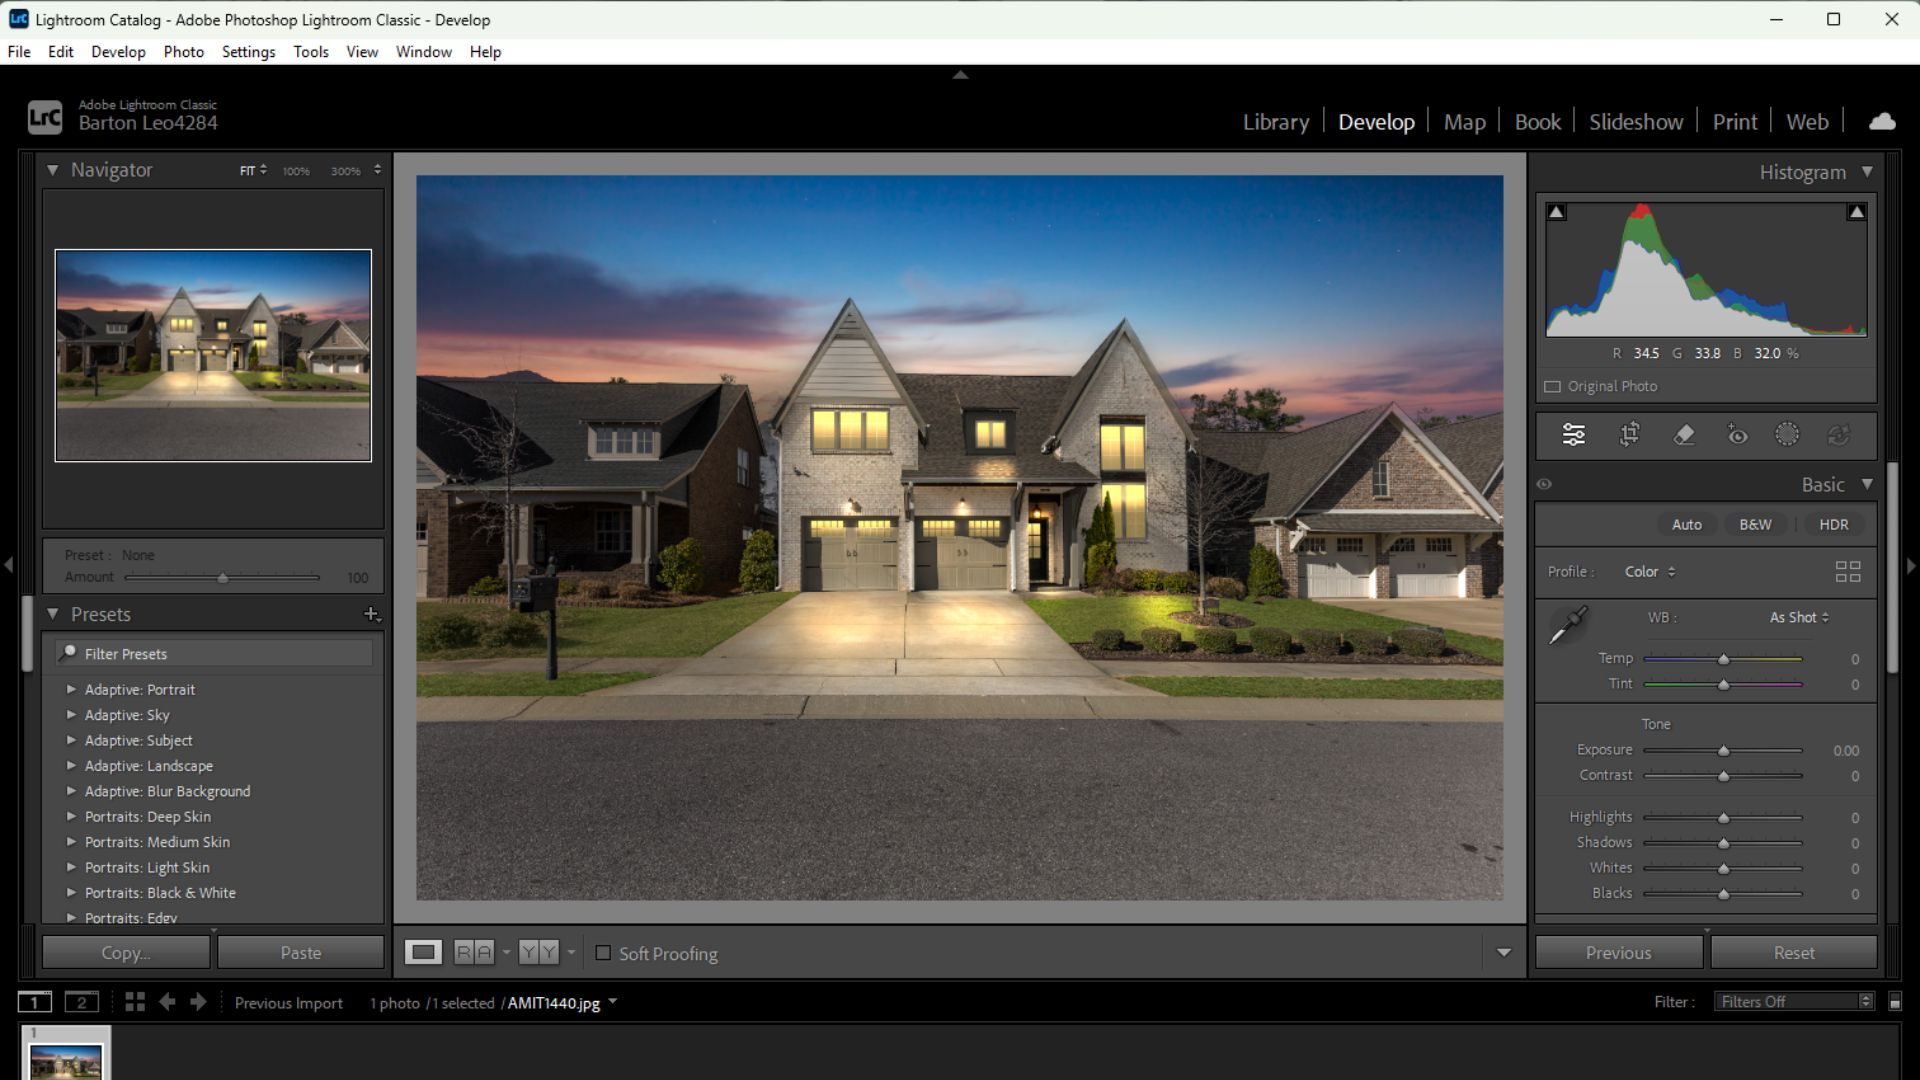
Day-to-dusk editing in Lightroom
Day-to-dusk editing transforms a daytime exterior photo into a warm twilight scene.
Basic steps include:
- Slightly lower Exposure
- Cool down the sky using Temperature
- Apply a Graduated Mask to darken the sky
- Use a Brush to enhance interior and exterior lighting
- Fine-tune Highlights and Whites to make lights glow naturally
Synchronize settings across multiple photos
To maintain consistency and save time:
- Fully edit one reference photo
- Select similar images using Shift + click
- Click Sync in the Develop module
- Choose settings such as Light, Color, and Lens Corrections
- Click Synchronize
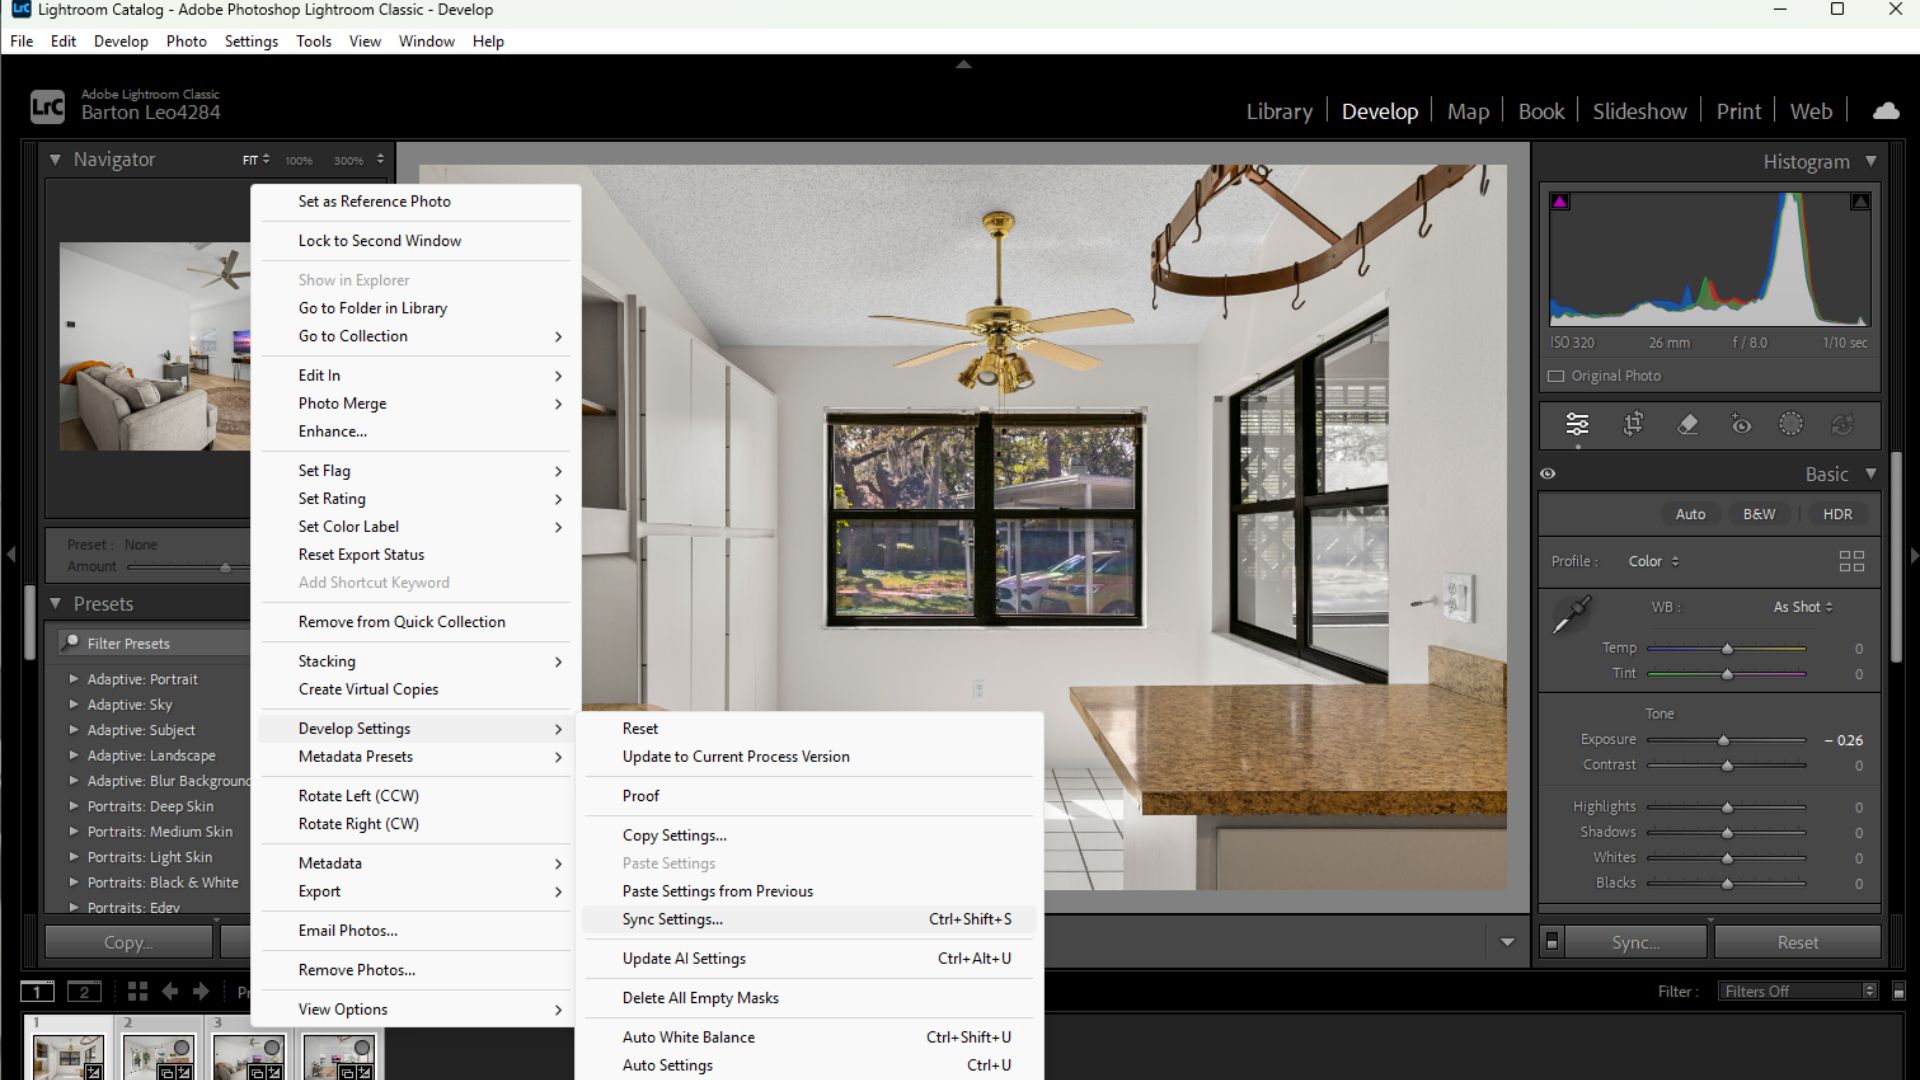
Final review in Grid View
Before exporting, return to Grid View by pressing G
- Review all images together
- Check consistency in lighting, color, and composition
- Flag or rate final images for export
This step ensures professional quality and visual consistency.
Basic Lightroom Settings for Real Estate Photos
Before jumping into advanced techniques, nailing your foundational settings is what separates a flat snapshot from a professional listing image. These core adjustments apply to nearly every real estate photo you will edit, and mastering them builds the consistency and speed that high-volume real estate work demands.
Setting
Recommended Value
What It Does
Exposure
From +0.5 to +1.0
Brightens the overall image to make interiors feel open and inviting. Avoid going beyond +1.5 to prevent blown-out windows and flat wall colors.
Highlights
From -40 to -70
Recovers detail in bright areas like windows, lamps, and ceilings that tend to overexpose in interior shots.
Shadows
From +30 to +60
Lifts dark corners and underlit areas to reveal texture and depth throughout the room.
Whites
From +10 to +30
Sets the brightest point in the image cleanly without clipping highlight detail.
Blacks
From -10 to -20
Anchors the darkest tones to add depth and prevent a ha
zy, washed-out appearance.
White Balance (Artificial Light)
From 4,500K to 5,500K
Neutralizes yellow and orange tints from indoor bulbs for a clean, natural look.
White Balance (Natural Light)
From 5,500K to 6,500K
Balances cooler daylight tones in rooms with large windows or outdoor-facing spaces.
Contrast
From +10 to +20
Adds depth and dimension to the image without introducing harsh or unnatural tonal shifts.
Clarity
From +10 to +25
Enhances midtone detail on surfaces like wood floors, brick walls, and cabinetry.
Texture
From +15 to +30
Sharpens fine material surfaces like stone countertops, tiling, and fabric upholstery.
Vibrance
From +10 to +20
Selectively boosts muted colors like greenery and wood tones while leaving vivid hues untouched.
Saturation
From +5 to +10
Raises overall color intensity. Keep this value low to avoid an unrealistic, over-saturated result.
Common Mistakes When Editing Real Estate Photos in Lightroom
Even with a strong workflow, small editing mistakes can quickly make real estate photos look unrealistic or unprofessional. The goal of real estate photo editing is not to completely transform a property, but to present it in the cleanest, brightest, and most accurate way possible. Avoiding these common Lightroom mistakes can help maintain a natural and high-quality result.
Overexposing Interior Spaces
One of the most common mistakes in real estate photo editing is pushing the exposure too far. While bright interiors are important, excessive brightness can wash out details, flatten textures, and make rooms look unnatural. Overexposed walls, ceilings, and floors can also reduce the perceived depth of a space.
Instead of dramatically increasing overall exposure, try balancing highlights, shadows, whites, and blacks individually to preserve detail throughout the image.
Using Incorrect White Balance
Mixed lighting conditions are common in real estate photography. Natural daylight, tungsten bulbs, and LED lighting can all create different color temperatures within the same room. If white balance is not corrected properly, images may appear too yellow, too blue, or inconsistent from one photo to another.
A clean and neutral color tone usually works best for property listings. Lightroom’s White Balance Selector tool can help create more accurate interior colors while maintaining a natural atmosphere.
Oversaturating Colors
Increasing saturation too aggressively can make interiors look artificial and distracting. Floors may appear overly orange, grass unnaturally green, and skies unrealistically blue. This often reduces trust in the listing photos because buyers expect realistic representations of the property.
Instead of boosting global saturation heavily, use Vibrance carefully and make smaller targeted adjustments where needed.
Ignoring Vertical Line Corrections
Crooked walls and leaning vertical lines are one of the fastest ways to make real estate photos look amateur. Wide-angle lenses commonly distort perspective, especially when photographing small interiors.
Using Lightroom’s Transform tools to straighten vertical lines helps rooms appear more balanced, spacious, and architecturally accurate.
Overusing Clarity and Sharpening
Too much clarity or sharpening can create harsh edges, exaggerated textures, and noisy surfaces. While clarity can help define architectural details, excessive use often makes interiors feel overly processed.
Real estate images generally look better with clean and soft natural sharpness rather than aggressive texture enhancement.
Removing Too Many Objects
Object removal should improve the image without misleading potential buyers. Removing temporary distractions like cables, outlet covers, or sensor dust is common practice, but removing permanent property features can create unrealistic expectations.sss
The final image should still represent the actual condition and layout of the property accurately.
Inconsistent Editing Across Photos
A real estate photo set should feel visually consistent from beginning to end. Differences in brightness, color temperature, or contrast between images can make the listing feel unpolished.
Using Lightroom’s sync and batch editing tools helps maintain a consistent editing style across all photos in the project.
Exporting Images With Incorrect Settings
Even well-edited images can lose quality if exported incorrectly. Oversized files may slow down listing websites, while low-resolution exports can appear blurry or compressed.
For most real estate listings, exporting high-quality JPEG files with optimized dimensions helps maintain both image clarity and fast loading performance across MLS platforms and social media.
Rotider Media – Professional Real Estate Photo Editing with Lightroom
Editing real estate photos in Lightroom can greatly enhance image quality, but achieving consistent, market-ready results requires experience, precision, and time. For real estate professionals handling multiple listings, managing post-production in-house is not always efficient.
Rotider Media is a professional real estate photo editing service specializing in Lightroom-based workflows for real estate agents, photographers, and marketing teams. We focus on accurate light balancing, natural color correction, and clean compositions.

By using Lightroom as our core editing platform, we ensure:
- Consistent lighting and color across every photo set
- Efficient batch processing for high-volume projects
- Non-destructive editing with professional quality control
Our editors handle everything from basic exposure correction to advanced enhancements, helping your listings look polished and visually appealing without overprocessing.
Our Lightroom-based real estate photo editing services include:
- HDR Photo Editing: Blending multiple exposures to balance bright windows and dark interiors naturally.
- Day-to-Dusk Editing: Transforming daytime exterior photos into warm twilight-style images for stronger visual impact.
- Twilight Editing: Creating realistic evening scenes with natural sky tones and lighting balance.
- Object Removal: Removing unwanted elements to deliver clean, distraction-free images.
- Flash Photo Editing: Refining flash images to achieve accurate colors and even lighting.
- Single Exposure Editing: Enhancing individual photos with precise light and color adjustments.
With a team of experienced editors and a fast 12–24 hour turnaround, Rotider Media helps real estate professionals save time, maintain consistency, and present properties at their best.
Whether you are editing real estate photos in Lightroom yourself or looking for a reliable partner for professional post-production, Rotider Media is ready to support your listing success. Contact us Now!
Annie Doo
Professional Video Editor
Hi, I’m Annie Doo, a professional video editor specializing in real estate post-production. Through hands-on experience with real-world projects, I’ve developed a strong understanding of visual storytelling, pacing, color, sound, and the workflows behind polished real estate videos. Here, I share practical insights, editing techniques, and production knowledge drawn from my day-to-day work in video post-production.
Was this article helpful?
Your feedback helps us create more useful real estate media guides.
Share this article


No Spam, Just Updates
Our fresh blogs provide technical and industrial information that helps strengthen your business. Sign up to be the first to receive the new updates
Related Posts
Real Estate Post-Production: A Complete Guide for Photographers and Media Teams
Oct 2, 2026
AI in Real Estate: A New Leap for Property Professionals
Sep 9, 2026
AI for Real Estate Marketing: A Practical Guide for Agents and Agencies
Sep 9, 2026
AI for Real Estate Agents: Practical Uses and Future Trends
Sep 7, 2026
15 Real Estate AI Companies to Know in 2026
Sep 5, 2026