
The ultimate guide to shooting bracketed images for HDR
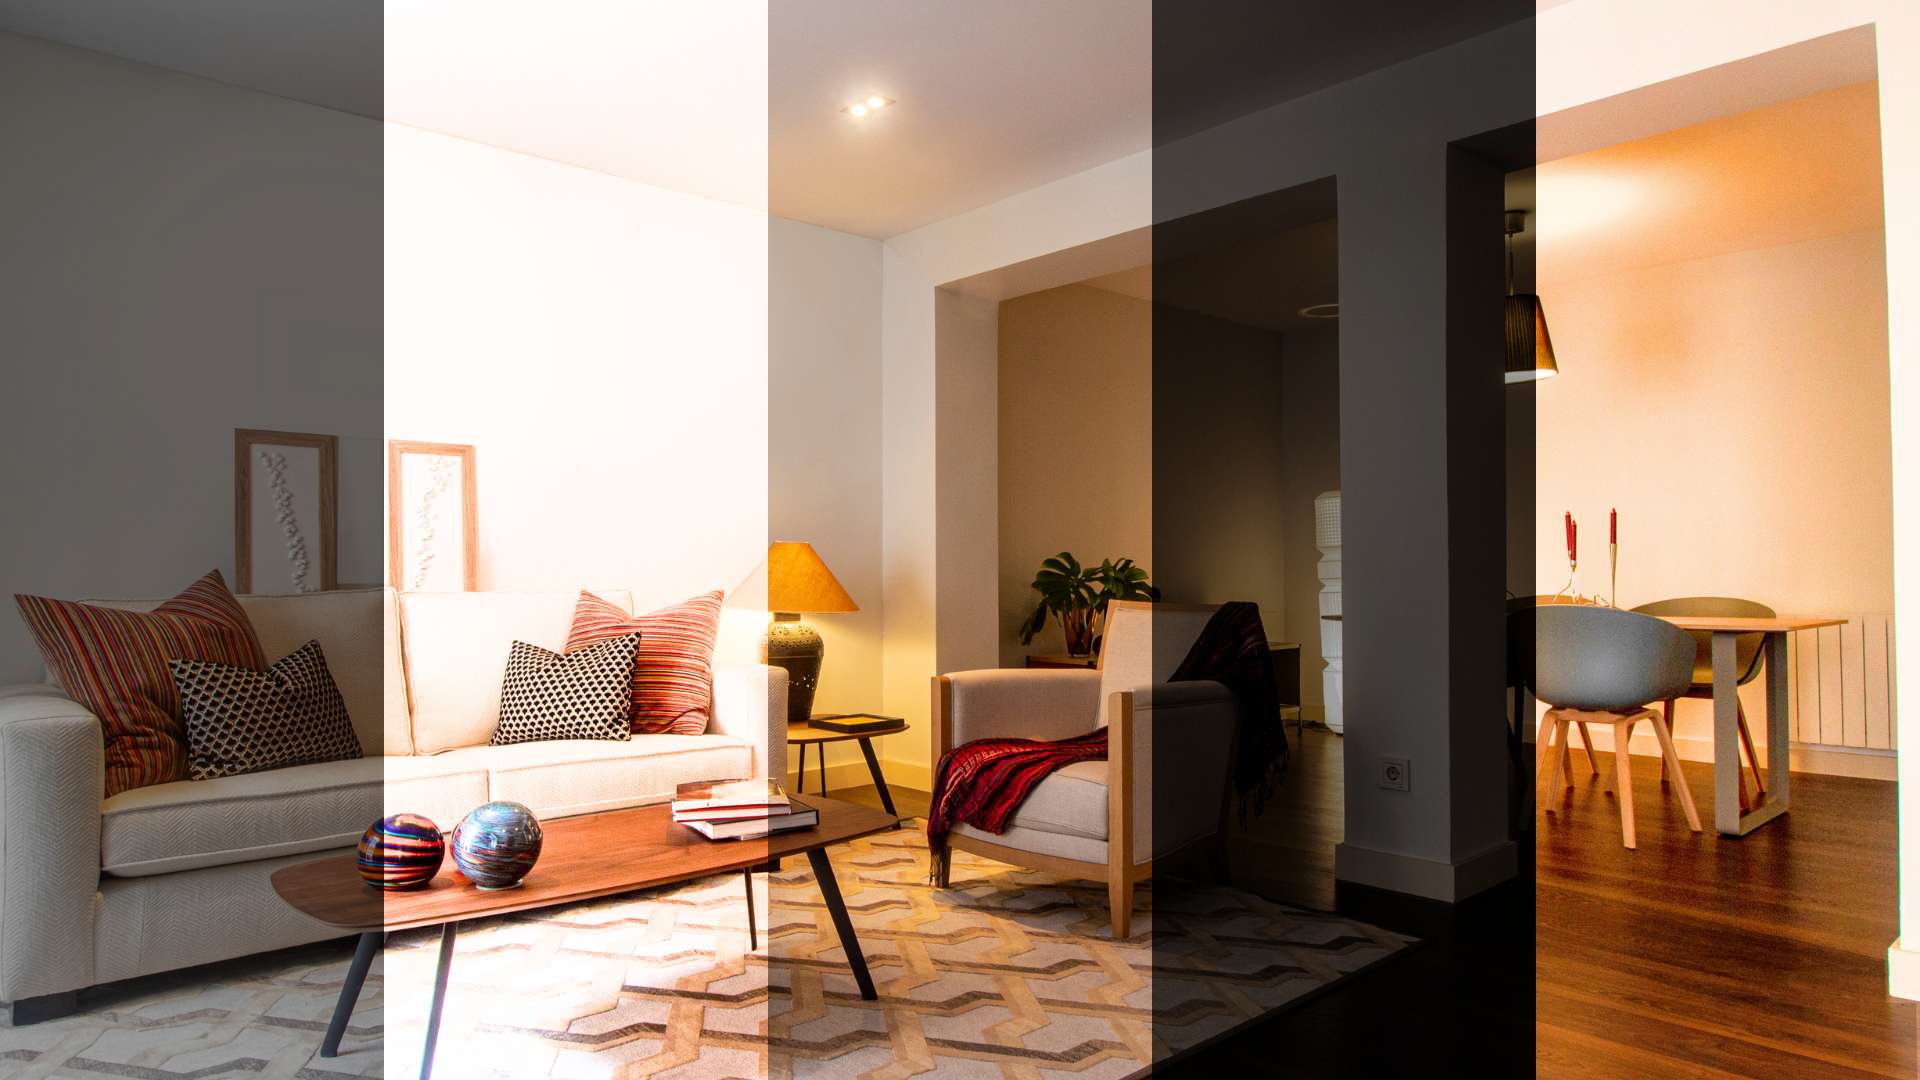
1. What Are Bracketed Images in HDR Photography?
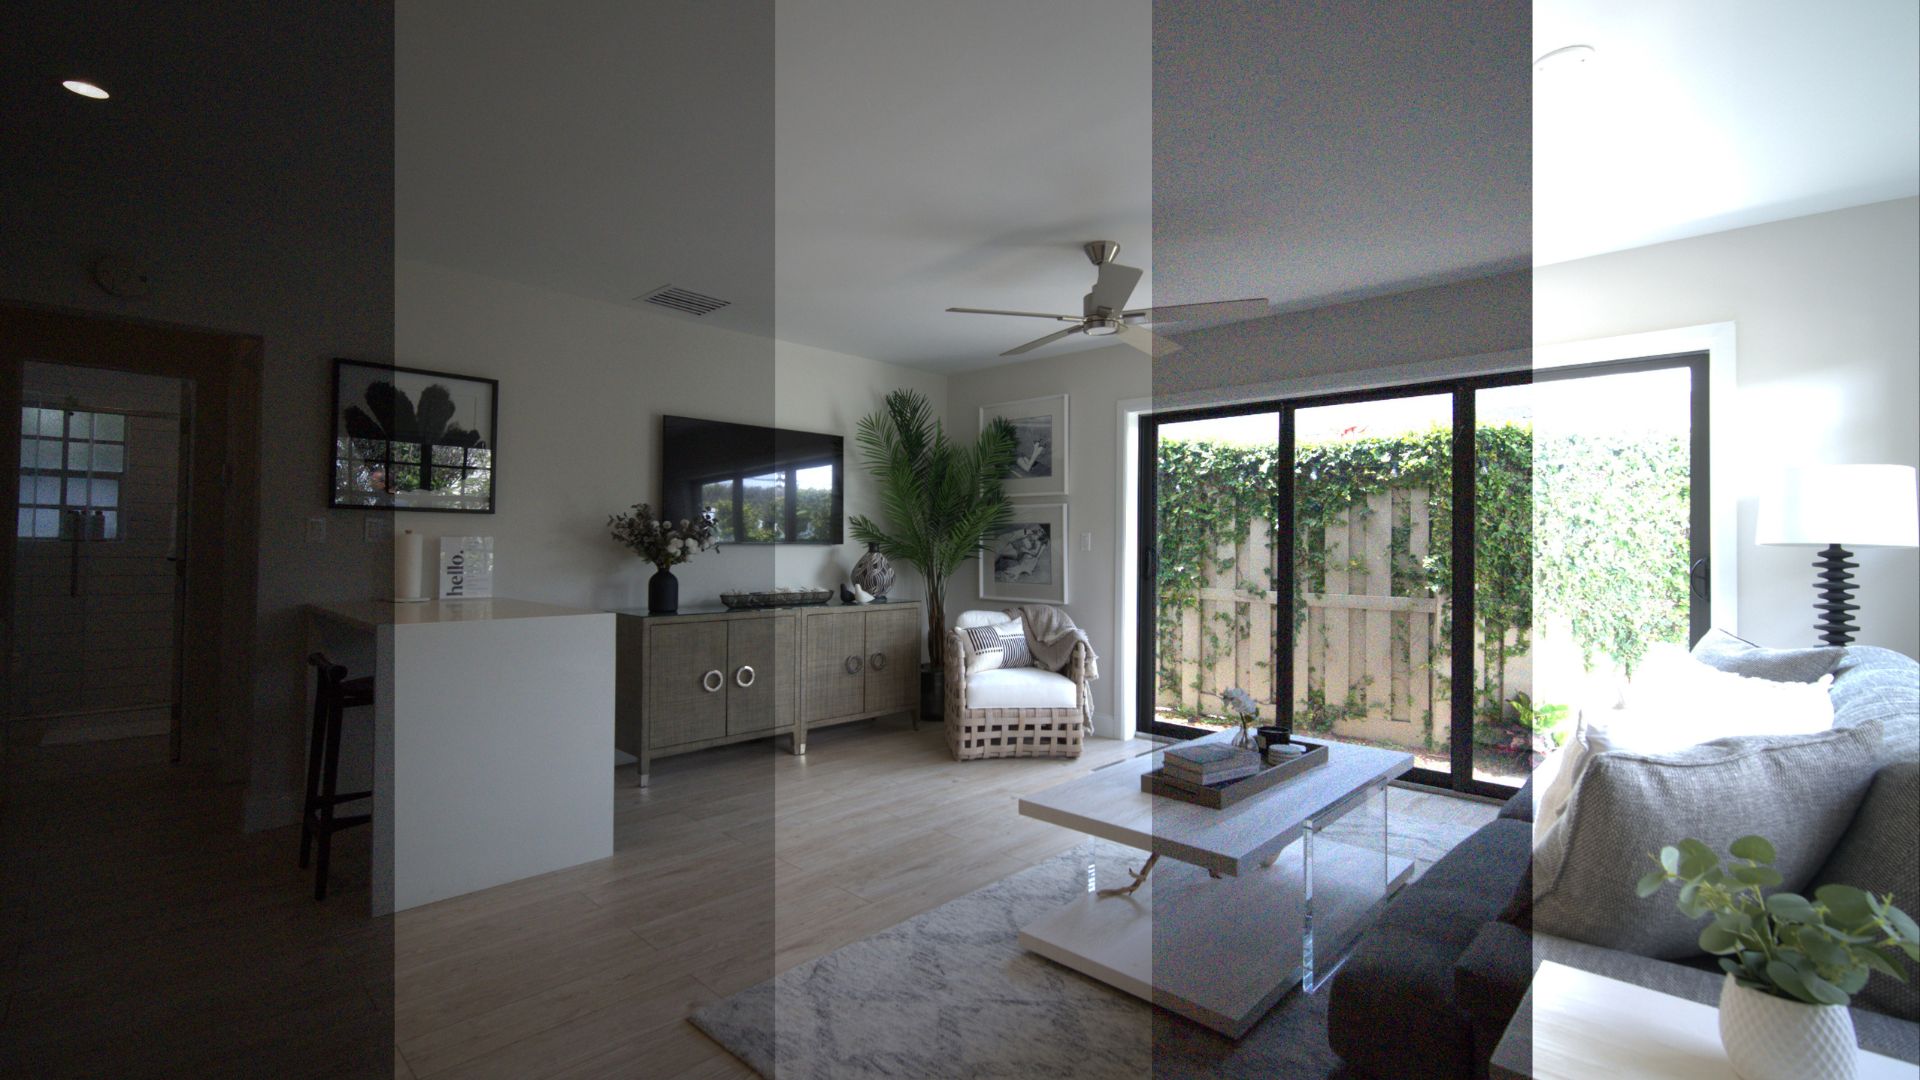
2. Why You Should Shoot Bracketed Photos for Real Estate
- Capture Full Lighting Range: Real estate interiors often include strong contrasts between bright and dark areas. Bracketing ensures you retain crucial details in both highlight and shadow zones—details that could otherwise be lost.
- Enhance Visual Appeal: Properties with evenly lit rooms look more inviting and professional. Bracketed HDR photos make interiors appear brighter, clearer, and more spacious—key traits that attract buyers.
- Minimize Post-Processing Struggles: Instead of forcefully adjusting shadows or highlights in editing, bracketed exposures give you a strong foundation for natural-looking enhancements with fewer artifacts or noise.
- Deliver Professional-Grade Quality: Whether you’re shooting standard listings or luxury homes, shooting bracketed images for HDR helps meet the expectations of clients and agencies that demand high visual standards.
- Consistent Results in Challenging Conditions: With bracketing, even properties with difficult lighting—such as twilight shots or rooms with strong backlight—can be photographed reliably and beautifully.
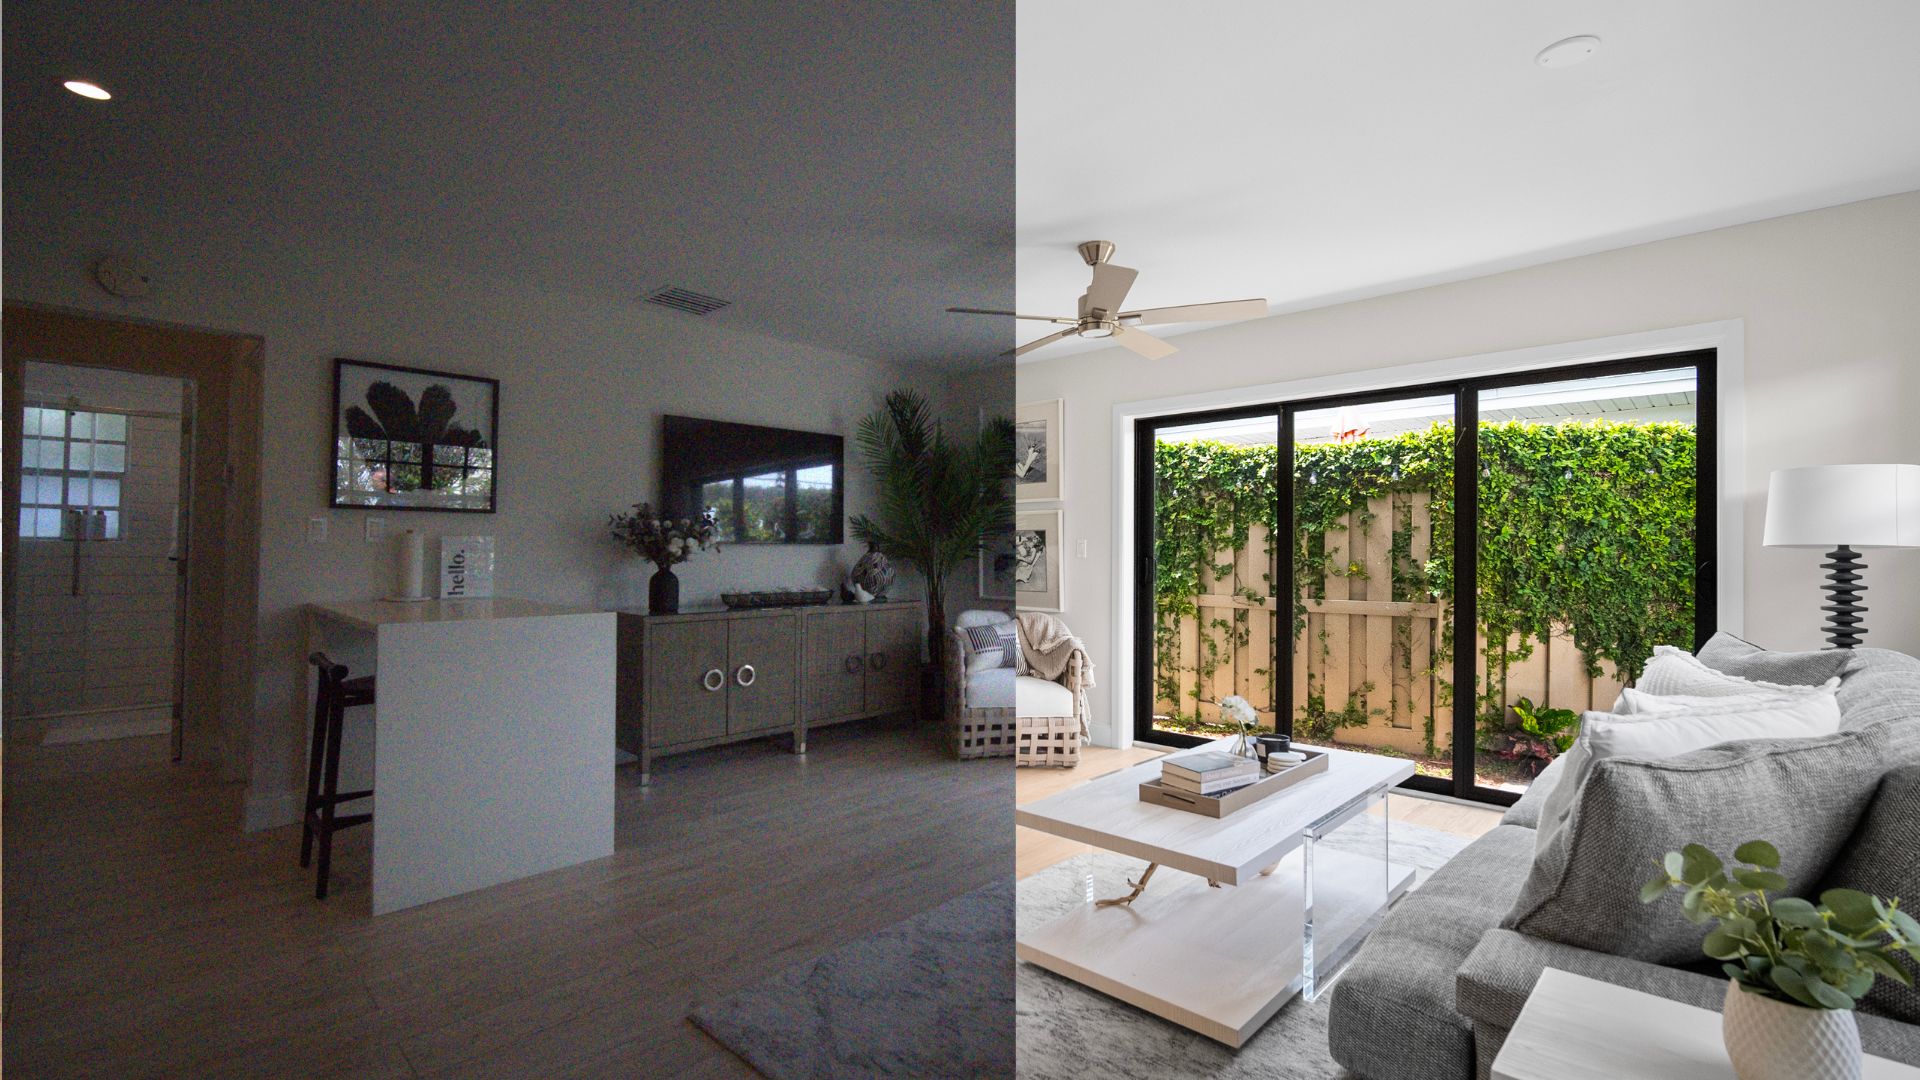
3. Guide to Shooting Bracketed images for HDR
Step 1: Prepare Your Equipment
- Camera with Auto Exposure Bracketing (AEB) mode
- Wide-angle lens for real estate spaces
- Tripod to keep your images perfectly aligned
- Remote shutter release or use the self-timer
- Memory card with high speed and capacity
- Always shoot in RAW to retain full image detail
Step 2: Set Up Your Camera Properly
- Switch to Manual (M) or Aperture Priority (Av) mode
- Lock your aperture to maintain the depth of the field
- Set ISO to 100–200 to avoid noise
- Enable AEB and select 3, 5, or 7 exposures
- Choose ±1EV or ±2EV, depending on the scene contrast
- Turn off Auto White Balance
- Double-check your focus and composition before shooting
Step 3: Choose the Right Number of Exposures
- 3 Exposures (±1EV): Good for balanced lighting
- 5 Exposures (±2EV): Ideal for most real estate interiors
- 7+ Exposures: Best for scenes with extreme brightness or shadows (e.g., sunset, twilight)
Step 4: Avoid Common Mistakes
- Don’t shoot handheld – even minor shifts can ruin alignment
- Avoid high ISO – reduces image quality with noise
- Turn off Auto White Balance – ensures color consistency across frames
- Keep the scene still – remove pets, people, or moving objects
- Check your histogram – avoid blown highlights or crushed shadows
4. Professional Bracketed HDR Photos Editing at Rotider Media
Why Choose Rotider Media?
Photo Post-production Specialist
Hi, I’m Vivian Nguyen, a Photo Post-production Specialist at Rotider Media, specializing in real estate image editing and professional post-production workflows. My work focuses on HDR and flambient editing, color correction, image retouching, virtual twilight, and quality control for high-volume real estate photography. Through hands-on production experience, I share practical insights into photo editing techniques, workflow optimization, and visual standards for real estate media.
Was this article helpful?
Your feedback helps us create more useful real estate media guides.


No Spam, Just Updates
Our fresh blogs provide technical and industrial information that helps strengthen your business. Sign up to be the first to receive the new updates
Related Posts
Real Estate Post-Production: A Complete Guide for Photographers and Media Teams
Oct 2, 2026
AI in Real Estate: A New Leap for Property Professionals
Sep 9, 2026
AI for Real Estate Marketing: A Practical Guide for Agents and Agencies
Sep 9, 2026
AI for Real Estate Agents: Practical Uses and Future Trends
Sep 7, 2026
15 Real Estate AI Companies to Know in 2026
Sep 5, 2026