
August 13, 2025
Photo Editing
How to Edit HDR Photos For Real Estate Like a Pro
In the competitive world of real estate marketing, high-quality visuals can make or break a buyer’s first impression. Therefore, photo post-editing plays an increasingly important role in making your listing stand out. One of the most effective techniques to showcase properties in their best light—literally and figuratively—is HDR (High Dynamic Range) photography. In this article, let’s learn how to edit HDR photos professionally to help enhance your real estate images effectively.
1. What is HDR Photo Editing?
HDR (High Dynamic Range) photo editing is the process of combining multiple images of the same scene—each captured at different exposure levels—into one final image that accurately represents both the brightest highlights and the darkest shadows. This technique is especially useful in real estate photography, where lighting conditions often vary drastically between interior and exterior areas.
For example, a typical HDR photo of a living room with large windows might be composed of three exposures:
- One underexposed (to capture detail in bright windows)
- One properly exposed (for midtones)
- One overexposed (to bring out details in darker corners)
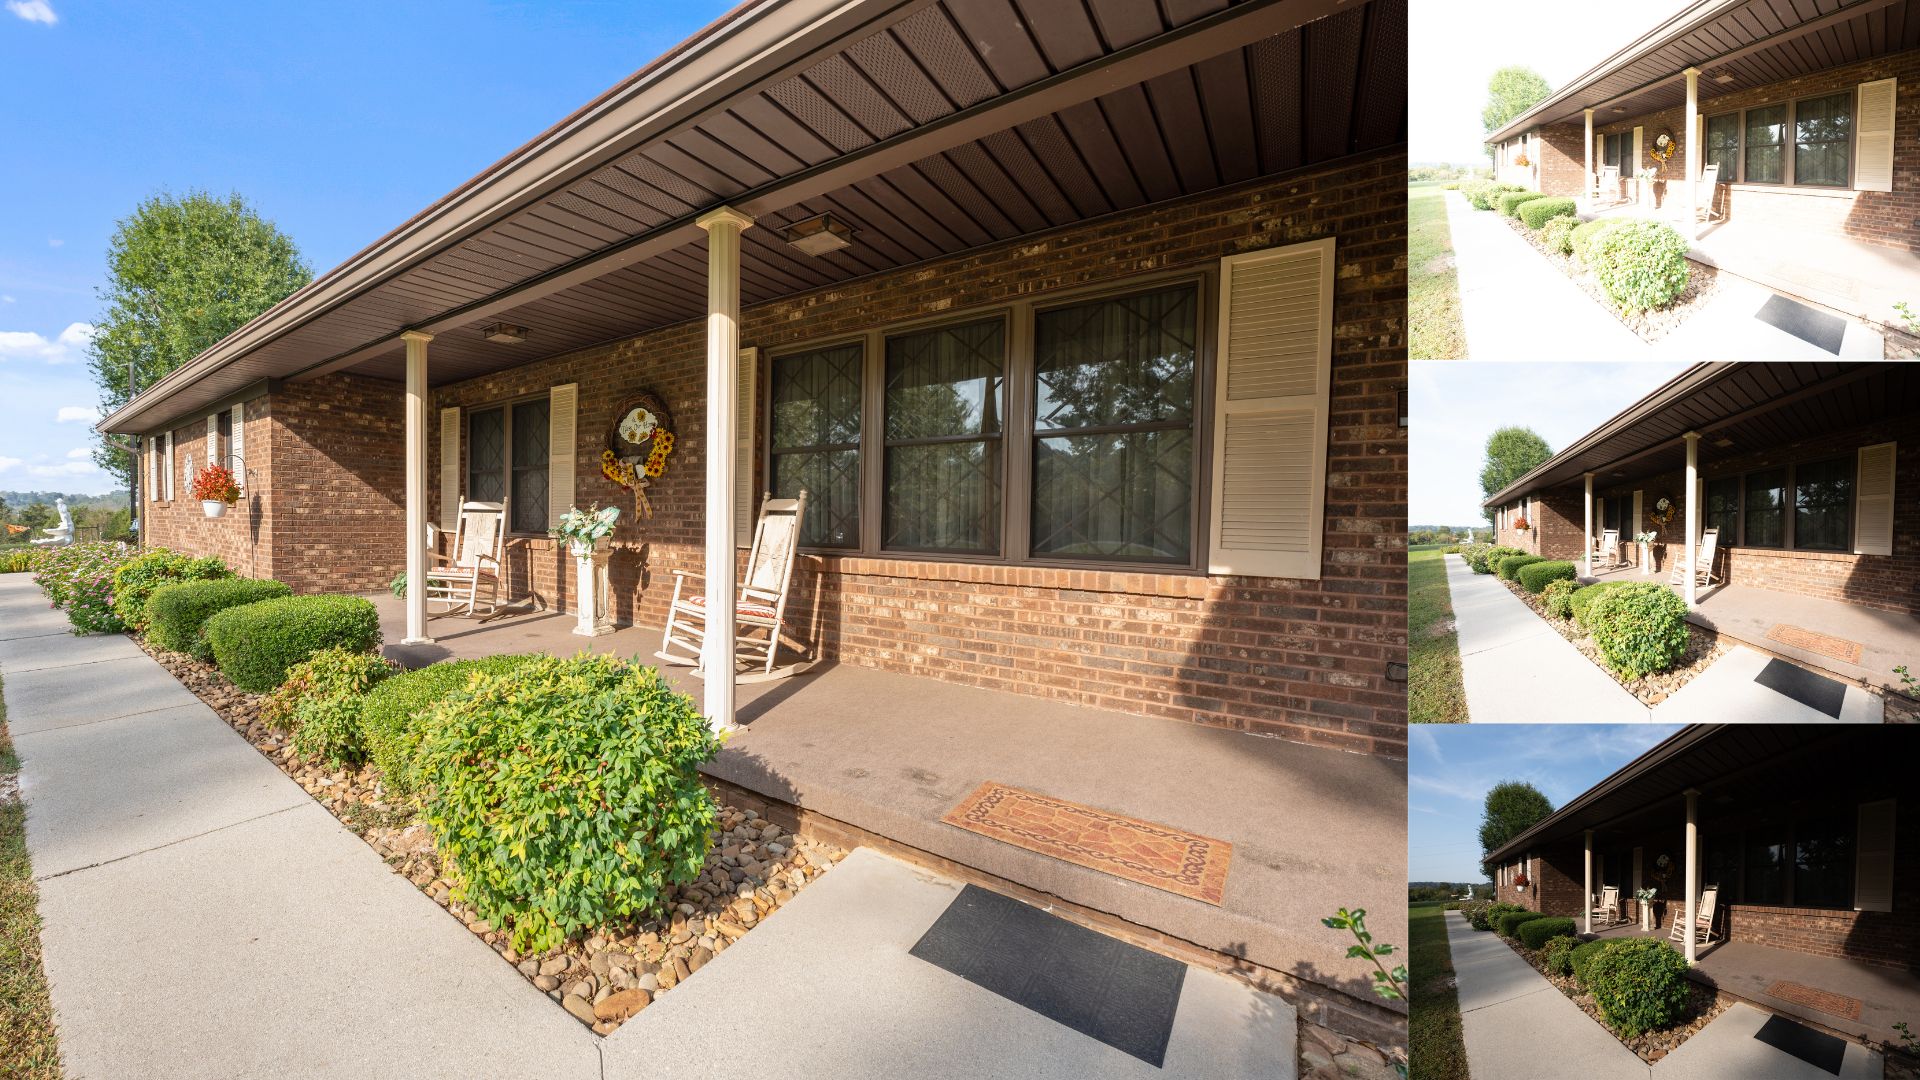
By merging these exposures during editing, the resulting image reveals a more balanced and true-to-life view of the property—with clear skies visible through windows, well-lit interior spaces, and realistic color tones.
2. Benefits Of HDR Photo Editing in Real Estate?
HDR real estate photo editing is one of the most popular photo editing techniques today to make your real estate more attractive and valuable. Here are the benefits HDR photo editing can bring to your listing:
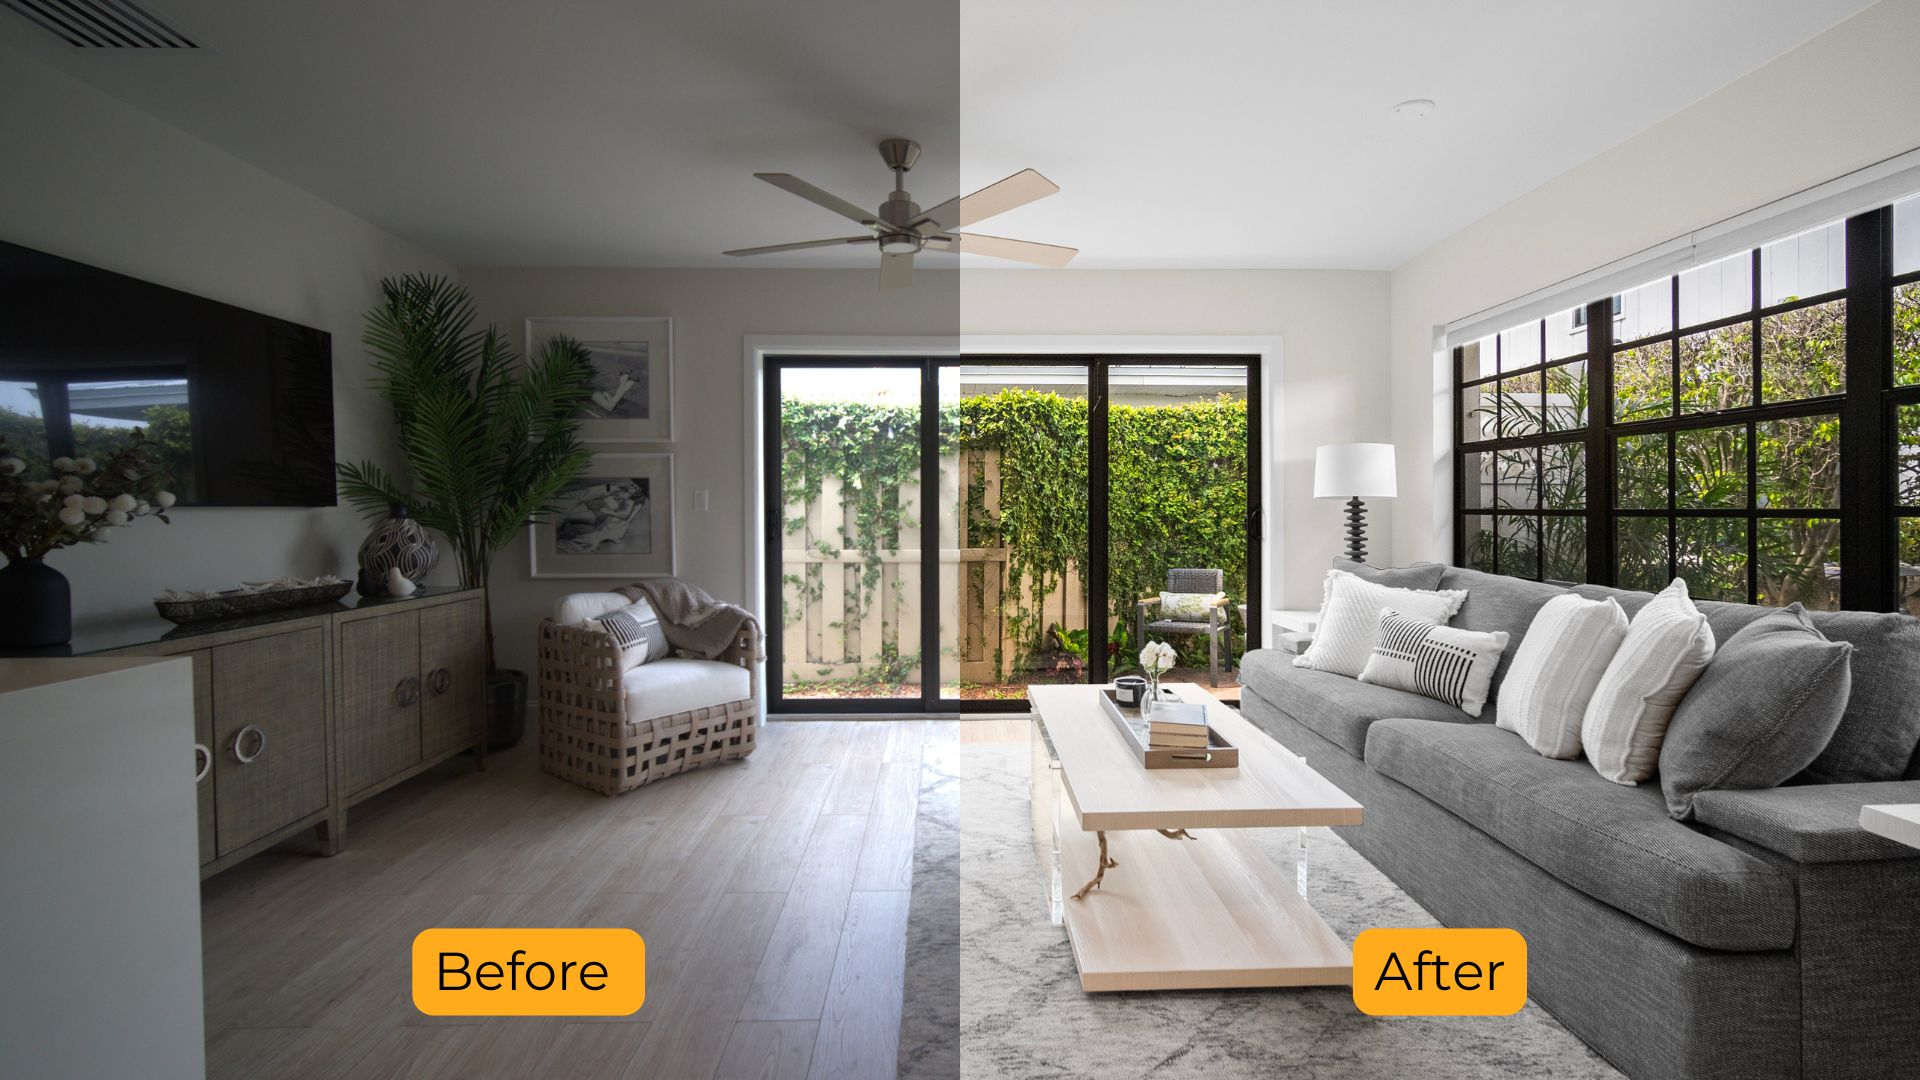
- Balanced exposure in every shot: HDR editing eliminates harsh shadows and blown-out highlights by blending multiple exposures, making both interior and exterior elements visible in one image.
- True-to-life color and detail: It enhances textures and maintains accurate color tones of furniture, flooring, and wall paint, helping buyers get a realistic sense of the space.
- Better presentation of small or dark rooms: HDR brings out hidden details in underlit areas like hallways, bathrooms, or basements—spaces that often get overlooked in standard photos.
- Time-efficient shooting process: Photographers can rely on natural lighting and bracketed shots instead of setting up complex lighting equipment—saving time on site while achieving studio-like results.
- Improved buyer trust: Natural-looking HDR photos reflect the true atmosphere of a home, making online listings more transparent and credible.
Reference: When to Use HDR Photography for Best Results
3. How to Edit HDR Photos For Real Estate Like a Pro
To achieve professional-quality real estate photos using HDR techniques, it’s essential to follow a structured editing workflow. HDR editing isn’t just about merging exposures—it’s about enhancing lighting, color, and perspective in a way that makes the property feel both bright and natural. Here’s how to edit HDR real estate photos like a pro:
- Step 1: Import and Align Bracketed Exposures Start by importing 3–5 RAW bracketed images into editing software such as Adobe Lightroom or Photoshop. Use auto-align functions to correct any slight movement between shots, and apply ghost reduction to fix issues like moving curtains or trees.
- Step 2: Merge Using Exposure Blending or Tone Mapping Merge the exposures to retain detail in both shadows and highlights. Choose a natural blending method to avoid harsh halos or over-saturation. Tools like Lightroom’s HDR Merge, Aurora HDR, or Photomatix Pro can handle this step.
- Step 3: Adjust White Balance and Color Fine-tune white balance to correct mixed lighting (e.g., daylight from windows vs. warm interior bulbs). Correct color casts and ensure that walls, furniture, and floors reflect their true tones.
- Step 4: Sharpen and Reduce Noise Apply local sharpening to define lines, edges, and textures—especially in kitchens and bathrooms. Use noise reduction in darker areas to preserve image quality.
- Step 5: Correct Perspective and Distortion Use vertical and horizontal transform tools to straighten walls, windows, and ceilings. Apply lens corrections to remove barrel distortion or vignetting for a clean architectural look.
When editing HDR photos for real estate, the goal is always to highlight the space realistically and attractively without over-processing. With the right tools and attention to detail, you can transform average brackets into stunning images that sell.
4. Professional HDR photo editing services
While editing HDR photos manually can yield great results, it often requires significant time, skill, and consistency—especially when handling large volumes of listings. That’s why many real estate professionals turn to professional HDR photo editing services to ensure every image meets the highest visual standards.
A professional editing team can:
- Deliver natural-looking HDR images with balanced lighting and true-to-life color
- Handle complex edits like window pulls, sky replacements, object removal, and perspective correction
- Ensure consistent quality across every listing photo
- Provide fast turnaround times—usually within 12 to 24 hours
If you’re looking for a reliable partner to elevate your real estate visuals, Rotider Media offers specialized HDR photo editing tailored to real estate needs. With a team of experienced editors, we deliver clean, professionally blended HDR images that showcase properties at their absolute best. Whether it’s a standard listing or a high-end luxury home, Rotider Media helps you save time and stand out in a competitive market.
Mastering how to edit HDR photos for real estate is key to producing images that are bright, balanced, and visually compelling. Ready to enhance your real estate photos? Contact us to experience the difference.
Annie Doo
Professional Video Editor
Hi, I’m Annie Doo, a professional video editor specializing in real estate post-production. Through hands-on experience with real-world projects, I’ve developed a strong understanding of visual storytelling, pacing, color, sound, and the workflows behind polished real estate videos. Here, I share practical insights, editing techniques, and production knowledge drawn from my day-to-day work in video post-production.
Was this article helpful?
Your feedback helps us create more useful real estate media guides.
Share this article


No Spam, Just Updates
Our fresh blogs provide technical and industrial information that helps strengthen your business. Sign up to be the first to receive the new updates
Related Posts
Real Estate Post-Production: A Complete Guide for Photographers and Media Teams
Oct 2, 2026
AI in Real Estate: A New Leap for Property Professionals
Sep 9, 2026
AI for Real Estate Marketing: A Practical Guide for Agents and Agencies
Sep 9, 2026
AI for Real Estate Agents: Practical Uses and Future Trends
Sep 7, 2026
15 Real Estate AI Companies to Know in 2026
Sep 5, 2026