
July 3, 2025
Photo Editing
Simple Guide to Shadow Removal Editing in Real Estate
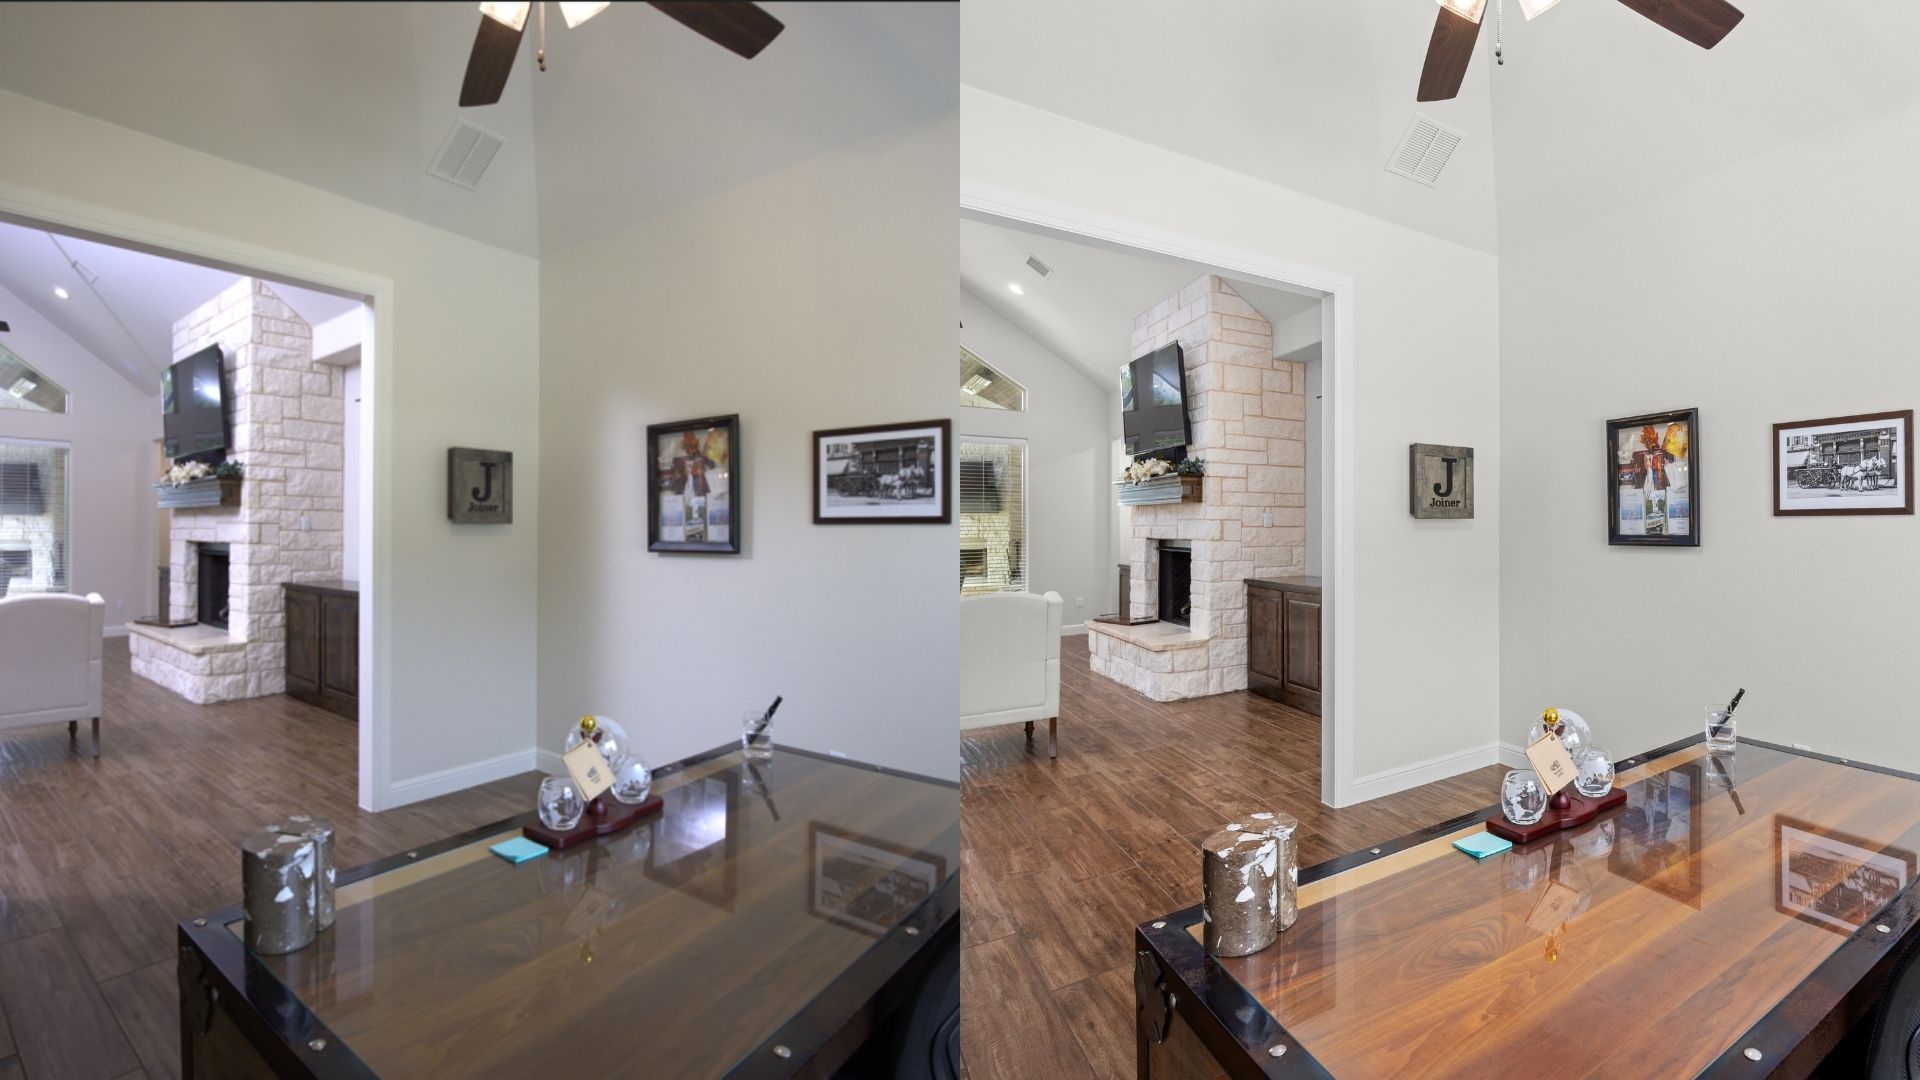
Shadows in real estate photos can make a space look dark, cramped, and unprofessional. This article shares how shadow removal editing in real estate can improve lighting, highlight interior details, and enhance the aesthetics of your photos. Learn detailed editing steps and the right tools to remove shadows to make your listing more attractive and professional in this article.
1. How Do Shadows Affect Real Estate Photos?
In real estate photography, lighting plays a crucial role in shaping how a space is perceived, and shadows can either enhance or detract from that impression. While soft, natural shadows may add dimension and realism, harsh or misplaced shadows often create distractions that lower the perceived quality of a listing.
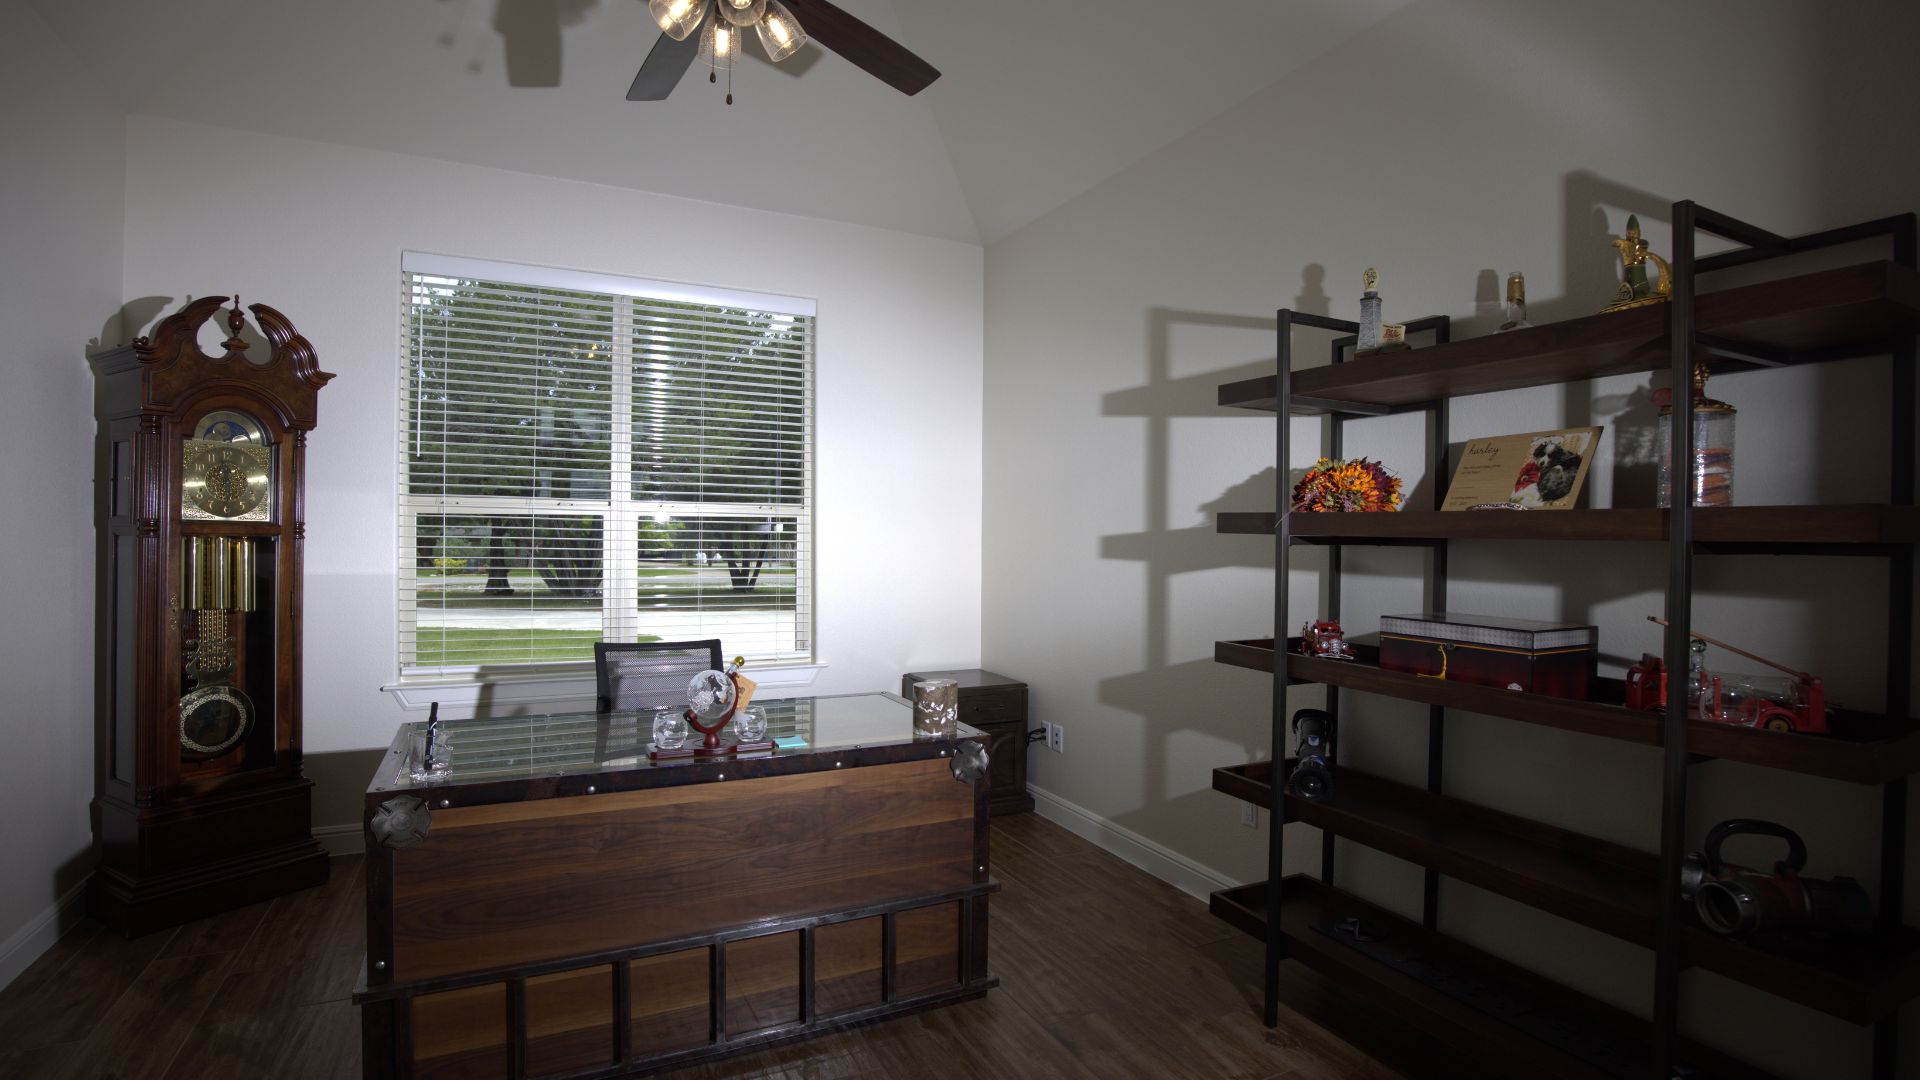
These unwanted shadows typically result from uneven lighting, direct flash, or uncontrolled window glare. They often appear on walls, floors, ceilings, or around furniture, and can negatively impact your photos in several ways:
- Make spaces appear darker and smaller than reality
- Hide important architectural or design details
- Distort lighting balance, creating a gloomy or poorly maintained look
- Reduce image clarity and professionalism, especially in high-end listings
These visual flaws may prompt potential buyers browsing online to skip over your listing, regardless of the property’s actual value. That’s why shadow removal editing in real estate photography is a key step to ensure each image feels bright, clean, and market-ready.
2. Benefits of Shadow Removal Real Estate Photo Editing
Removing shadows is not only one of the key photo editing techniques that directly improves the image quality and effectiveness of your real estate listing. When done correctly, removing unwanted shadows can dramatically enhance the way buyers perceive a space.
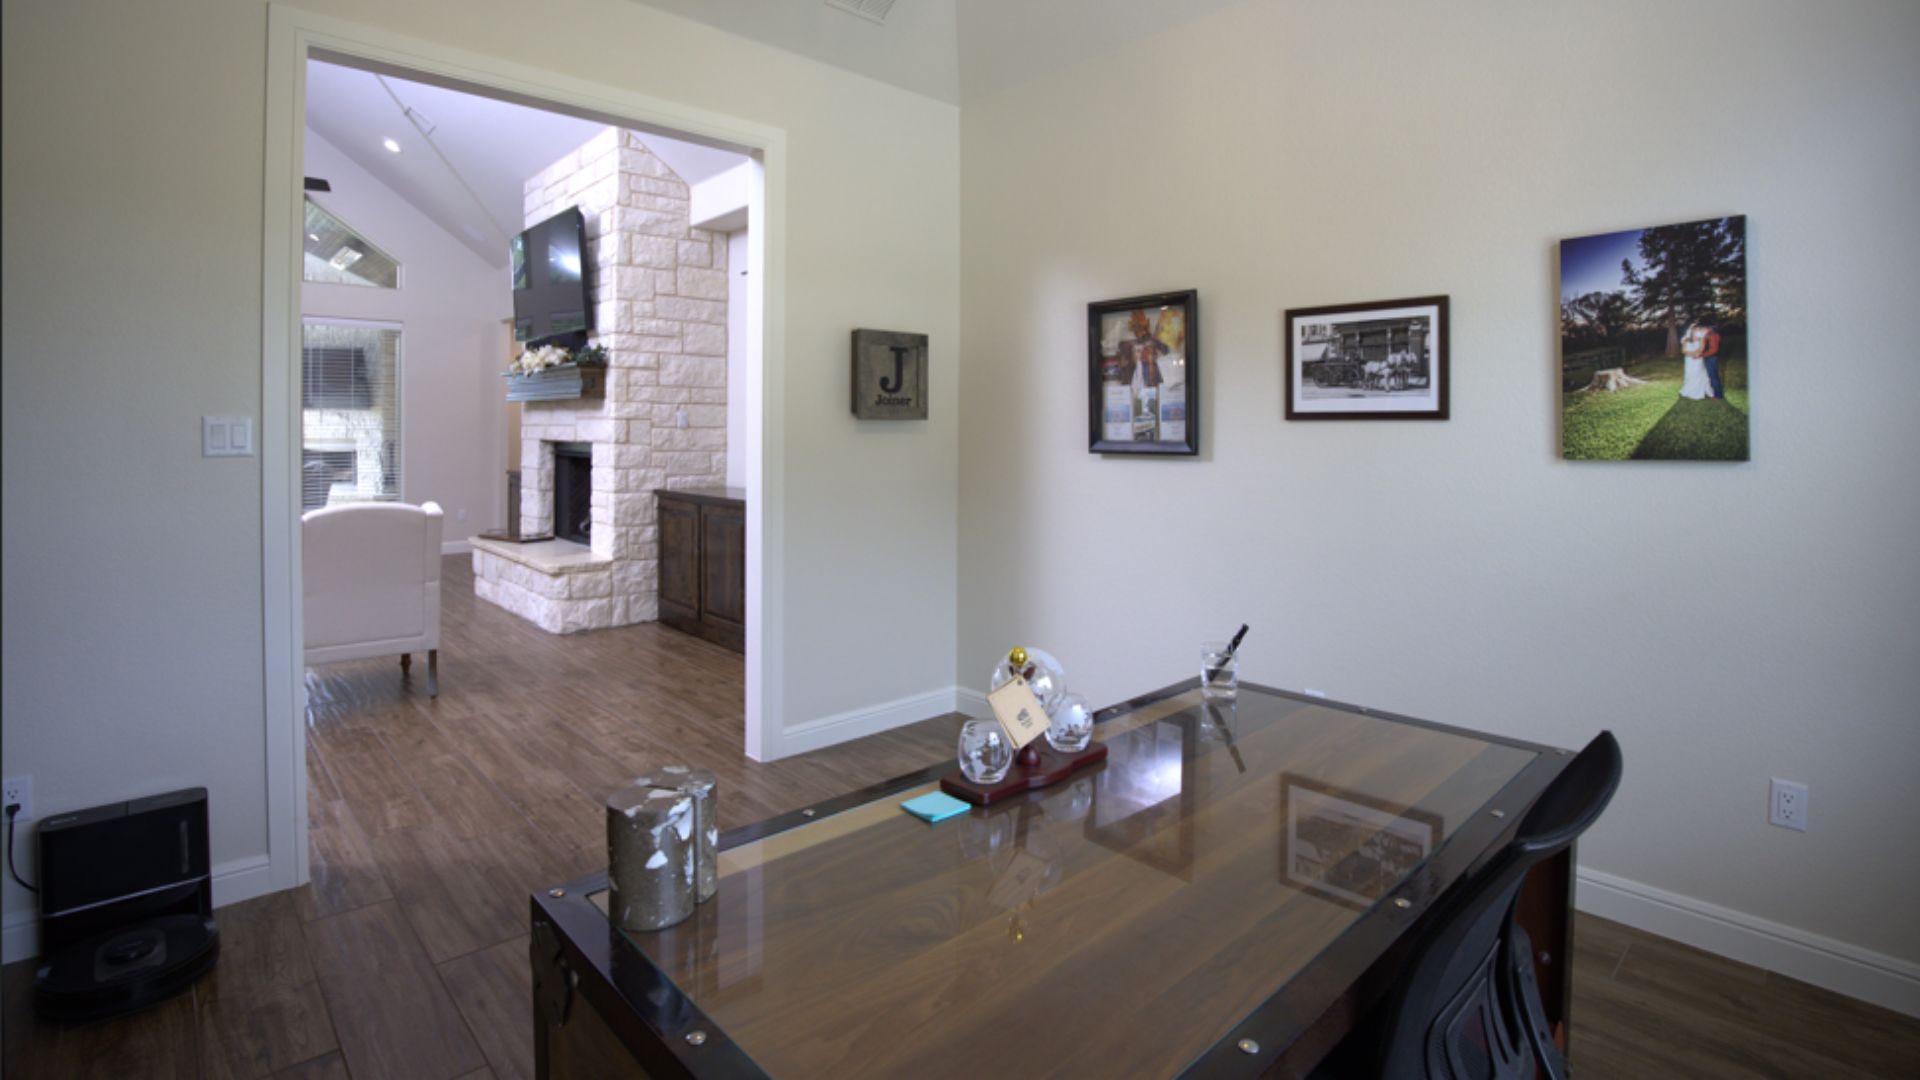
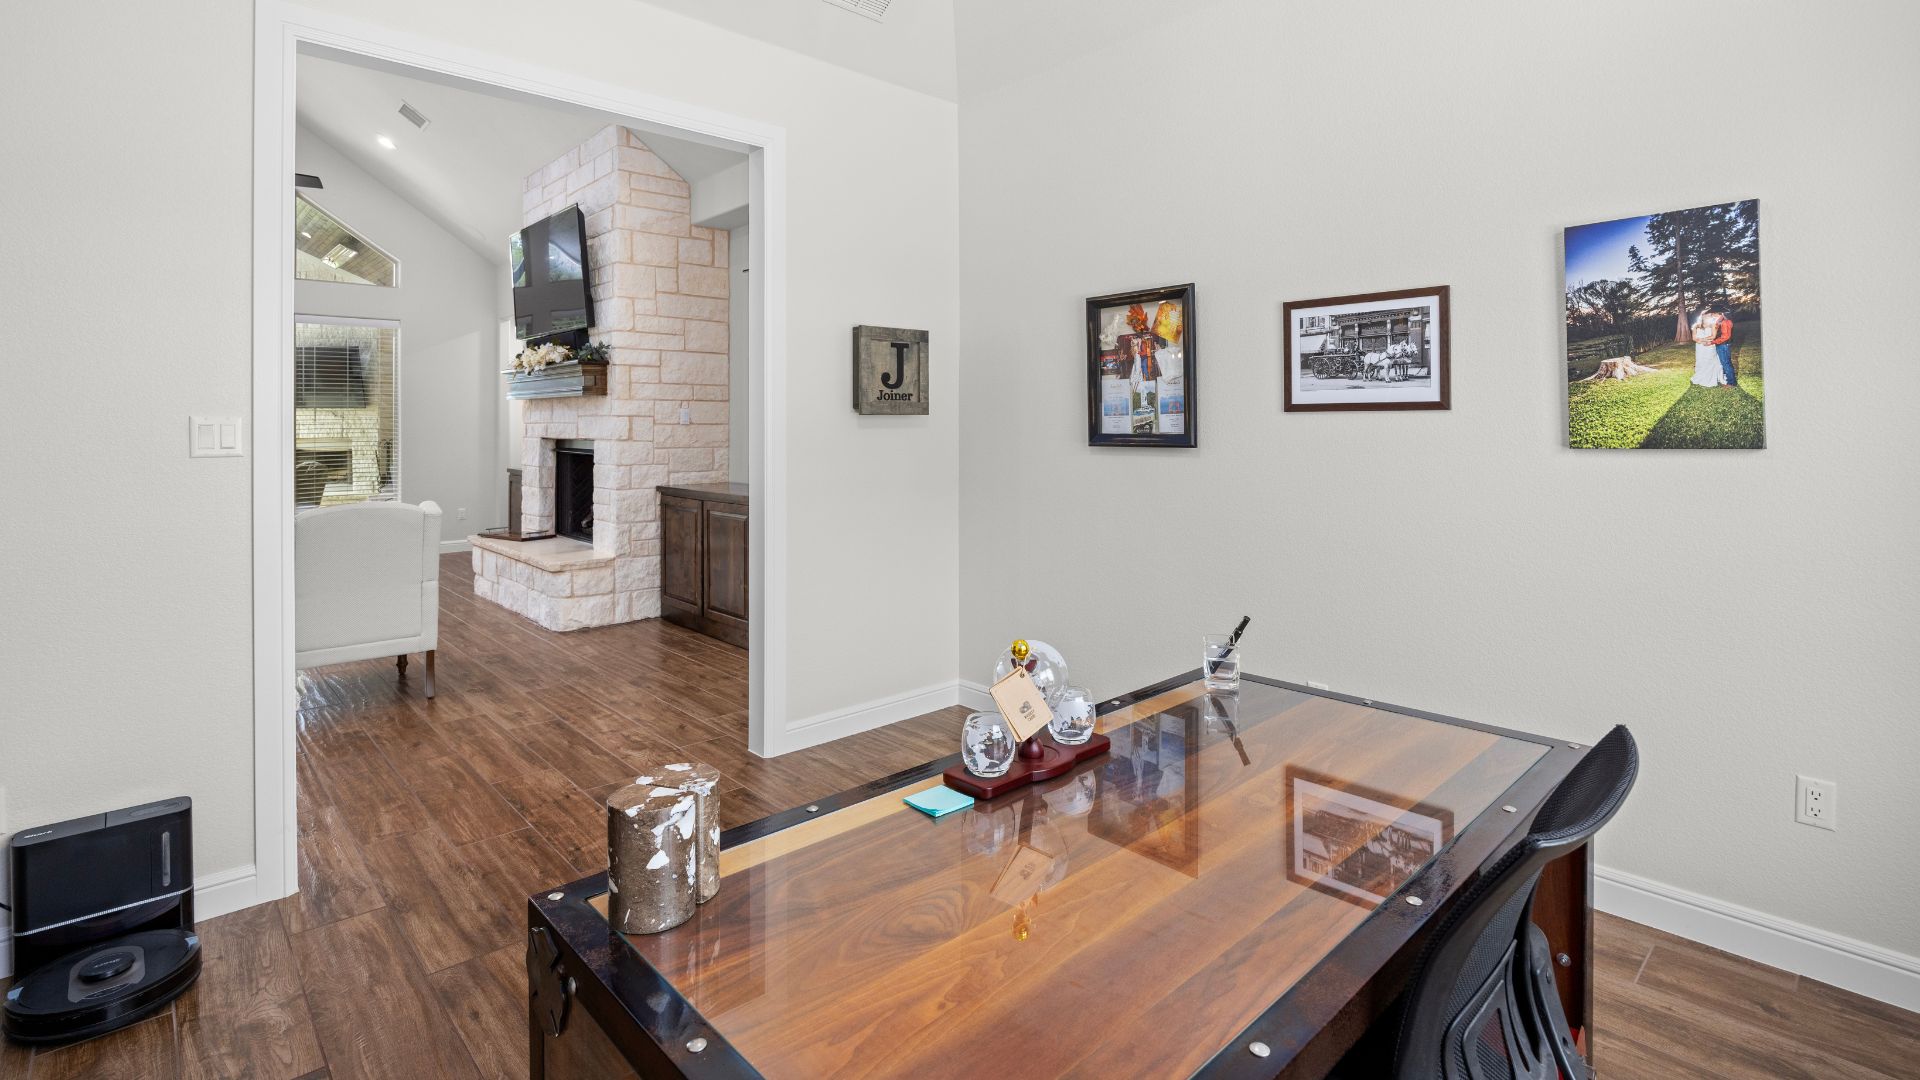
Here are the key benefits of shadow removal editing in real estate photography:
- Consistent Lighting: Unwanted shadows can make rooms feel dim and uninviting. By removing or softening them, the entire space looks brighter, cleaner, and more welcoming, especially in tight or naturally dark areas like bathrooms, hallways, or basements.
- Highlights the Details of the Room: Shadows often hide textures, furniture edges, flooring patterns, or architectural elements. When these shadows are removed, the photo reveals the room’s true layout and design, helping buyers better understand what they’re seeing.
- Balanced and Professional Look: A photo with balanced lighting, no harsh shadows or blown-out highlights, feels polished and professional. This improves the perceived value of both the property and the brand behind it.
- Enhances Visual Consistency: When every photo in a listing maintains the same lighting style, color tone, and shadow control, it builds visual harmony. This consistency strengthens your brand identity and gives your listings a more curated, high-end feel.
- Competitive Edge: By removing distracting shadows, your listings instantly look more polished and professional, helping them stand out on crowded platforms. Clean, well-lit images attract more clicks, build buyer trust, and give you a clear edge in today’s competitive real estate market.
3. Guide to Shadow Removal Editing in Real Estate
Shadow removal in real estate photography requires a higher level of precision than basic global adjustments. Harsh shadows from flash, window light, or mixed lighting can distort wall colors, reduce perceived space, and distract potential buyers.
Adobe Photoshop is the most powerful tool for advanced shadow removal thanks to its layer-based workflow, precise masking, and professional-level control. It is especially suitable for high-end real estate images where realism and detail retention are critical.
Below is a detailed, step-by-step guide to removing shadows effectively using Adobe Photoshop:
Step 1: Open the Photo and Duplicate the Layer
- Open your image in Photoshop.
- Press Ctrl + J (Windows) or Cmd + J (Mac) to duplicate the background layer
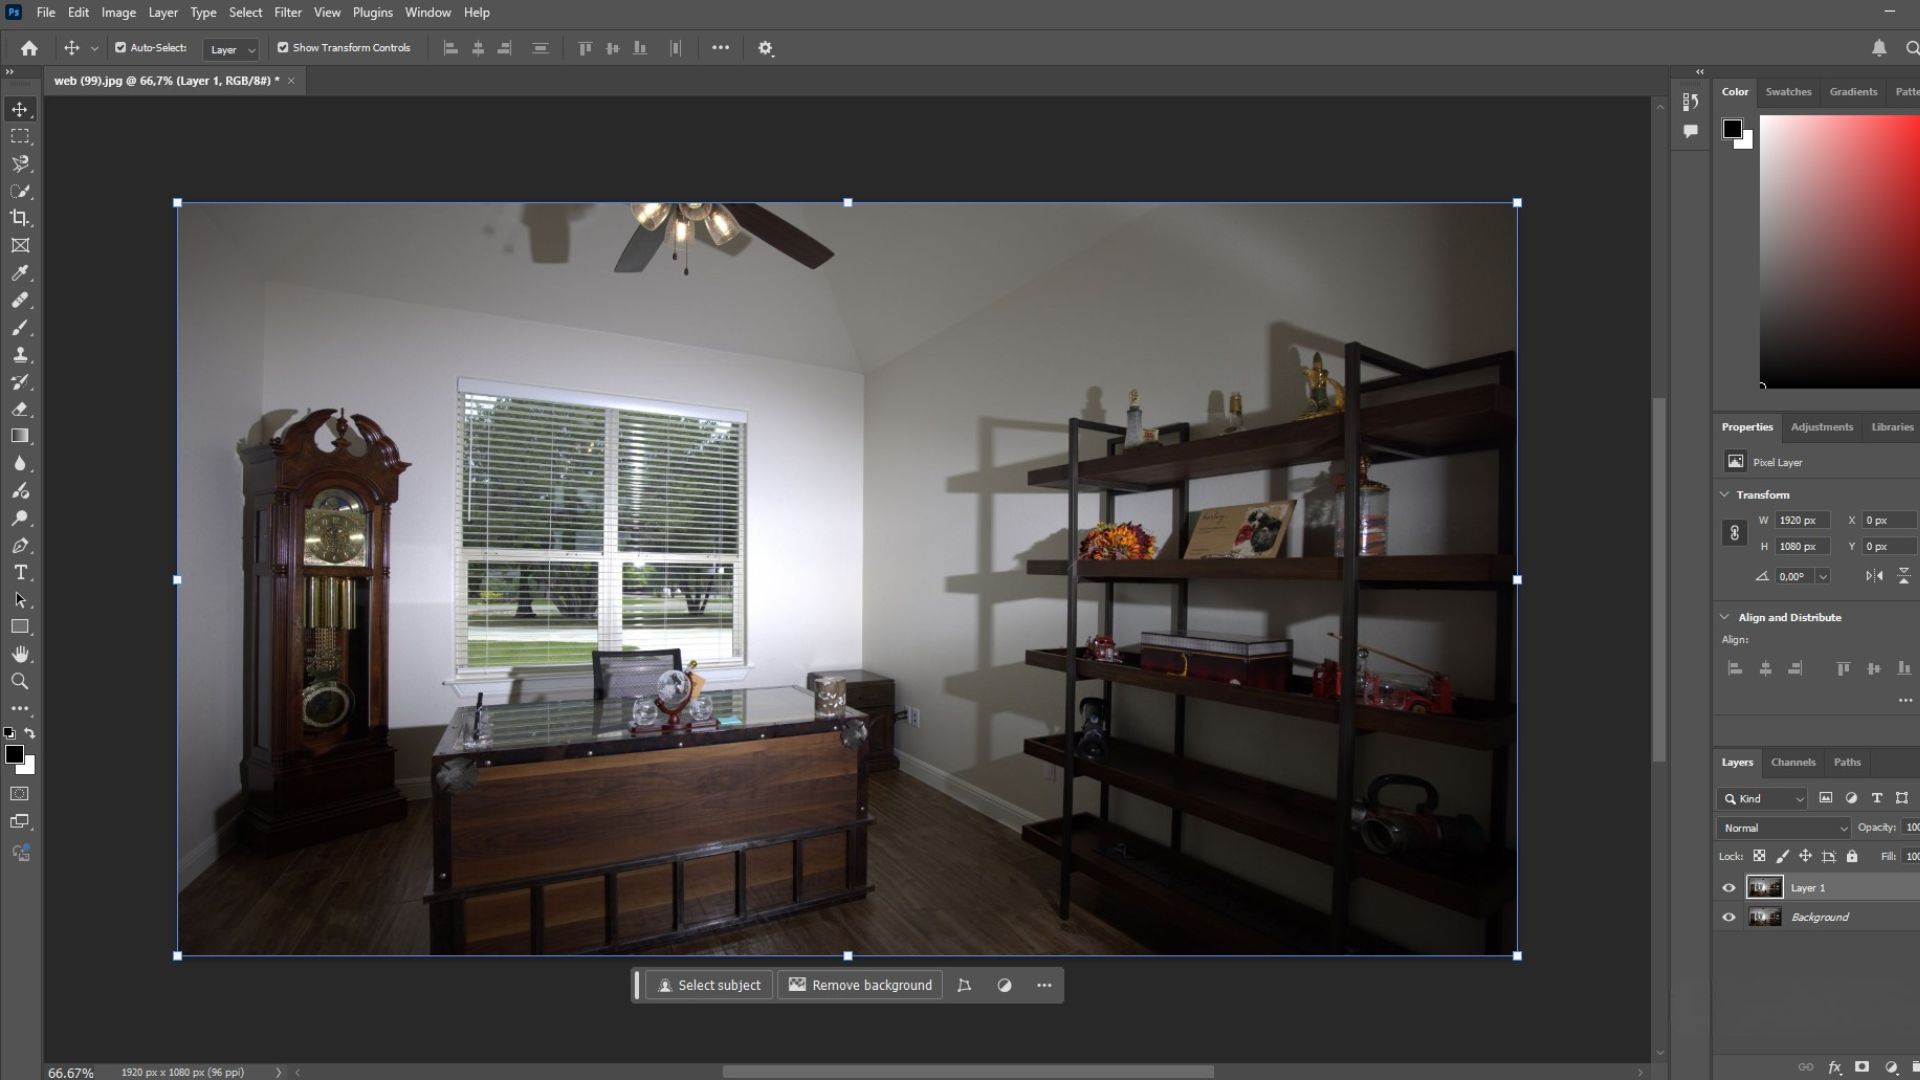
This allows you to edit safely and return to the original image at any time.
Step 2: Brighten the Whole Photo First
Before fixing specific shadows, adjust the overall lighting:
- Go to Image > Adjustments > Shadows/Highlights
- Increase Shadows between 20 and 40
- Keep Highlights low to avoid overexposure
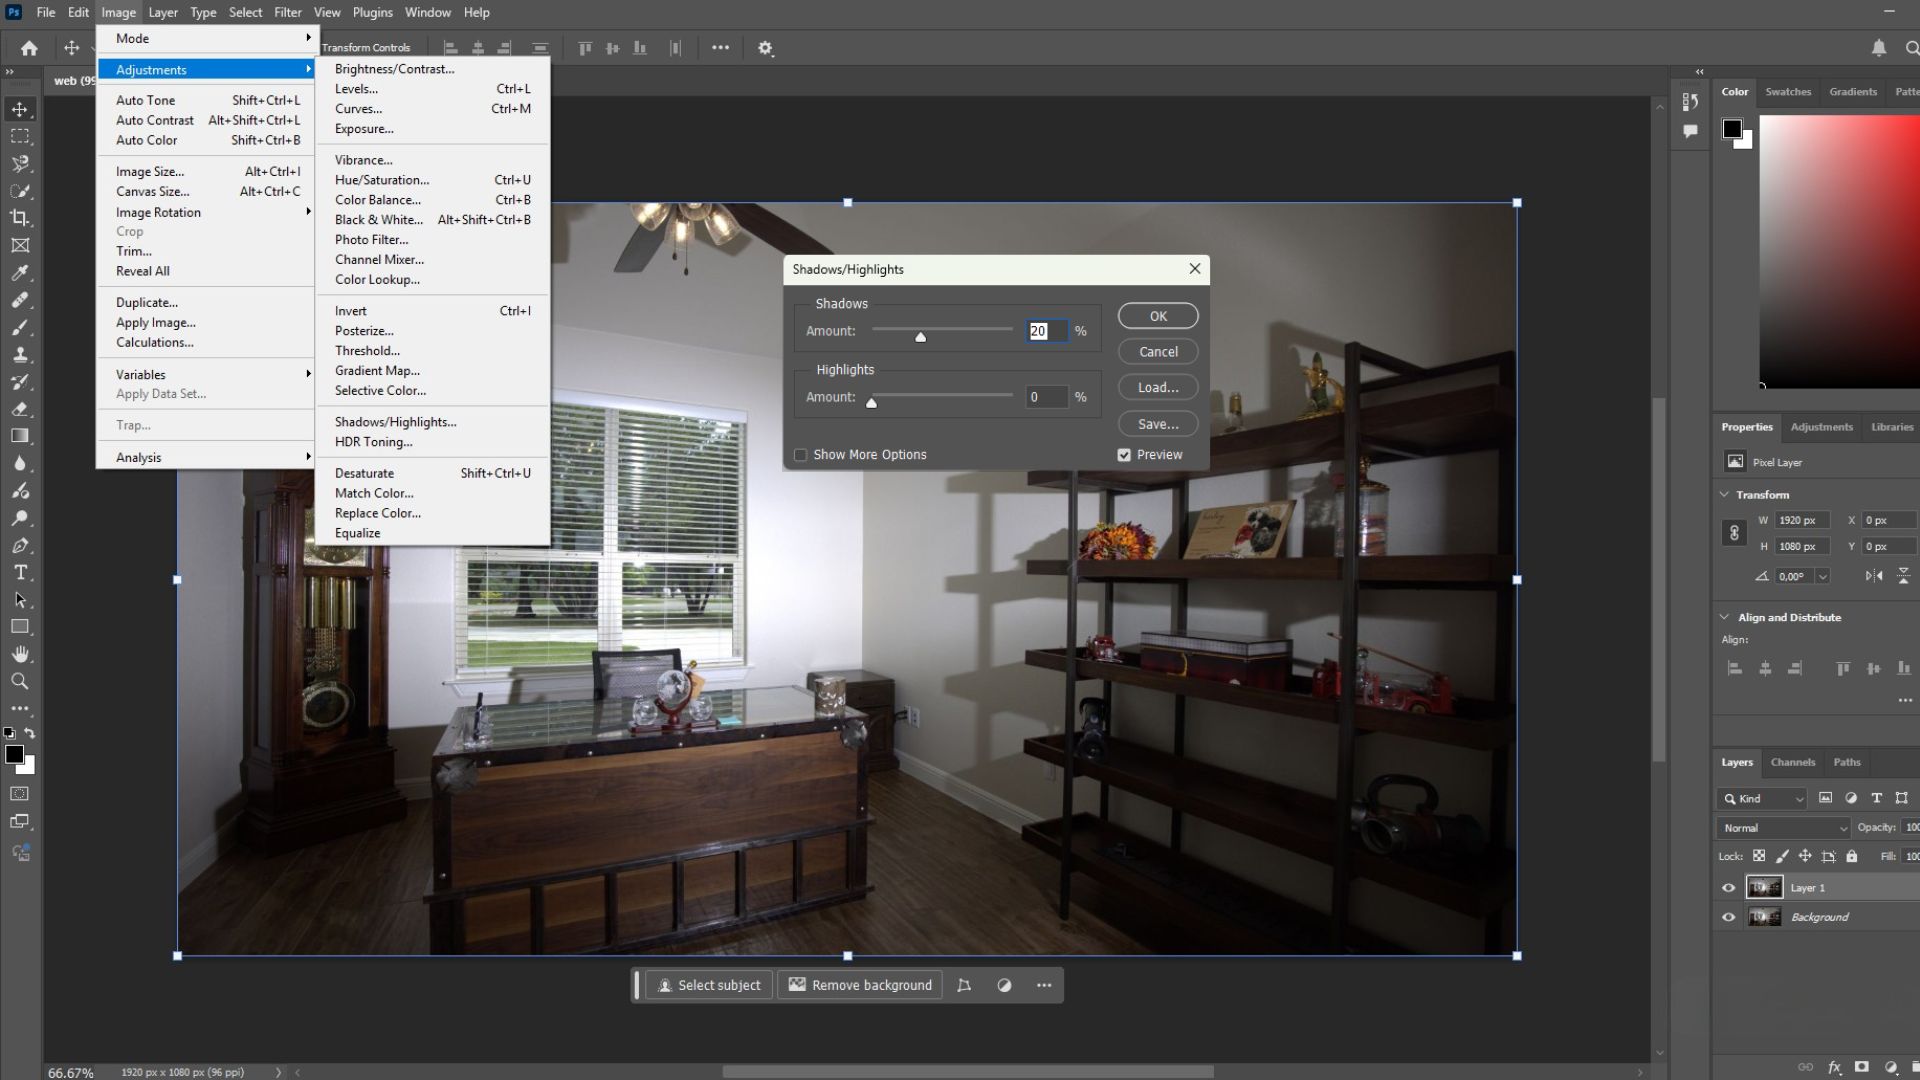
This step reduces heavy shadows and creates a better base for further edits.
Step 3: Select the Shadow Area
Identify areas with visible shadows, such as wall corners, floors, or ceilings:
- Use the Lasso Tool to select the shadowed area roughly
- Precision is not required
- Then go to Select > Modify > Feather and set it to 20–30 px for smooth edges.
Step 4: Lighten the Shadow Area
With the shadow area selected:
- Go to Image > Adjustments > Curves
- Gently lift the middle of the curve
This brightens the shadows while maintaining a natural and realistic lighting effect
Step 5: Blend for a Natural Look
If the edited area looks noticeable:
- Use a Layer Mask or Eraser Tool
- Set opacity to 10–20%
- Softly blend the edges into the surrounding areas
The goal is to soften shadows, not remove them completely
Step 6: Fix Color Differences
After brightening shadows, color shifts may appear.
- Go to Image > Adjustments > Color Balance
- Adjust slightly to match the wall and floor colors with nearby areas
- Avoid strong color changes to keep the image realistic.
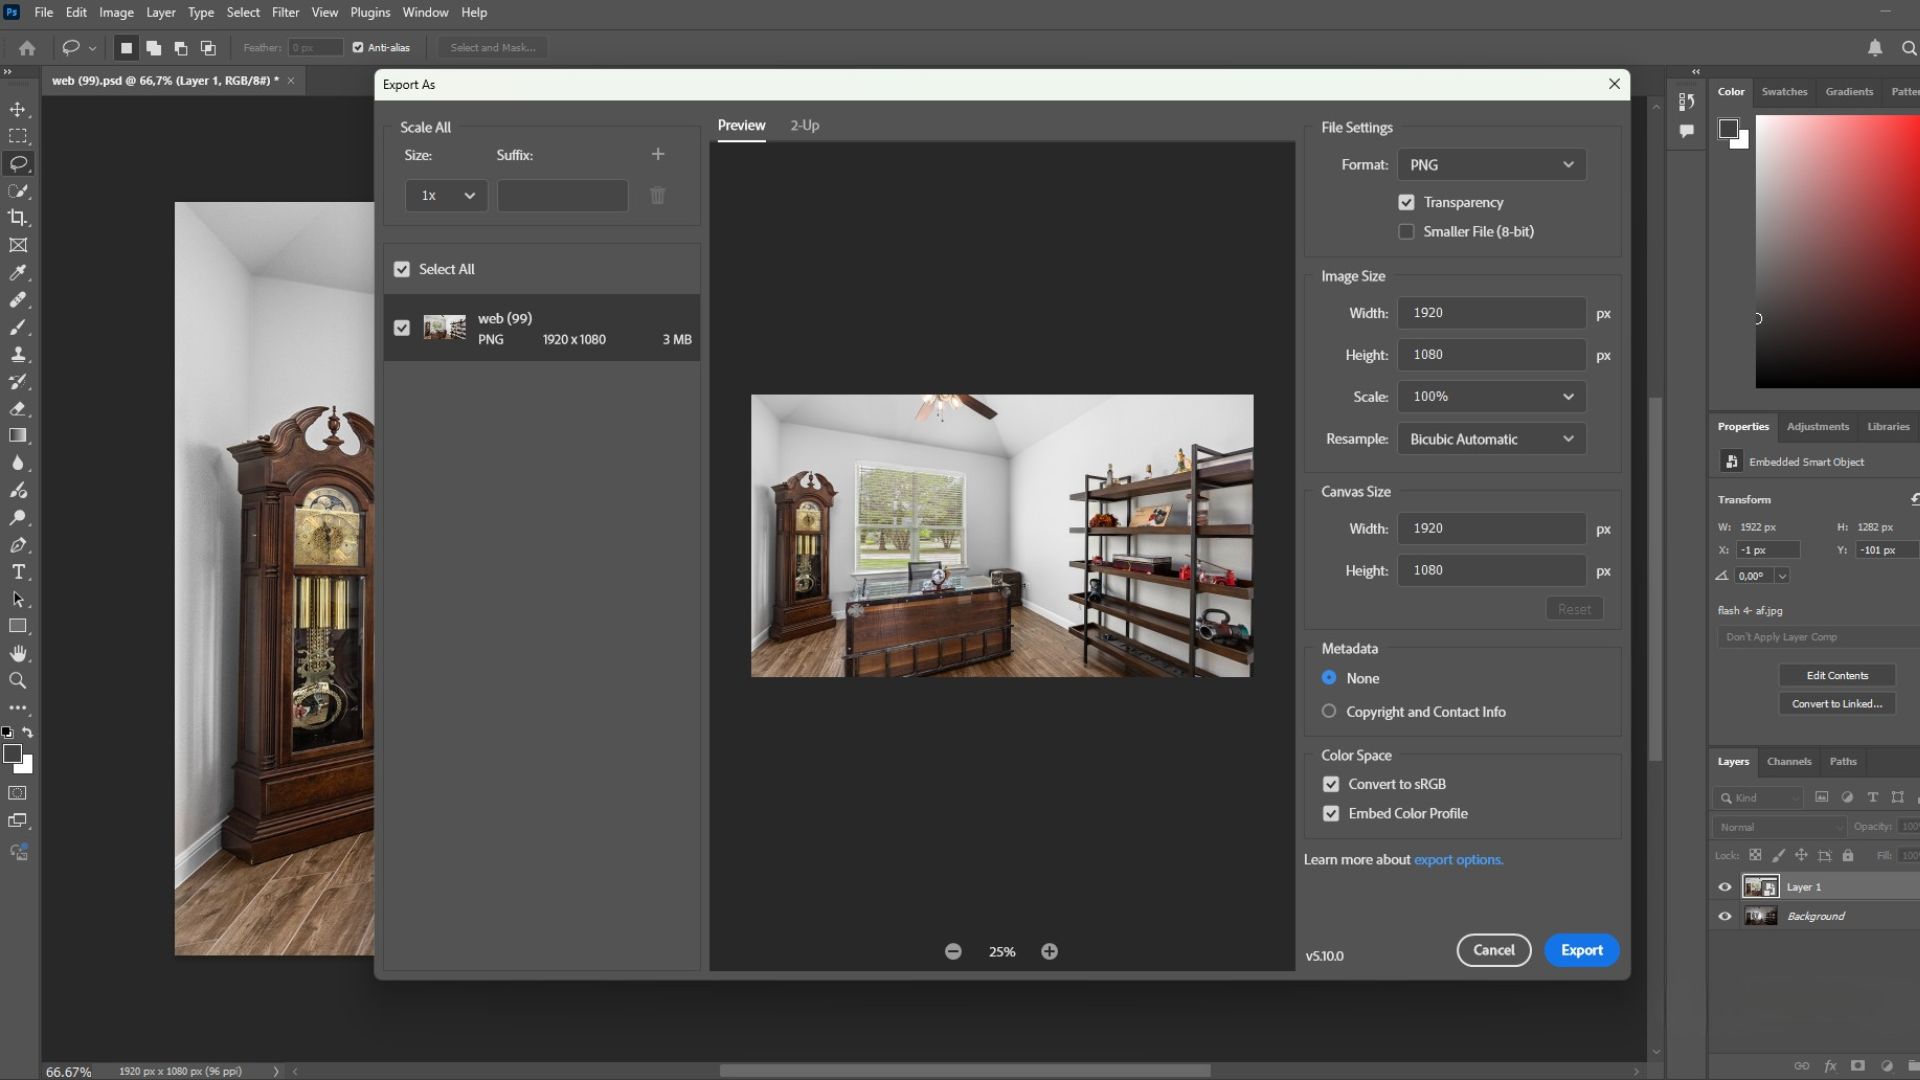
Step 7: Save and Export
Once you are satisfied with the result:
- Go to File > Save As for PSD file
- Use File > Export > Export As or Save for Web for PNG/JPEG delivery
- Choose high-quality settings suitable for real estate listings
4. Professional Shadow Removal Editing Service at Rotider Media
Although there are many tools available to help you remove shadows in real estate photos, the process can be time-consuming, especially if you’re not a professional photo editor. If you are looking for a professional shadow removal service tailored specifically to real estate, Rotider Media is a dependable choice.
Why choose Rotider Media for shadow removal editing?
Expert-level editing
Our professional editors use advanced tools and manual masking techniques to remove harsh shadows without affecting natural lighting, textures, or image realism.
Time-saving workflow
Outsourcing shadow removal to Rotider Media helps you focus on shooting and selling properties while we handle post-production efficiently.
Consistent results across listings
We ensure uniform brightness and clean lighting for every image, helping your property listings look polished and professional.
Real estate-focused solutions
Our shadow removal service is optimized for real estate photography, ensuring bright interiors, clear exteriors, and visually appealing spaces that attract buyers.
Scalable and cost-effective service
Whether you need editing for a single property or large batches of images, Rotider Media offers flexible pricing and fast turnaround times.
With our experienced editing team and consistent workflow, we save you time, maintain consistent image quality, and enhance the value of every listing. Contact us to get started!
FAQs
1. Why is shadow removal important in real estate photography?
Unwanted shadows can make interiors look dark, cramped, or poorly maintained. Shadow removal helps create brighter, more inviting images that attract buyers and accurately reflect the space.
2. What causes harsh shadows in real estate photos?
Harsh shadows are typically caused by uneven lighting, such as direct sunlight through windows, flash use, overhead lights, or tight indoor spaces with limited light bounce.
3. What tools are commonly used to remove shadows?
Popular tools include Adobe Lightroom, Photoshop, Luminar Neo, and Capture One. These allow you to adjust exposure, use brush tools, gradients, and cloning features for precise shadow removal.
4. Will removing all shadows make the image look fake?
Yes, removing all shadows can sometimes make a space appear flat and unrealistic. The goal is to remove only the distracting or unnatural shadows, while preserving soft, natural ones that add depth.
5. How long does professional shadow removal take?
At Rotider Media, our turnaround time is typically 12–24 hours, depending on the number of images. We focus on delivering consistent, high-quality edits without delays.

Annie Doo
Professional Video Editor
Hi, I’m Annie Doo, a professional video editor specializing in real estate post-production. Through hands-on experience with real-world projects, I’ve developed a strong understanding of visual storytelling, pacing, color, sound, and the workflows behind polished real estate videos. Here, I share practical insights, editing techniques, and production knowledge drawn from my day-to-day work in video post-production.
Was this article helpful?
Your feedback helps us create more useful real estate media guides.
Share this article


No Spam, Just Updates
Our fresh blogs provide technical and industrial information that helps strengthen your business. Sign up to be the first to receive the new updates
Related Posts

AI in Real Estate: A New Leap for Property Professionals
Sep 9, 2026
AI for Real Estate Marketing: A Practical Guide for Agents and Agencies
Sep 9, 2026
AI for Real Estate Agents: Practical Uses and Future Trends
Sep 7, 2026
15 Real Estate AI Companies to Know in 2026
Sep 5, 2026
How to Find Real Estate Image Editing Jobs in the USA
May 2, 2026